
While the Vision Pro is a standalone device, it can also function as a monitor for your Mac, providing you with additional utility. However, if you’re new to using the Vision Pro in this way, navigating the setup might seem challenging. To help you get started, here’s a step-by-step guide on how to use your Vision Pro as a monitor for your Mac.
Convert Vision Pro Into Mac Monitor
Before you begin, there are a few prerequisites to check. First, ensure that you are using an M-series MacBook model, as this feature requires macOS 14 Sonoma or later.
Additionally, you’ll need to sign in to the same Apple ID on both devices for the Mac Virtual Display feature to function correctly. Both devices should also be connected to a Wi-Fi network, although they don’t need to be on the same network. Once you’ve taken care of these prerequisites, there are two methods you can use to set up your Vision Pro as a Mac monitor. Here’s how:
Connect Directly to Your Mac
1. Ensure that your Mac’s display is turned on and in use.
2. Put on the Vision Pro and direct your gaze towards your Mac’s display.
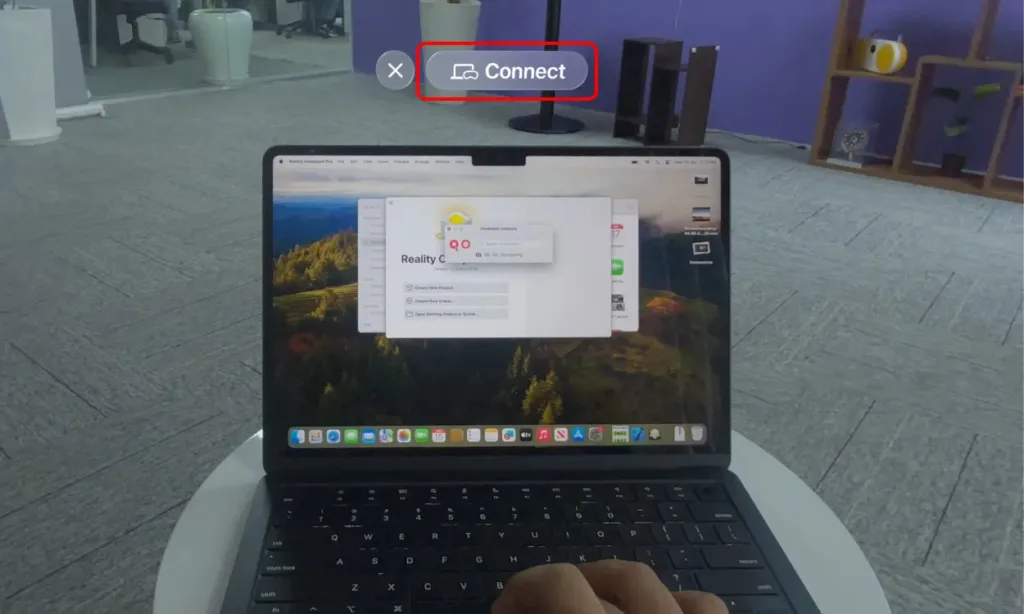
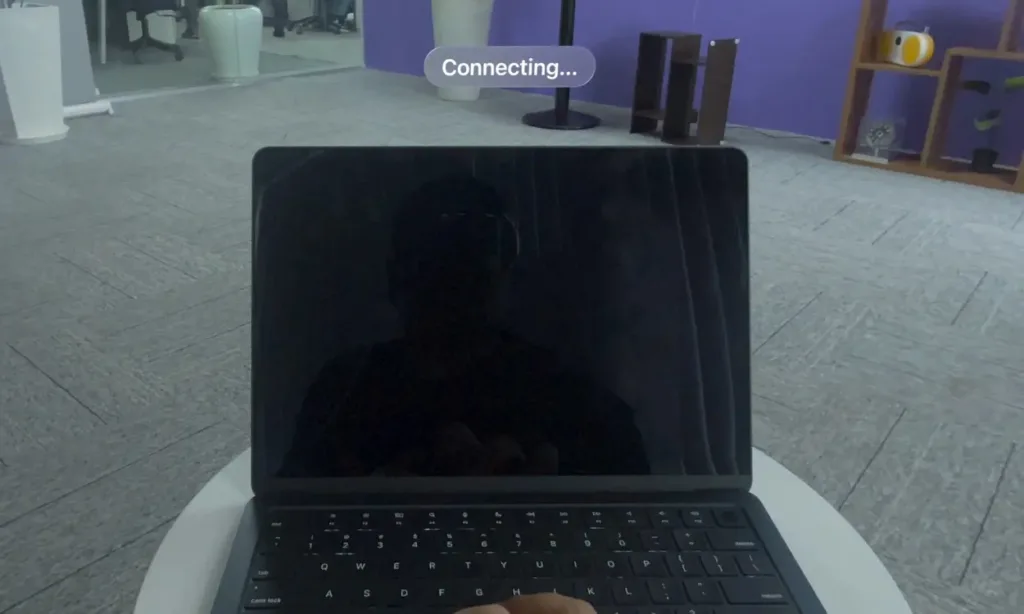
3. A “Connect” button will appear at the top of your Mac’s display. Focus on it and use the two-finger pinch gesture to select it. Your Mac’s screen will then turn black and appear on your Apple Vision Pro.
Manually Start Mac Virtual Display Session
While the first method is convenient, the Connect button may not always appear. You can follow these steps, in such cases:
1. Look up to summon the down-arrow button.

2. Select the Control Panel icon from the four available options.

3. In the Control Panel, find and select the Mac Virtual Display icon.

4. On the next page, your connected devices will be displayed. Choose the device you want to project onto your Vision Pro, and its screen will appear instantly.
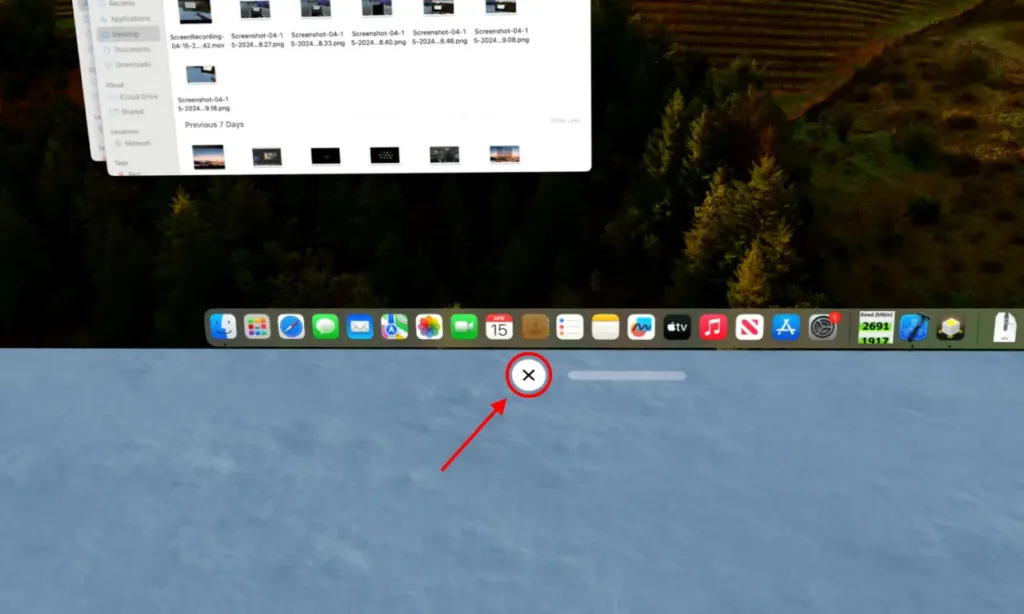
5. To stop projecting your Mac’s screen onto your Vision Pro, either click on “End Session” on the Mac Virtual Display page or select the cross icon under the projected Mac display on your Vision Pro to close the window, which will disconnect your Mac from the Vision Pro.

Adjust Mac Screen in Vision Pro
Now that you know how to turn your Vision Pro into a Mac monitor, you may want to customize the display further. If the default projection size or positioning isn’t to your liking, you can easily adjust it on your Vision Pro:
1. Look at the corners of the projected Mac screen; they will become highlighted. To resize the projection, use the two-finger pinch gesture to grab the edge and stretch it outwards or inwards.
2. To adjust the positioning, look at the bottom panel of the projection where a bar panel will appear. Use the same gesture to grab onto the panel, move it around, and place it anywhere you prefer.
It’s important to note that you can only view your Mac screen on the Vision Pro; you’ll still need to use your Mac’s trackpad and keyboard to navigate, similar to using a regular monitor.
The Vision Pro offers several features like Guest Mode, which can enhance your experience with the device. Exploring its functionalities thoroughly will help you understand its capabilities better. Interestingly, Apple states that you can’t use the Mac Virtual Display feature in Guest Mode, but during my testing, I found that this functionality still works. So, if your friend wants to connect their Mac to your Vision Pro, they can still enjoy the experience, at least for now.
That wraps up this guide. I hope it has been helpful in connecting your Vision Pro to your Mac and maximizing your experience. If you encounter any issues, feel free to leave a comment below, and I’ll be happy to assist you.


