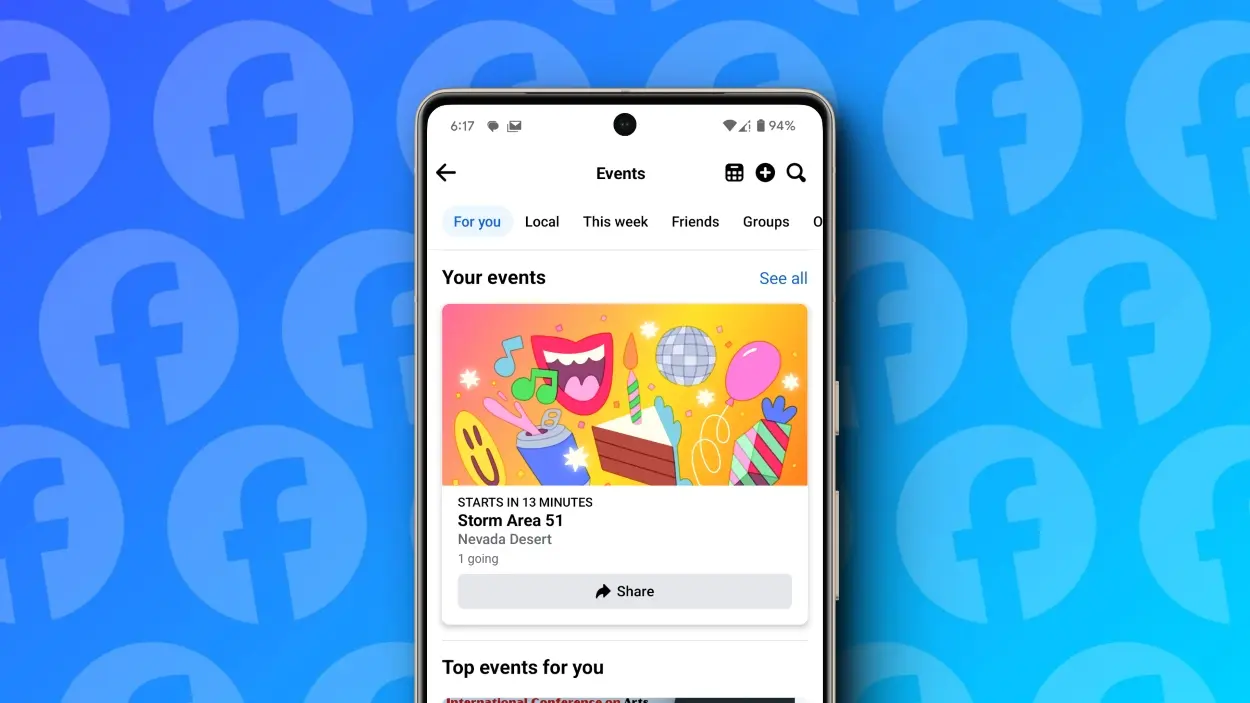
Planning a birthday bash, a casual hangout, or even just a weekend get-together? Utilizing Facebook events can be an excellent way to spread the word and send out invites to your friends and acquaintances. Whether it’s a movie night or any other event, here’s a handy guide to help you navigate the process of creating an Event on Facebook.
Types of Events on Facebook
Facebook Events serve as a platform to provide details about the gathering you’re organizing. Users can express their interest, stay updated with event-related information, and RSVP to confirm their attendance. During the event creation process, you’ll encounter four different privacy settings to choose from. Let’s briefly discuss each before delving into the steps to create your event.
Private: A private event on Facebook is exclusively visible to individuals invited by the organizer. Only those invited users who RSVP to the event can access details such as the attendee list. As the host, you have the option to permit guests to invite their friends.
Public: Public events are visible to everyone, regardless of whether they are friends with the organizer. Anyone can view the event details, RSVP, and see who else is interested or attending.
Friends: Opting for the Friends privacy setting makes the event visible to all individuals in your friends list. Similar to the Public option, but restricted to your Facebook friends.
Group: This setting provides event details exclusively to members of a group that you are a part of.
Create an event on Facebook
1. Open the Facebook app.
2. Tap on the hamburger menu located at the top or bottom right corner, depending on your operating system.
3. Select “Events” from the menu.
4. Tap on the add icon situated at the top right corner.
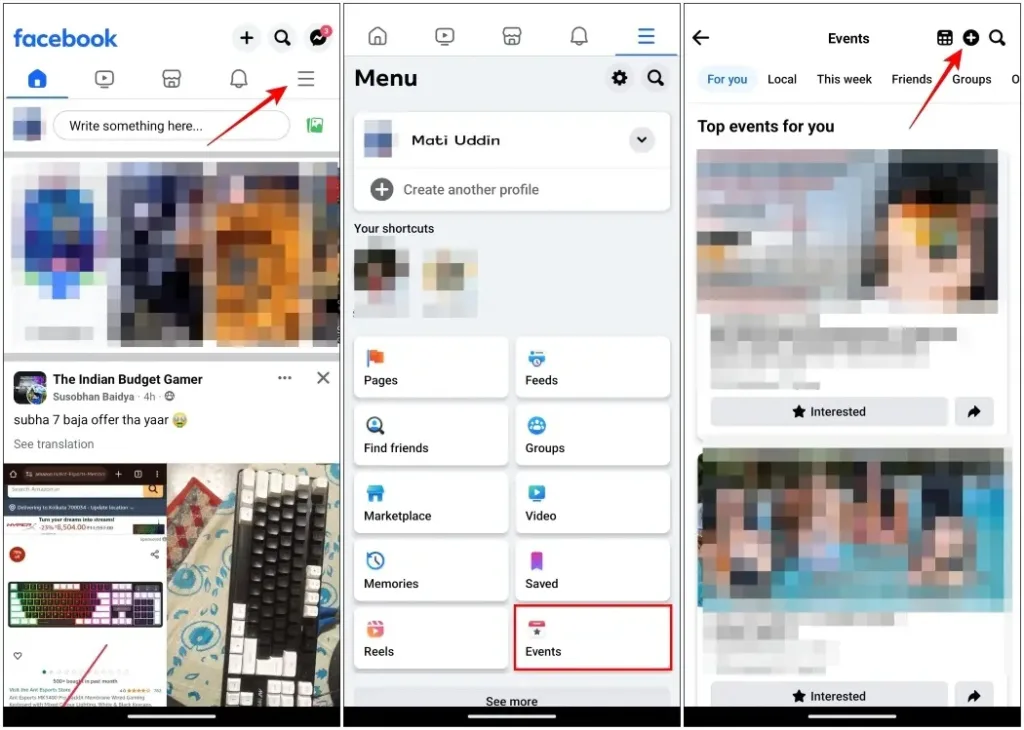
5. Enter the event name, date, and time on the following page.
6. Select the event type as either “in person” or “virtual” in the subsequent text field.
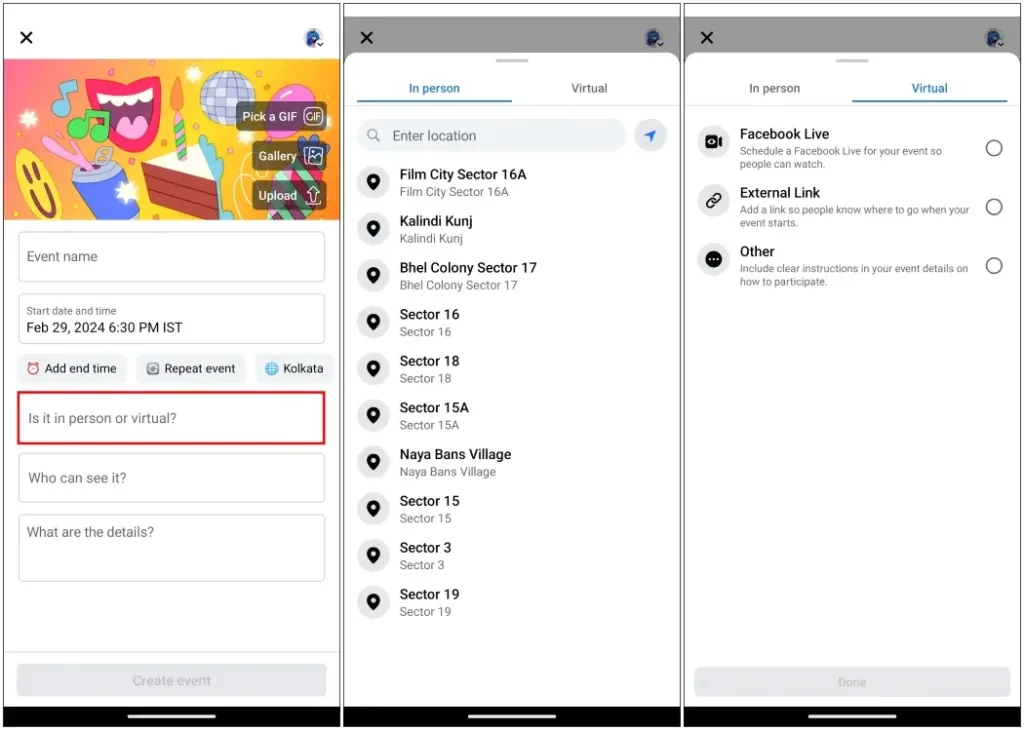
For in-person events, input the venue location. For virtual events, include a link to the event site.
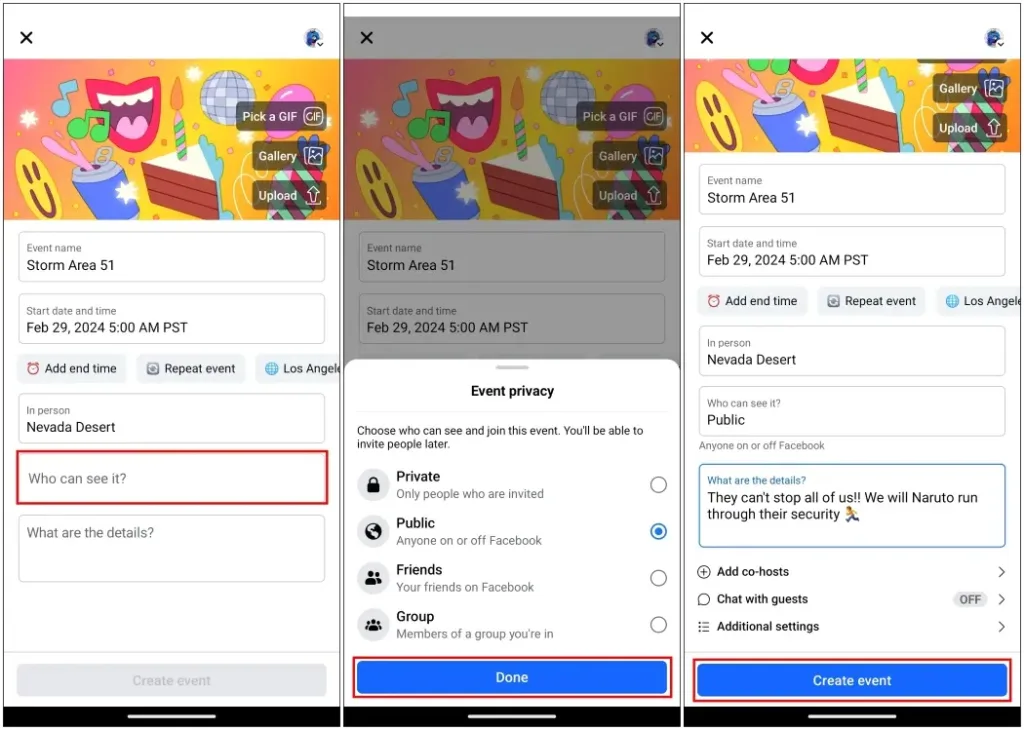
7. Choose one of the four privacy options outlined earlier in the provided box. Once selected, tap on Done.
8. Craft a description for the event you’re creating. Explore additional options like adding co-hosts or enabling chat with guests before finalizing your event.
9. Finally, select Create Event at the bottom to finish the process.
Inviting Guests to an Event on Facebook
1. Open Facebook and click on the menu icon located at the top or bottom right corner of the screen.
2. Navigate to Events and select Your Events which you created.
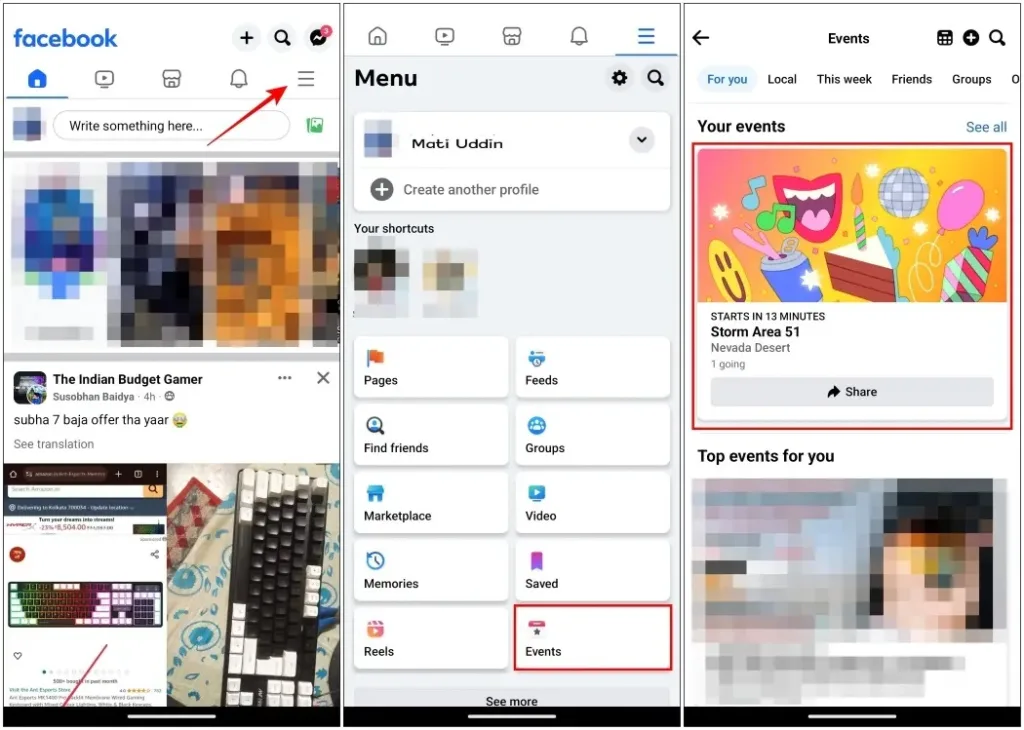
3. Tap on “Manage” and select “Invite.”
4. A list of your Facebook friends will appear. Tap the “Invite” button next to the name of the person you wish to invite to your event.
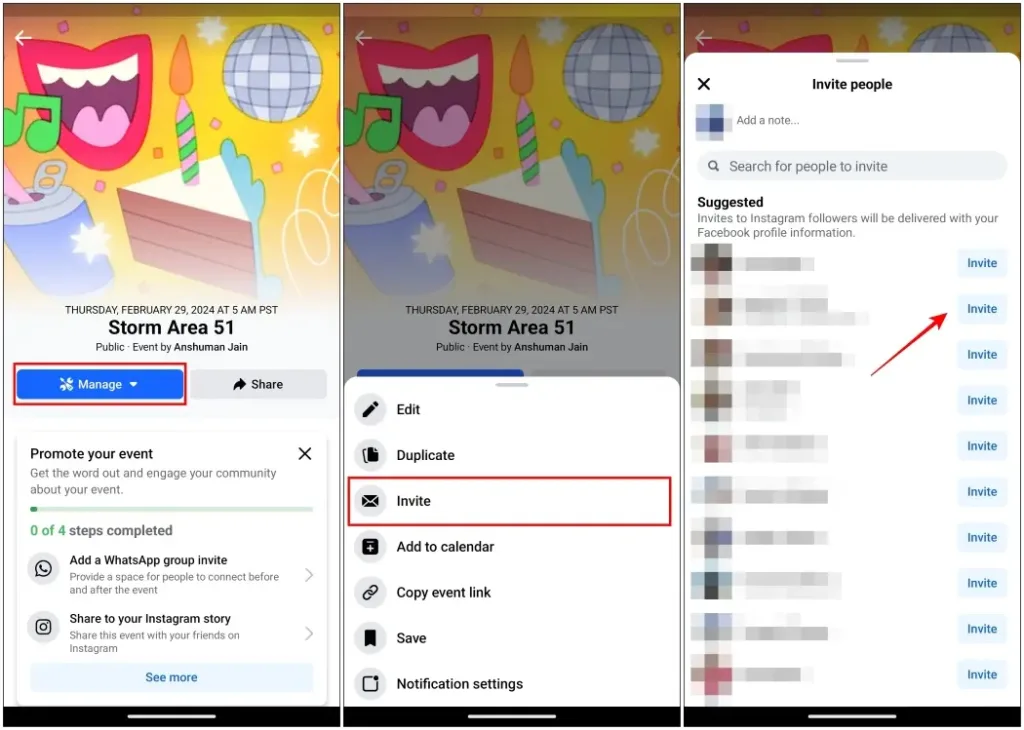
This action will send them an invitation notification, allowing them to open it and view the details of the event.
Canceling an event on Facebook:
If your plans change unexpectedly and the event is canceled, follow these steps to delete the event page.
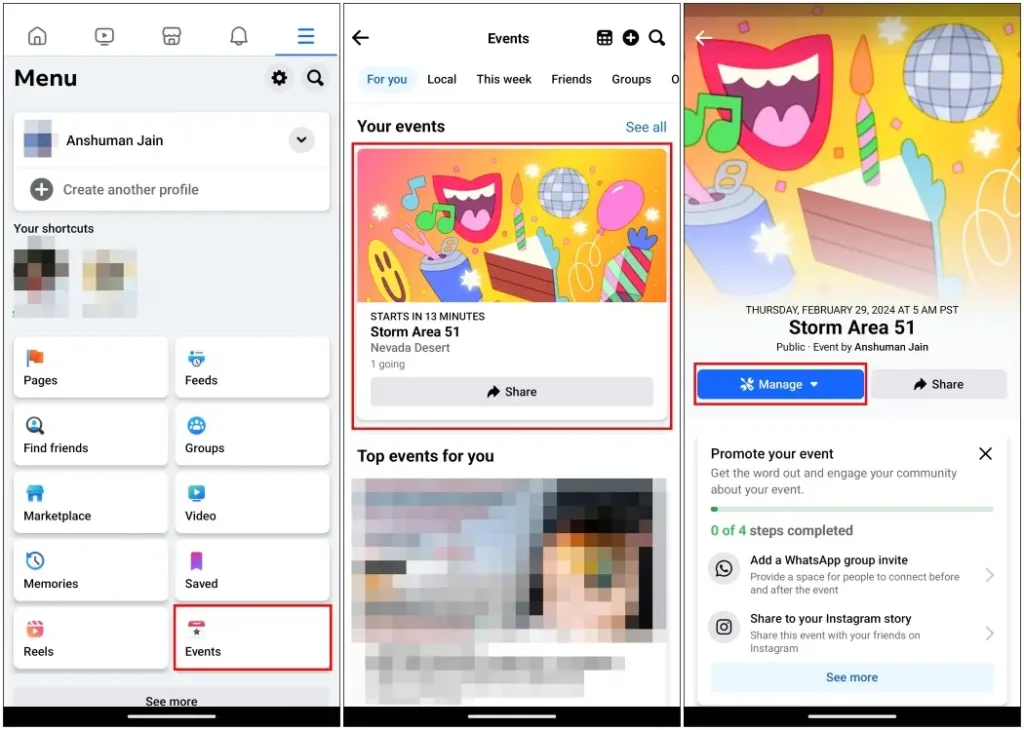
1. Open Facebook and tap on the menu icon located at the top or bottom right corner of the screen.
2. Go to the Events menu.
3. Select the event you wish to cancel from the “Your Events” section.
4. Tap on “Manage” on the event page.
4. Access the Edit option from the overflow menu.
5. Select the trash icon located at the bottom right corner.
6. Within the Cancel event menu, you can include a post to explain the reason for canceling the event.
7. Proceed by tapping on Cancel Event.
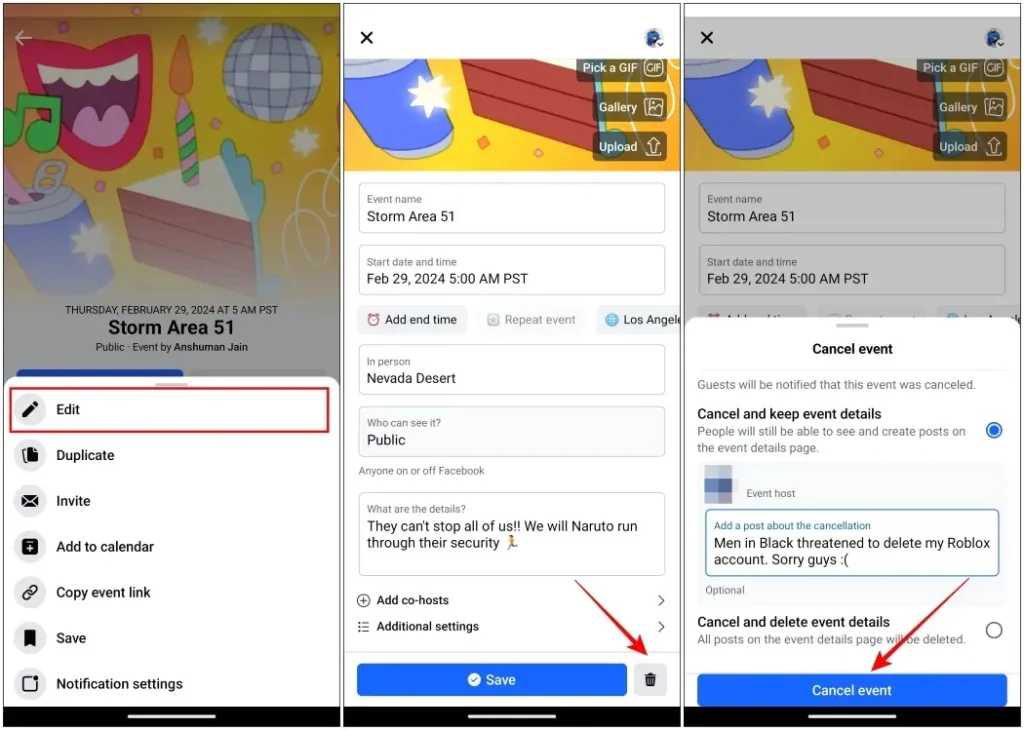
This action will cancel the event and automatically send a post to the invited users, explaining the reason for cancellation.
That’s how you can create an event on Facebook. Events are a valuable feature that allows you to discover ongoing events and parties. We trust you found this guide helpful.
Additionally, if you’re experiencing a chirping sound while scrolling through your Facebook feed on an iPhone, check out our article on how to disable it. We’d love to hear your thoughts on this guide in the comments below.


