

The latest Windows 11 version 24H2 enables Device Encryption (BitLocker) by default after a clean installation. Many users are unaware that BitLocker is active and do not know about the recovery key stored in their Microsoft account, which can lead to data loss if they cannot locate the key. To disable BitLocker in Windows 11 and 10 and prevent this issue, follow our guide below.
Method 1: Disable BitLocker via Control Panel
The simplest method to disable BitLocker on your Windows PC is through the Control Panel.
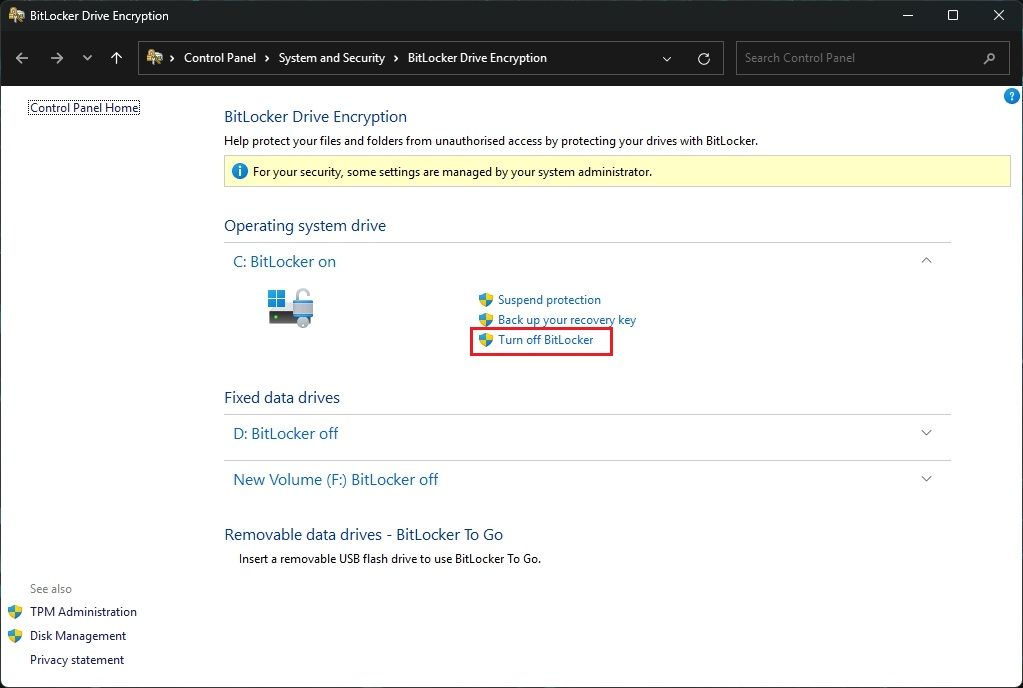
- To disable BitLocker on Windows 10 and 11, open the Start menu and search for “BitLocker.” Then click on Manage BitLocker.

- Click “Turn off BitLocker” and confirm in the prompt.
- The decryption process will start, and you can then track the progress as well. Keep in mind that the process may take a long time depending on how much your disk is used.
Method 2: Disable BitLocker via Windows Settings
In addition to the Control Panel, you can also disable BitLocker through Windows Settings. Here’s how to do it.
- Open the Start menu and search for “Manage disks and volumes.”
- Click on Properties next to the “C:” drive. This can also be done for other encrypted drives.
- Scroll down and click on “Turn off BitLocker.” Follow the on-screen instructions to complete the process.
Method 3: Disable BitLocker via Command Prompt
You can disable BitLocker through the Windows Command Prompt. Here’s how.
- Open the Start menu, search for “cmd,” and select “Run as administrator” when Command Prompt appears.

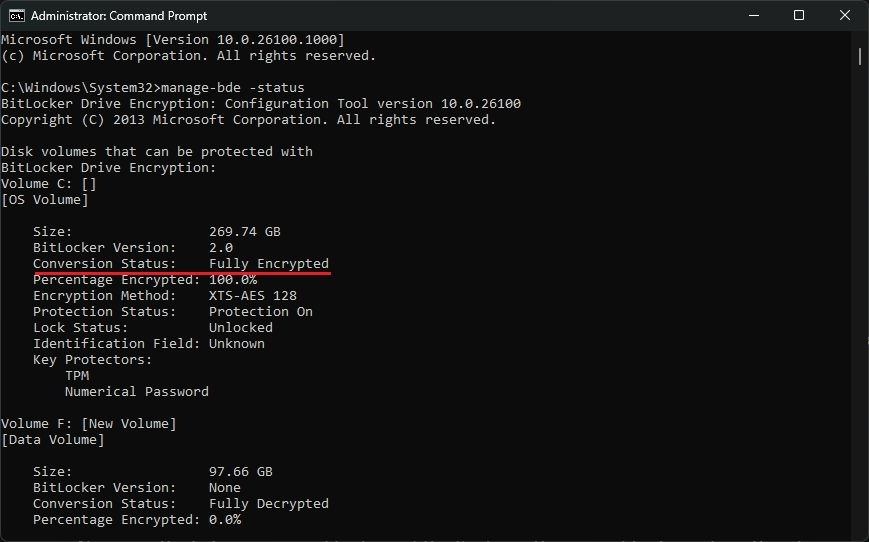
- Now, run this following command to see the status of BitLocker encryption. This will show you that the C: drive is fully encrypted.
manage-bde -status
- Run the following command to decrypt the C: drive. If you need to decrypt a different drive, replace the drive letter as needed.
manage-bde -off C:
Method 4: Turn Off BitLocker Using PowerShell
You can also disable BitLocker using Windows PowerShell on your PC. Follow these steps:
- Open the Start menu, search for “powershell,” and click on “Run as administrator.”
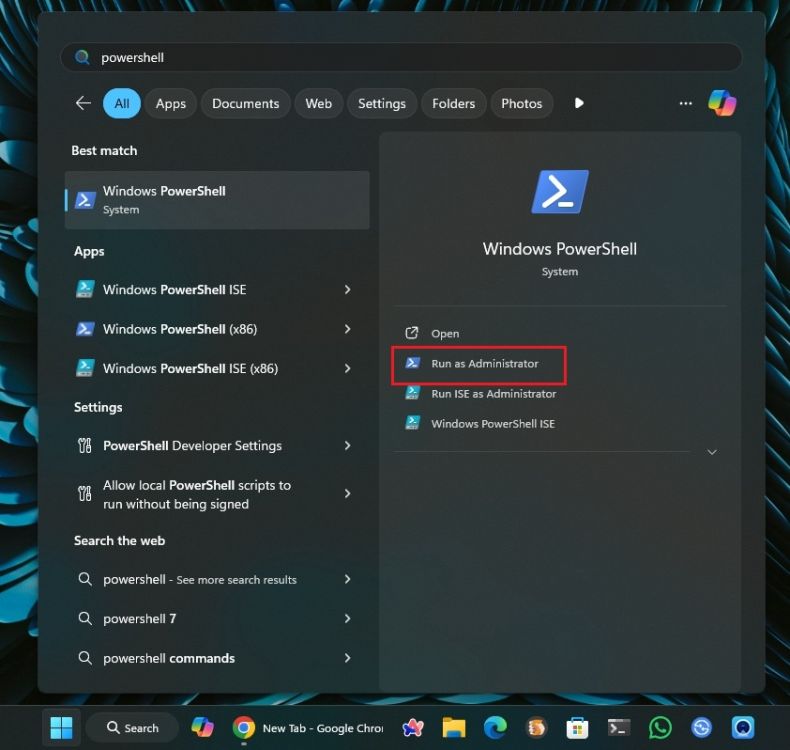
- Open the Start menu, search for “powershell,” and click on “Run as administrator.”
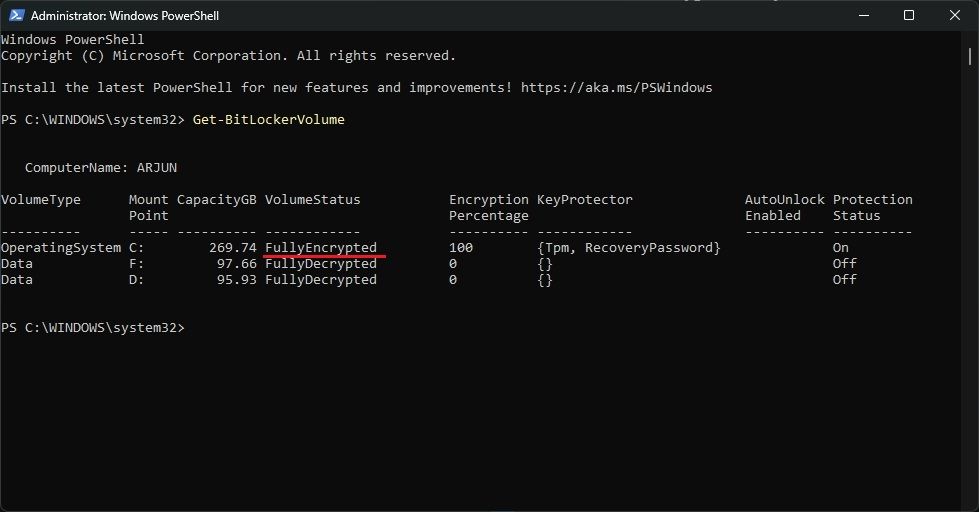
Get-BitLockerVolume
- To turn off BitLocker, run the command below. If you want to disable BitLocker on another drive, replace the drive letter accordingly.
Disable-BitLocker -MountPoint "C:"
These are the four methods to disable Device Encryption on your Windows 11 or 10 PC. During testing, I found that the decryption process can take as long as the encryption process, so it’s important to keep your PC plugged in until the process is complete.
If you want to encrypt individual files and folders on your Windows PC, check out our guide for some excellent apps. Drop your questions in the comment section below


Ive read several just right stuff here Certainly price bookmarking for revisiting I wonder how a lot effort you place to create this kind of great informative website