
Smartphones have revolutionized how we connect with loved ones and stay informed about global events. However, technology isn’t always flawless. At times, things may not function as expected, leading to communication challenges. For long-time Android users, encountering issues with notifications not appearing is not uncommon. If you’re facing this problem, here’s how you can fix it.
1.Turn Off Battery Optimizations
One common reason for notifications not appearing on your Android device is the battery optimization settings implemented by your device manufacturer. These optimizations are designed to extend battery life by removing apps from memory when they’re not in use. However, this can prevent apps from delivering notifications in real-time because they’re not running in the background. As a result, you may not receive notifications until you manually open the app.
Each device manufacturer has its own approach to battery optimization. Some may implement aggressive optimizations that interfere with notifications, while others may keep them more minimal. Dontkillmyapp, both as an app and a website, provides valuable insights into which manufacturers’ optimizations might affect your apps’ background functionality and battery usage.
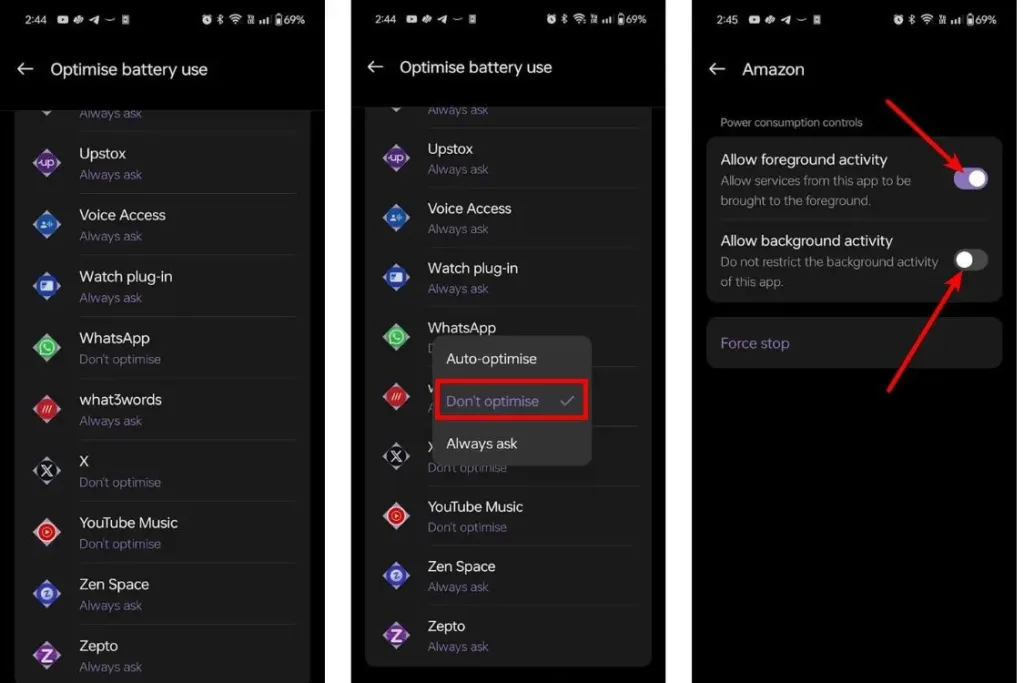
If you have a Pixel device, there’s no need to worry, as Pixel’s user interface doesn’t hinder app notifications or forcefully terminate background apps. However, for users of OnePlus, Huawei, ASUS, or Samsung smartphones, you can address this issue by navigating to Settings > Battery > Battery Optimizations. From there, select the relevant app, and enable the option to allow it to run in the background. This adjustment should resolve the problem of notifications not appearing on your Android device.
2. Enable Notifications for Apps
Another potential reason for Android notifications not appearing could be due to missing notification permissions. Android has implemented a new permission system where apps must prompt users to allow notifications upon initial launch. If you accidentally denied this permission, it could be why you’re not receiving notifications.
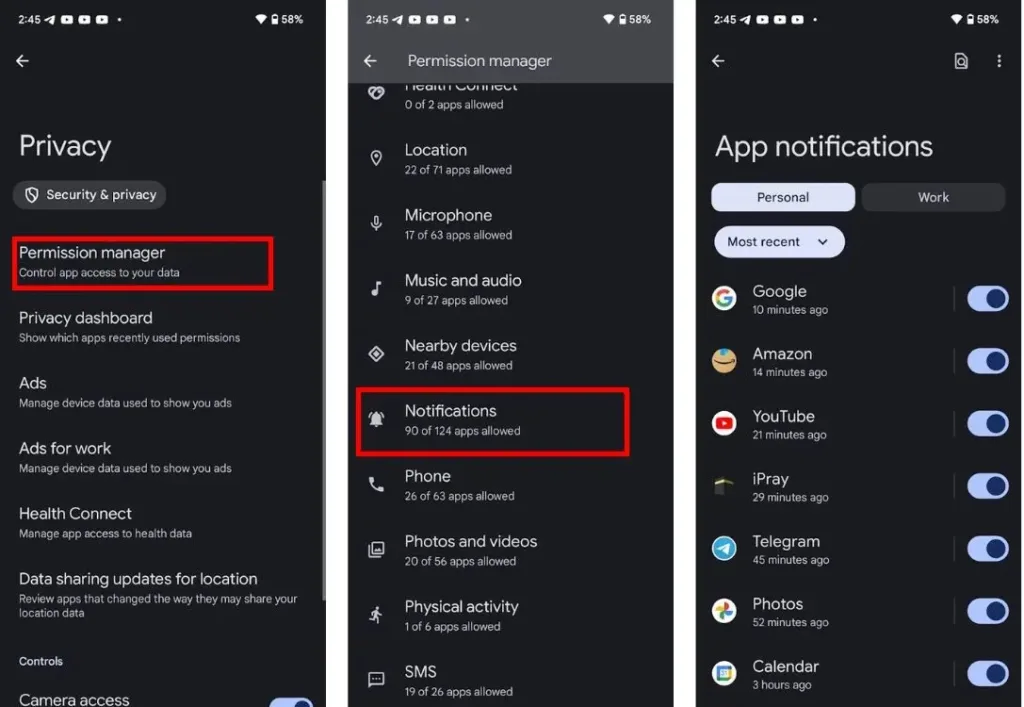
To rectify this, navigate to Settings > Security and privacy > Privacy > Permission manager. Scroll down to find “Notifications,” tap on it, and enable the toggle for the apps from which you want to receive notifications.
3.Enable Selective Notifications
If you’re still not receiving notifications, you may have inadvertently disabled notifications for a specific channel within an app. Android offers granular control over notifications, allowing you to disable certain types of notifications while keeping others active. For example, you might want to disable promotional notifications from a food delivery app while still receiving delivery updates.
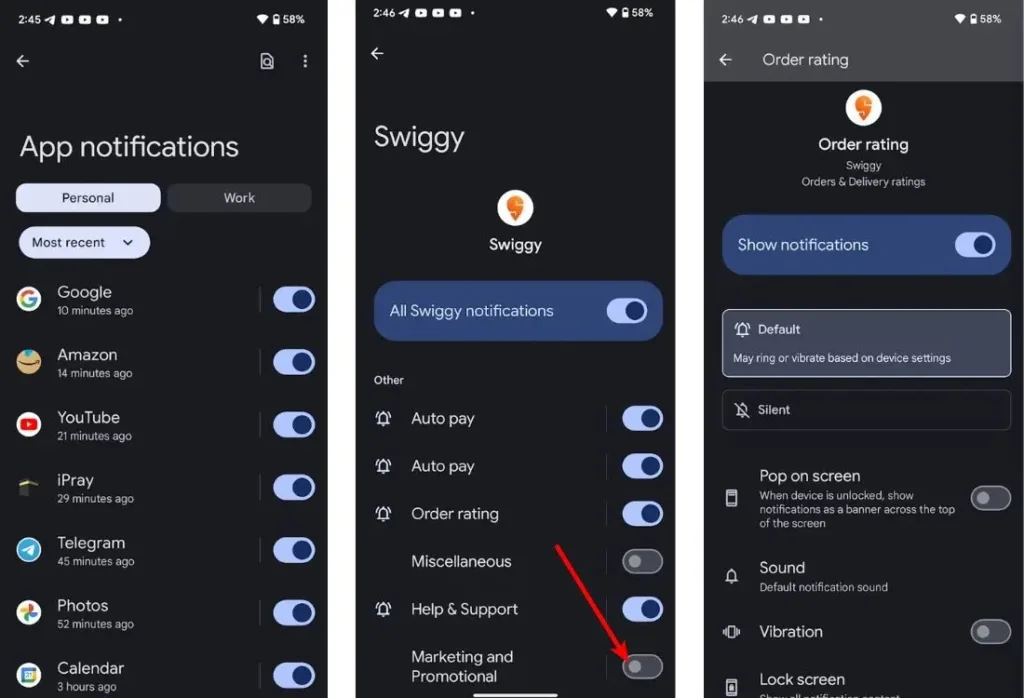
To check if you’ve disabled a specific notification channel, go to Settings > Security and privacy > Permission manager. Scroll down and tap on Notifications. Select the app from which you want to receive notifications, and ensure that the relevant notification channels are enabled.
4. Restart Your Device
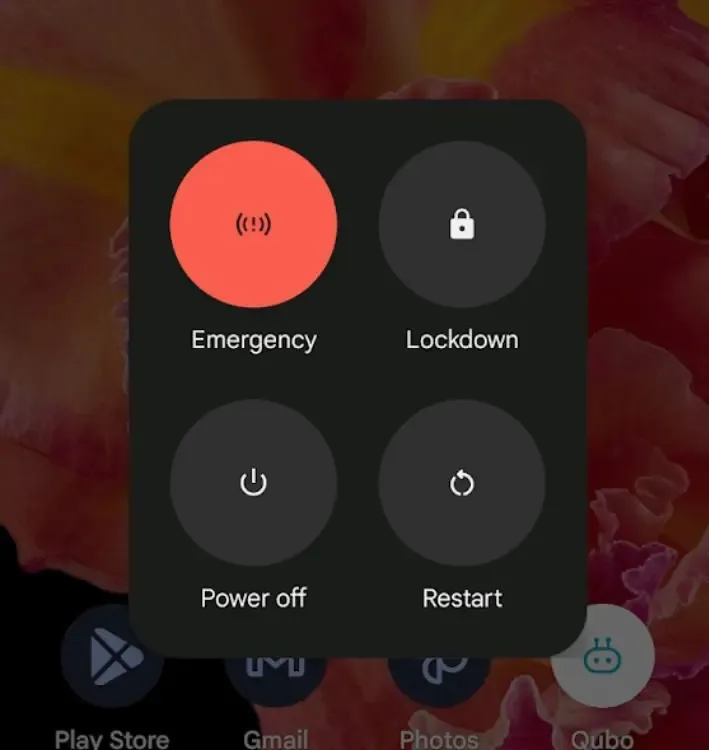
Restarting may appear too simplistic, but it’s surprising how often a simple restart can resolve even complex system issues. To restart your Android device, press and hold the power button, then select the restart option. This simple step can often restore normal notification functionality.
5. Enable Data and Wi-Fi Usage
Apps rely on internet connectivity to send notifications. If you’re not receiving notifications, it might be due to a poor internet connection. However, if your internet connection seems stable, you may have inadvertently disabled internet access for specific apps.

To rectify this, navigate to Settings > Apps > See all apps. Select the relevant app, tap on “Wi-Fi data usage,” and ensure that the “Background data” option is enabled. Repeat this process for any apps from which you’re not receiving notifications, and this should resolve the issue of notifications not appearing on your device.
6.Turn Off Do Not Disturb (DND) or Airplane Mode
When enabled, Do Not Disturb (DND) mode restricts notifications, while Airplane Mode disables data, potentially preventing apps from sending notifications. To deactivate DND mode, navigate to Settings > Sounds > Do Not Disturb and toggle it off. This action should reveal any accumulated notifications.

Likewise, to disable Airplane mode, go to Settings > Network & internet and toggle off Airplane mode.
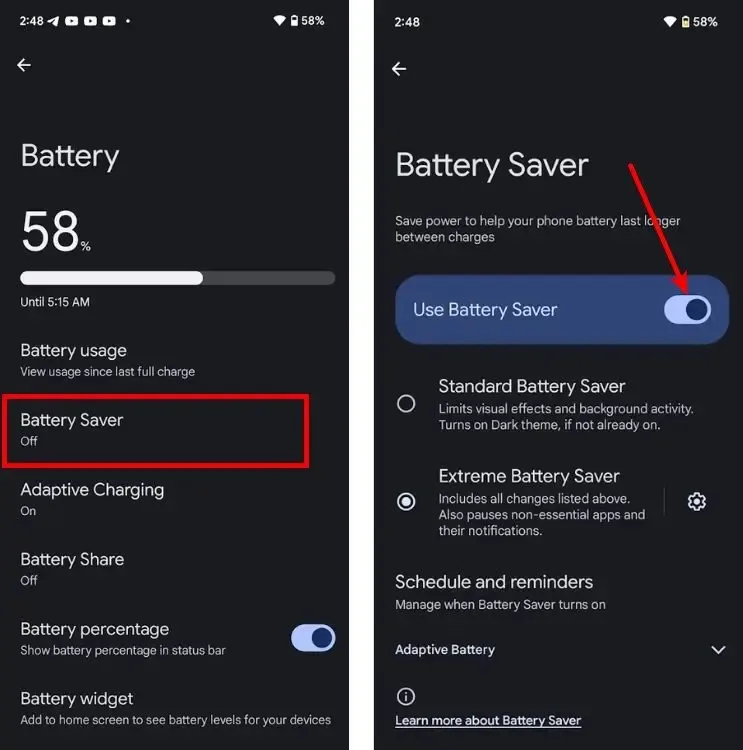
7. Turn off Power Saver Mode
Power saver mode conserves battery by limiting background app activity. To resume receiving notifications, you’ll need to disable Battery Saver. You can do this by navigating to Settings > Battery > Battery Saver and toggling off the “Use Battery Saver” option.
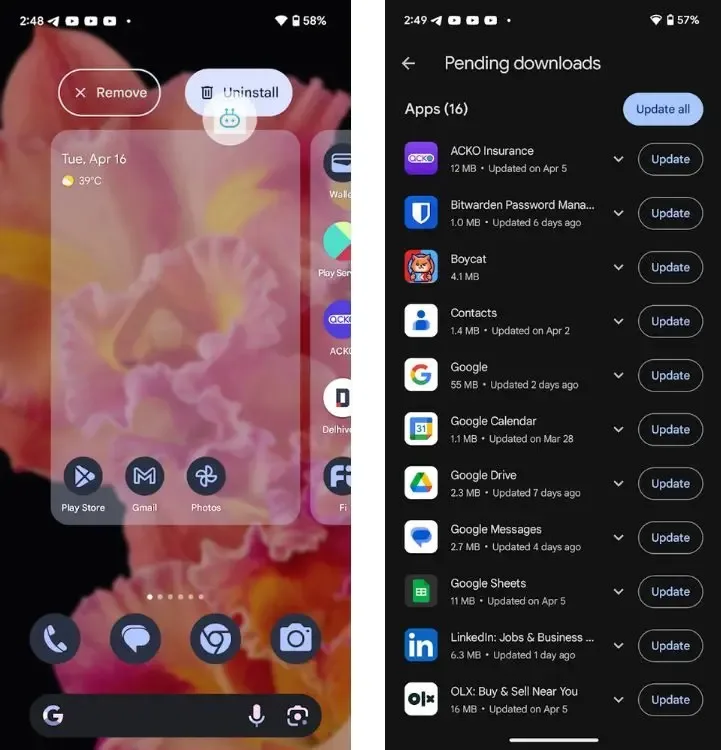
8.Update or Reinstall Your Apps
If none of the previous methods have resolved the issue, it’s possible that the problem lies with the app itself. Ensure that your apps are up to date by visiting the Google Play Store. Sometimes, a recent app update may have caused notification issues, and developers may have released a subsequent update to address the issue. If updating the app doesn’t fix the problem, you may need to reinstall it. Simply long-press the app icon, drag it, and drop it onto the “Uninstall” button.
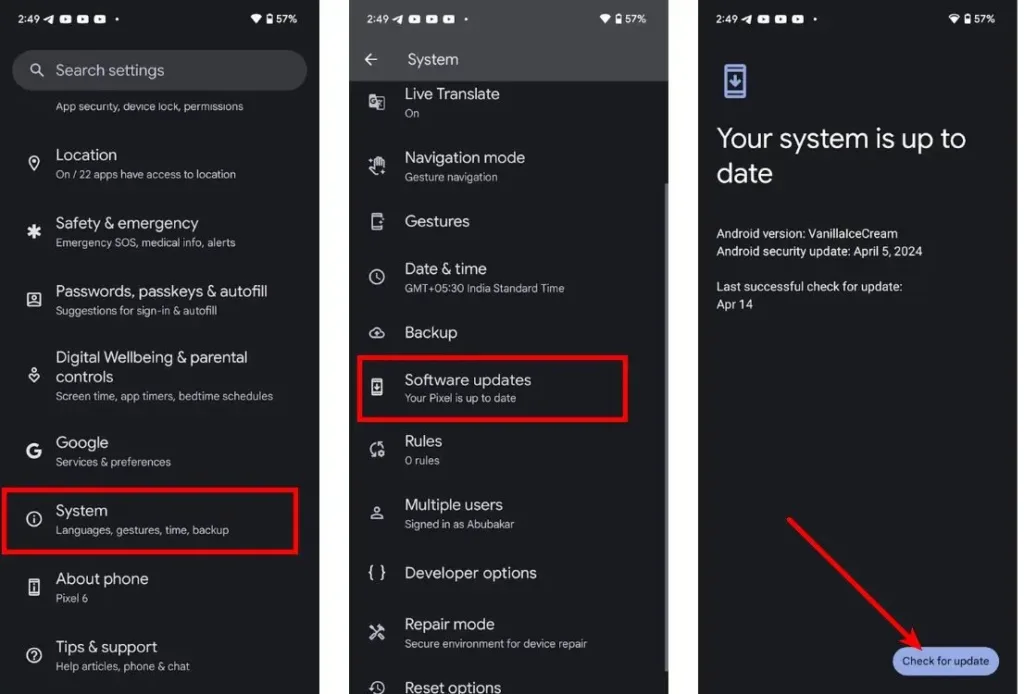
9. Update Your Android Device
System updates can also introduce errors, and if you’ve recently updated to the latest version of Android, it’s possible that it may have introduced bugs affecting notifications. Check for system updates by going to Settings > System > Software updates. If an update is available, installing it may resolve the “notifications not showing up” issue.
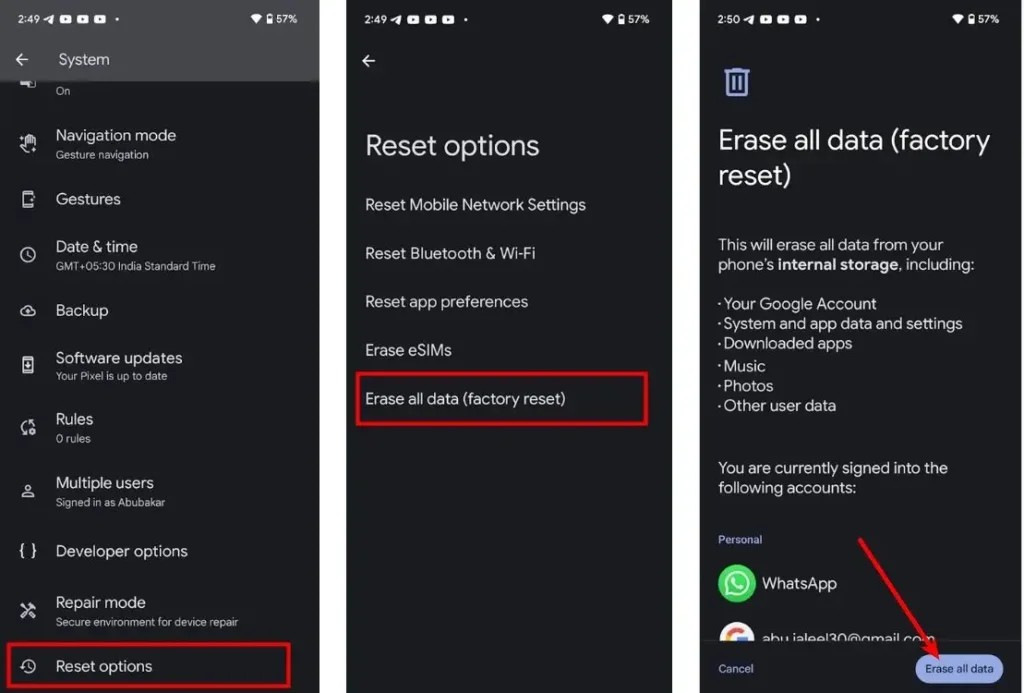
10. Factory Reset Your Device
If none of the previous methods have resolved the issue, a factory reset is the last resort. To perform a factory reset on an Android device, go to Settings > System > Reset options, and then tap on “Erase all data (Factory reset).” Your phone will restart and reset to its original state.
Were you able to resolve your app notification problems using these solutions? Let us know in the comments below which solution worked best for you!


