Ensuring your PC runs smoothly and stays secure requires regular Windows Updates. However, encountering the error code 0x800f081f can disrupt this process, particularly for Windows 11 users facing issues with the .NET Framework 3.5.
The error code 0x800f081f can also occur when attempting to run DISM commands to repair system files. In this guide, we will provide step-by-step instructions for all the solutions to fix this error on your PC. Here are six simple ways to resolve the install error 0x800f081f on Windows 11.
In this guide, we will provide step-by-step solutions to resolve the error code 0x800f081f, offering six straightforward methods to fix it on Windows 11.
Option 1: Enable .NET Framework in Windows Features
1. To open the search on Windows 11, press the “Windows button + S” keyboard shortcut or click on the start menu and search for apps, settings, and more.
2. Type “Windows Features” in the search bar and select the suggestion that says “Turn Windows features on or off.”

3. In the Windows Features window, check the box next to “.NET Framework 3.5” if it is not already checked.
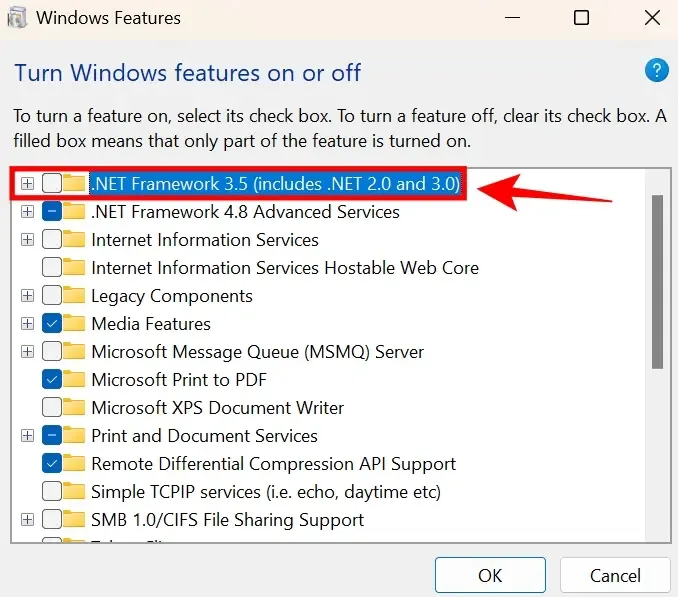
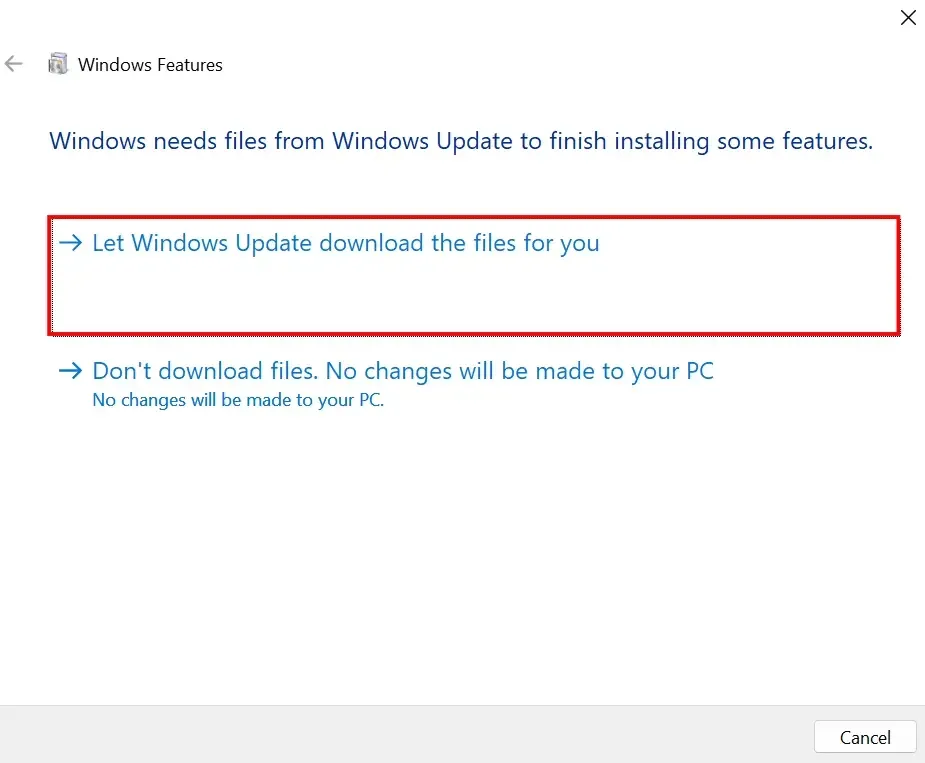
4. Click OK, and Windows will prompt you to download and install the feature through Windows Update.
5. Click on “Let Windows Update download the files for you,” and the .NET Framework 3.5 installation will commence.
If .NET Framework 3.5 was already installed on your system, the checkbox would be checked in the Windows Features window. In this case, you can uncheck and re-check the box to reinstall it.
Option 2: Run the Windows Update Troubleshooter
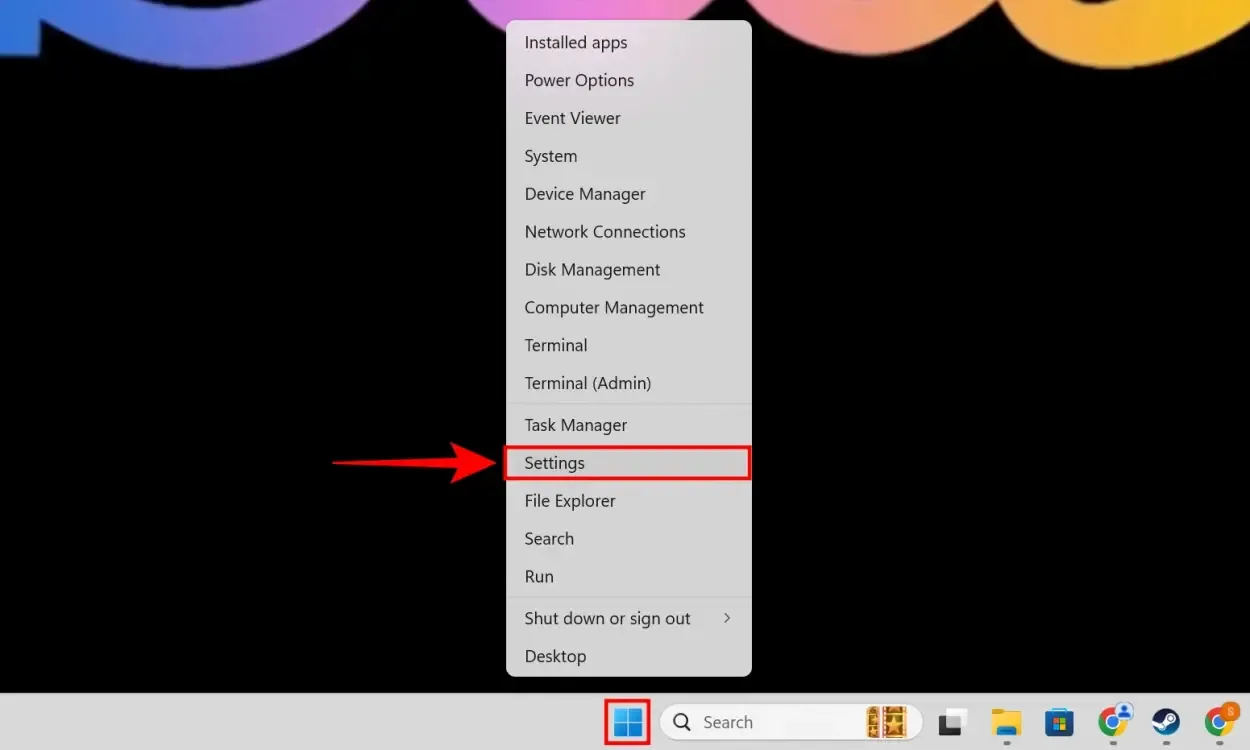
1. To access Settings, right-click on the Windows button on the taskbar or press “Windows + I” on your keyboard.
2. Click on System in the left sidebar of the Settings window.
3. Scroll down and click on Troubleshoot to access troubleshooting options.
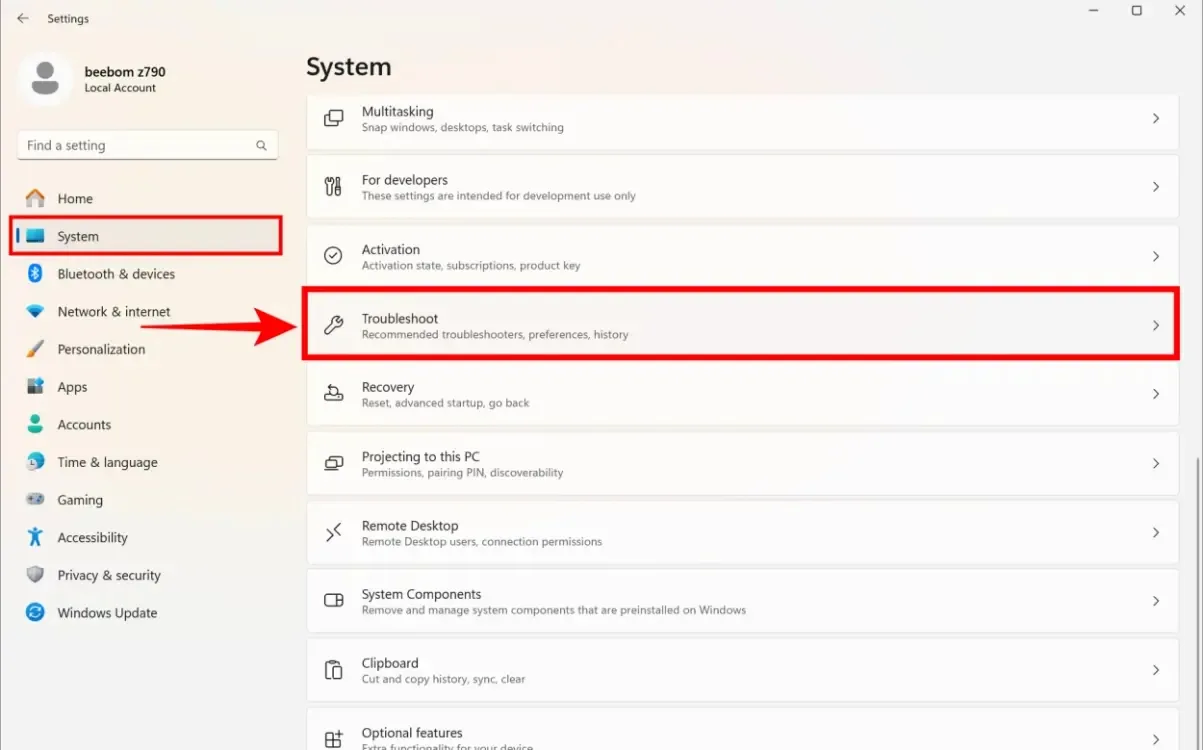
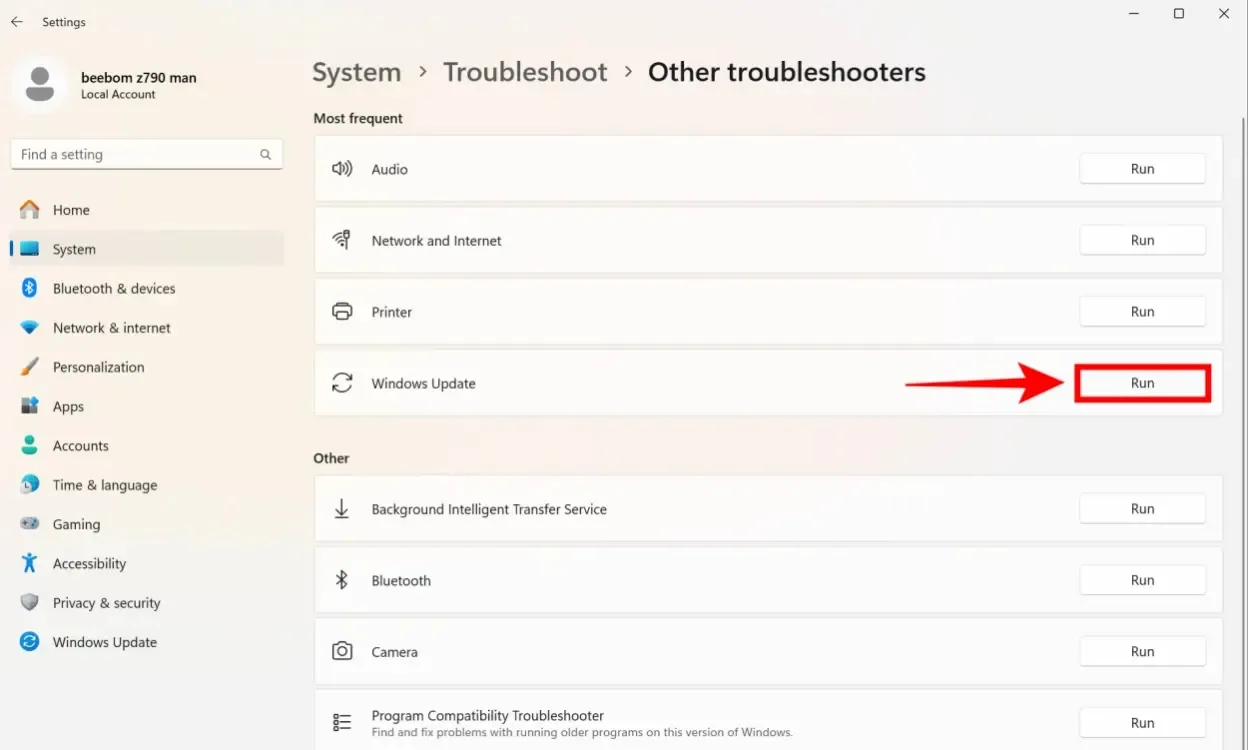
4. Under Other troubleshooters, locate Windows Update and click on Run.
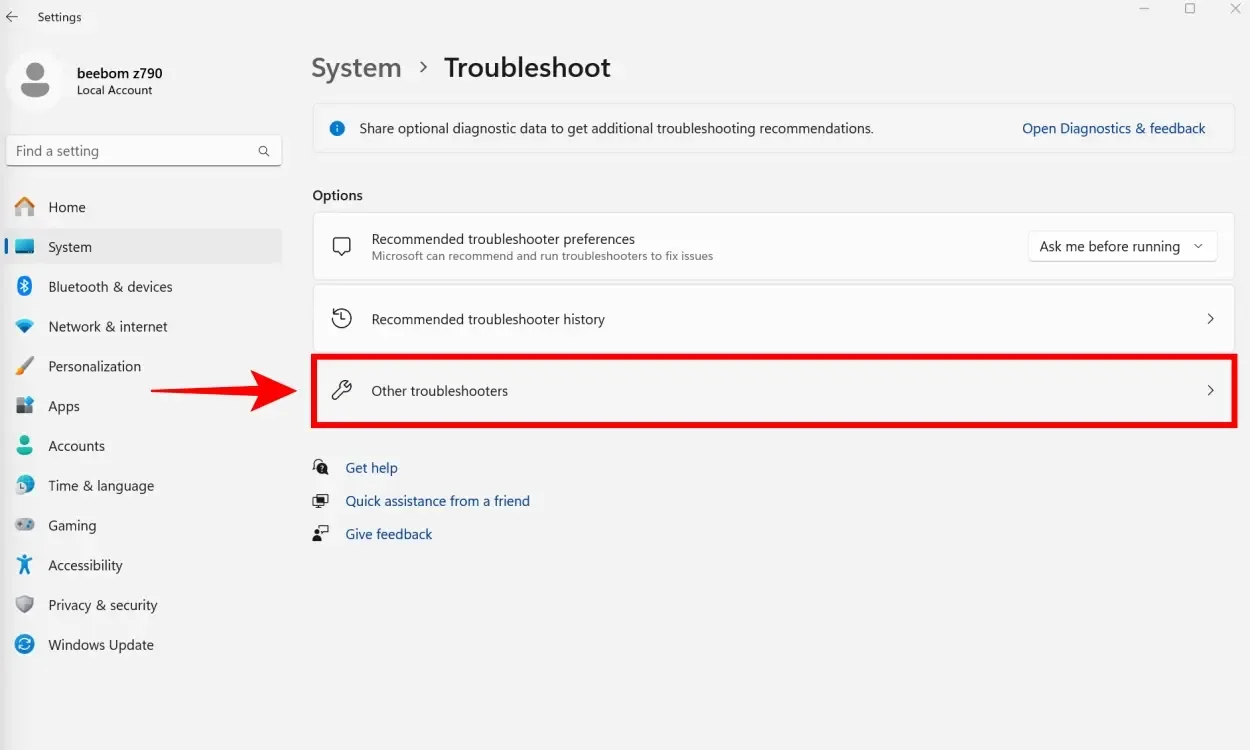
5. At the end, click on Run button next to the Windows Update in the menu bar.
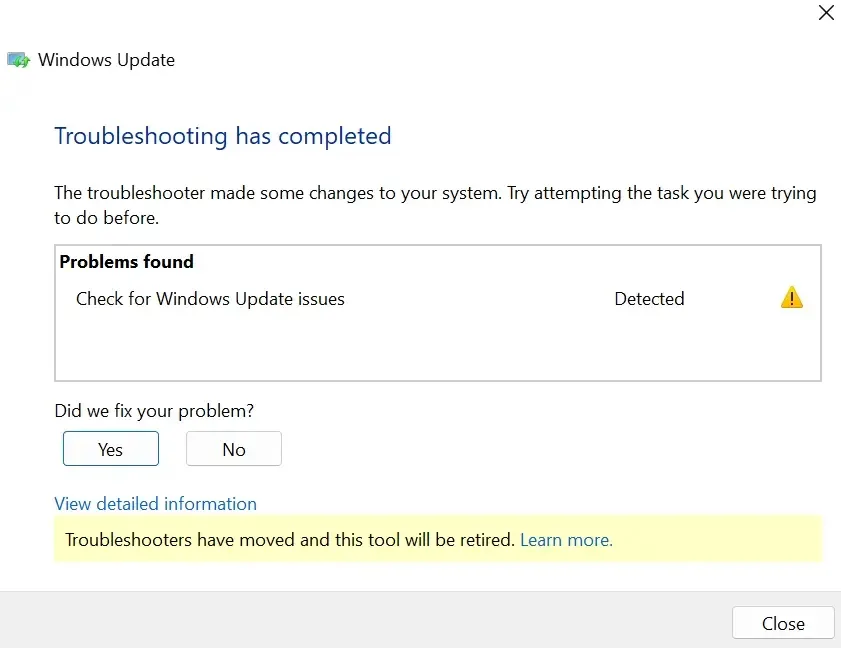
6. Follow the instructions provided by the Windows Update troubleshooter to resolve error 0x800f081f and identify any issues hindering Windows Update.
Option 3: Resetting Windows Update Services
To resolve the install error 0x800f081f on Windows 11, you can try restarting Windows Update Services. Here’s a step-by-step guide:
1. Open Windows Search by pressing “Win + S” on your keyboard or access it via the taskbar.
2. Type “Services” in the search menu and click on the suggested result.

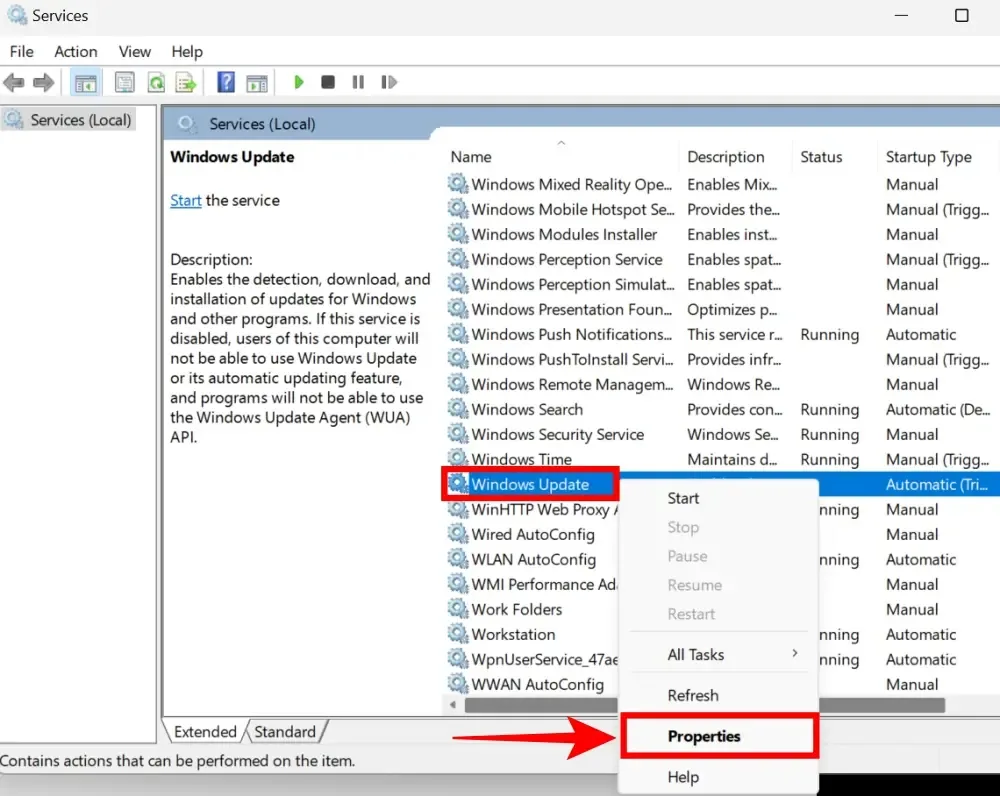
3. Scroll down and find “Windows Update” in the list. Right-click on it and select “Properties.”
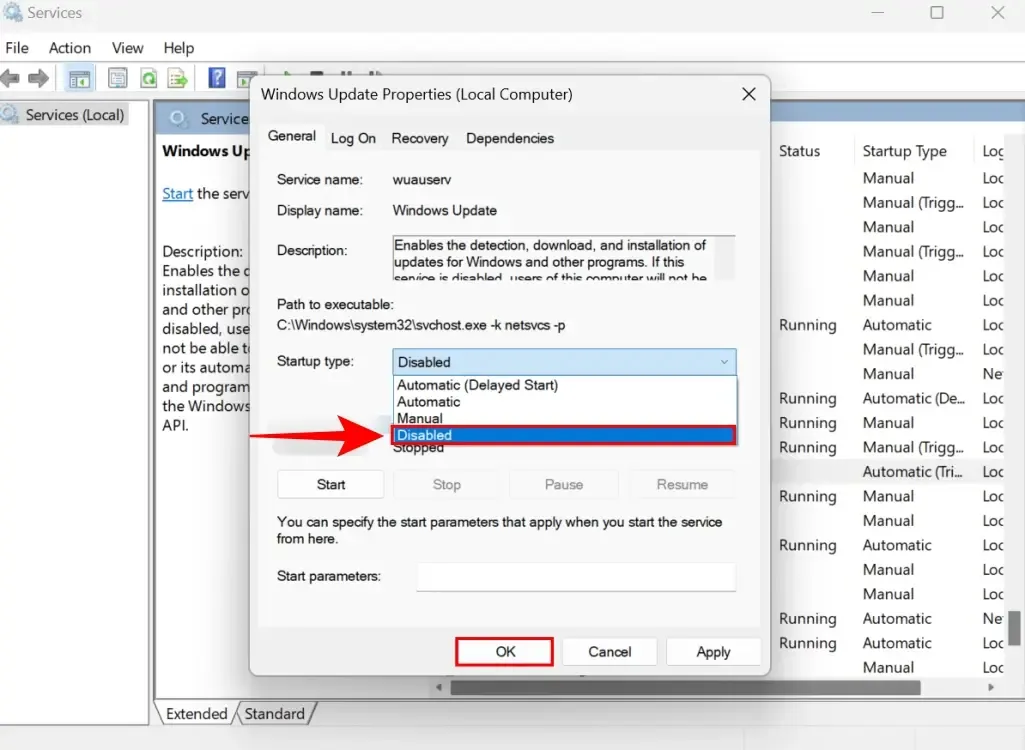
4. In the Properties window, click on the drop-down menu next to “Startup type” and select “Disabled.” Click OK to apply the changes.
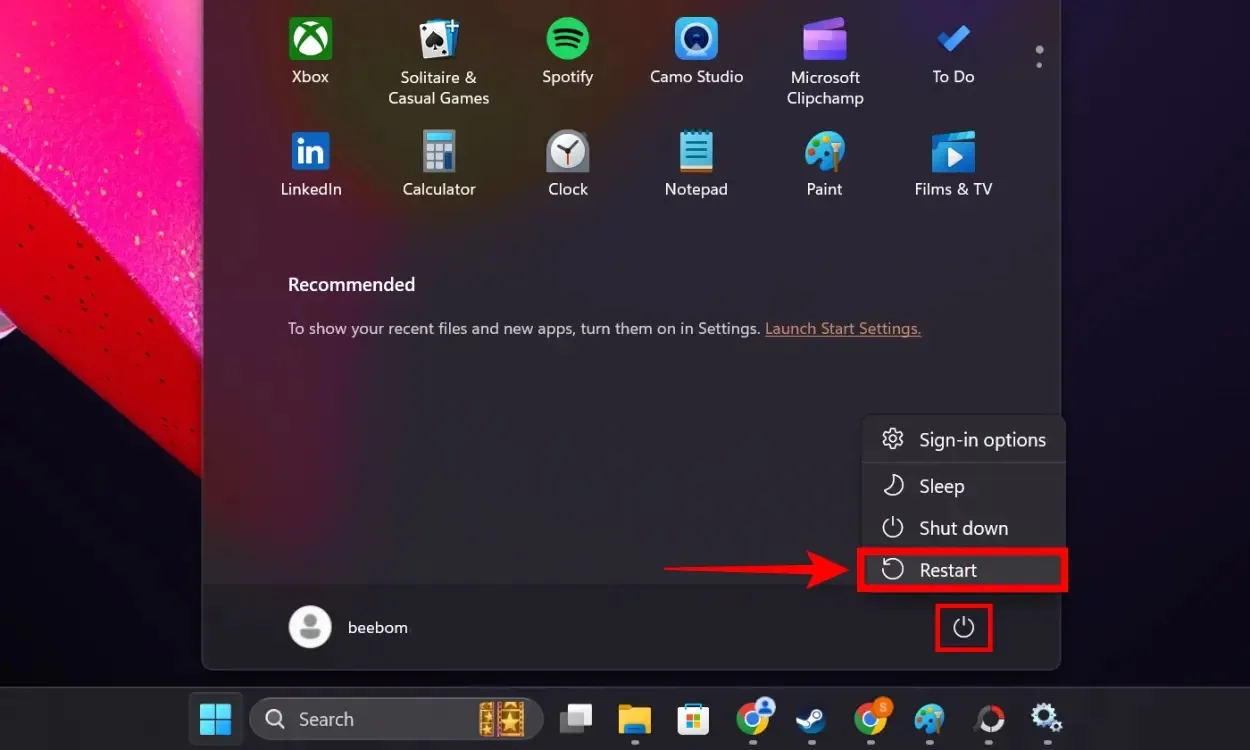
5. Restart your PC by clicking on the Windows Button, then the Power Button Symbol, and selecting “Restart.”
6. Once your PC restarts, open the list of Windows Services again.
7. Locate “Windows Update” in the list, right-click on it, and select “Properties.”
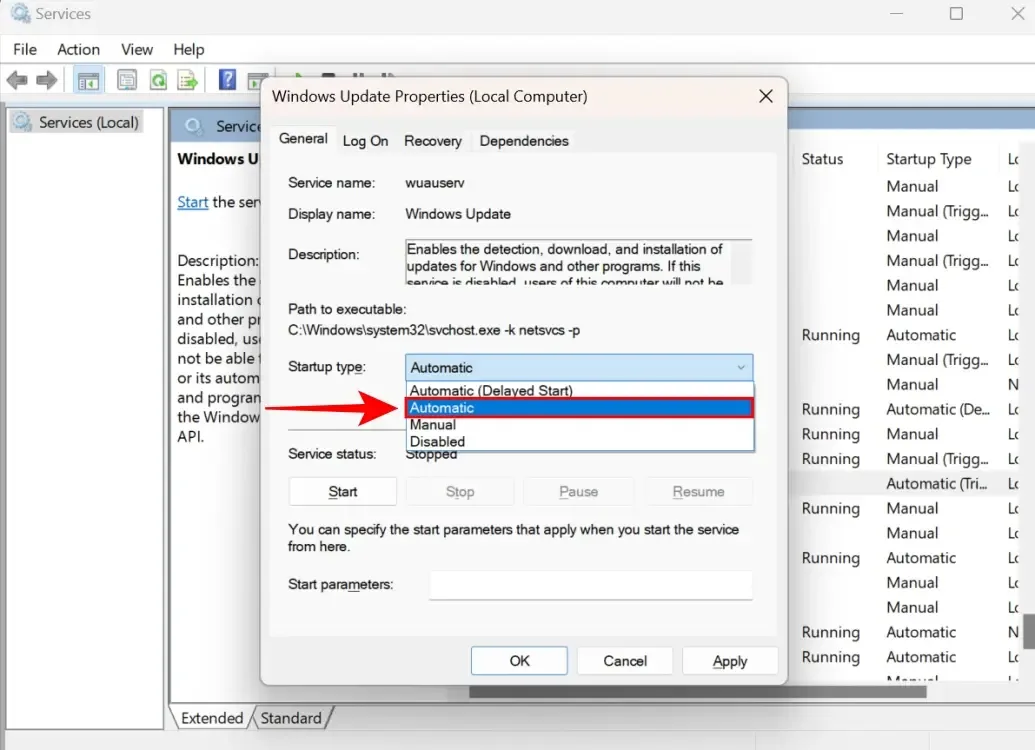
8. In the Properties window, set the “Startup type” to “Automatic” and click OK to save the changes.
9. Restart your PC again to complete the process.
Option 4: Running DISM & SFC Commands in CMD
After restarting your PC, check if the install error 0x800f081f has been resolved.
1. To use the DISM command to fix errors in Windows, open Search by pressing “Win + S” or clicking on the search menu in the taskbar.
2. Search for “cmd” and click on the Command Prompt suggestion, then select “Run as administrator.”
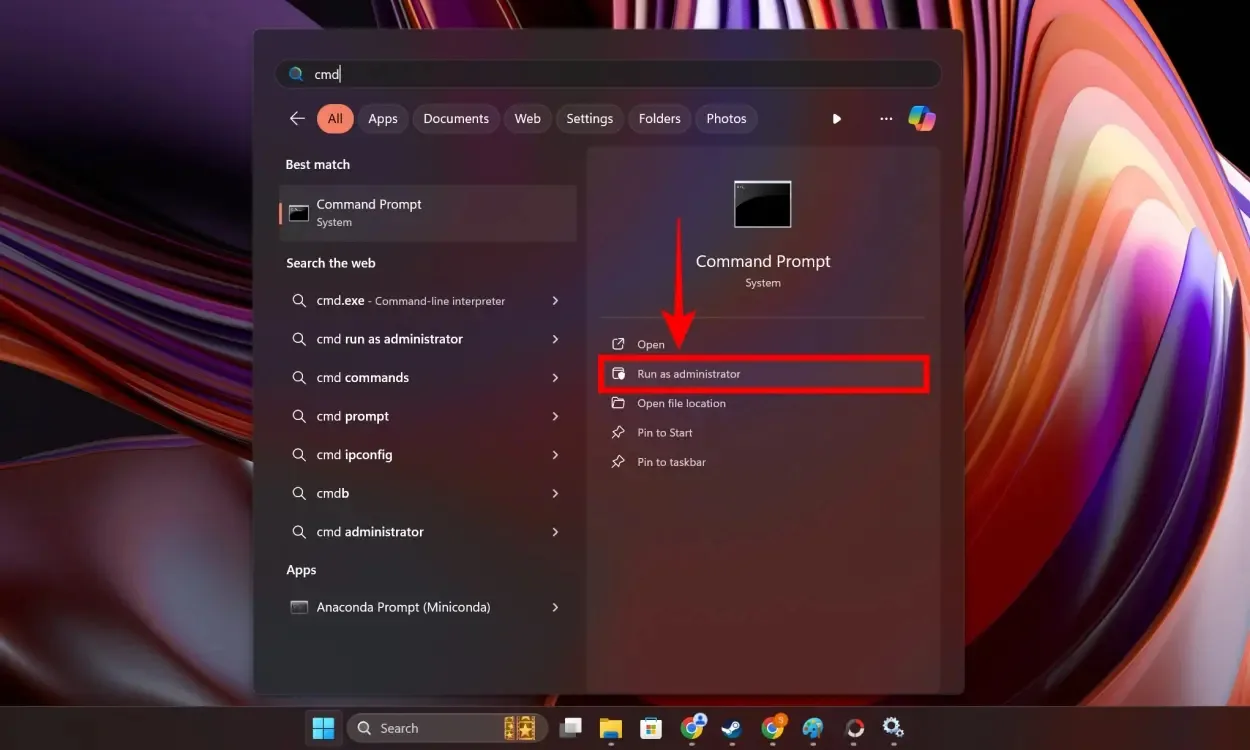
3. In the Command Prompt window, paste the following command and press Enter.
DISM /Online /Cleanup-Image /CheckHealth
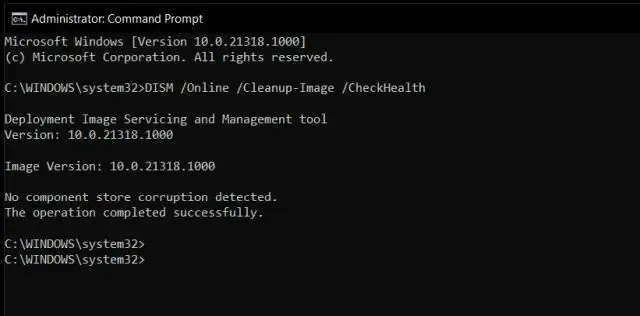
4. Make sure you are connected to the internet when using DISM. After running the above command, enter the following command and press Enter.
DISM /Online /Cleanup-Image /ScanHealth
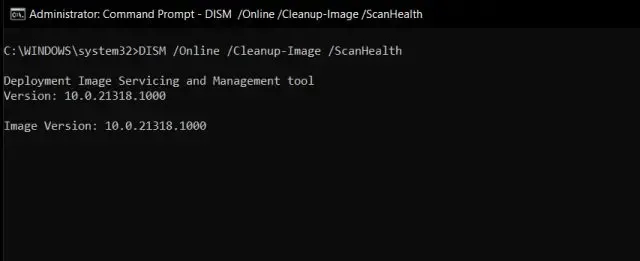
5. Enter the final DISM command below in Command Prompt and press Enter.
DISM /Online /Cleanup-Image /RestoreHealth
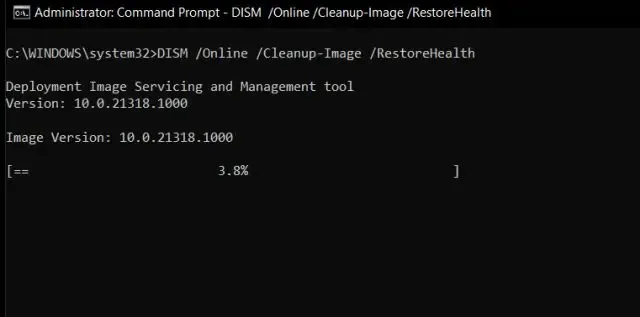
6. System File Checker (SFC) checks the integrity of your OS files. With CMD still open, input the following command and press Enter.
/scannow
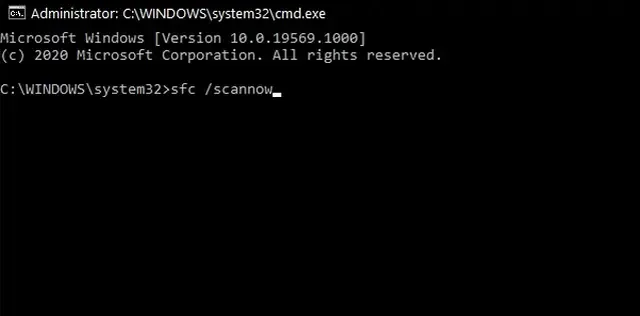
7. This process may take some time. Once completed, check if the install error 0x800f081f has been resolved.
Option 5: Modifying Windows Update Settings in Group Policy Editor
This is a straightforward method to resolve the install error on Windows 11. However, if you are using Windows 11 Home edition, you may need to enable the Group Policy Editor first. Follow these steps:
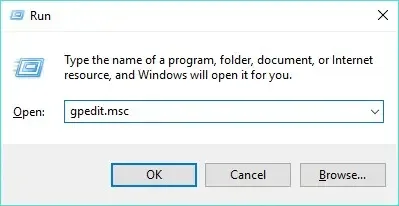
1. Press “Windows + R” to open the Run command window. Type “gpedit.msc” and click OK.
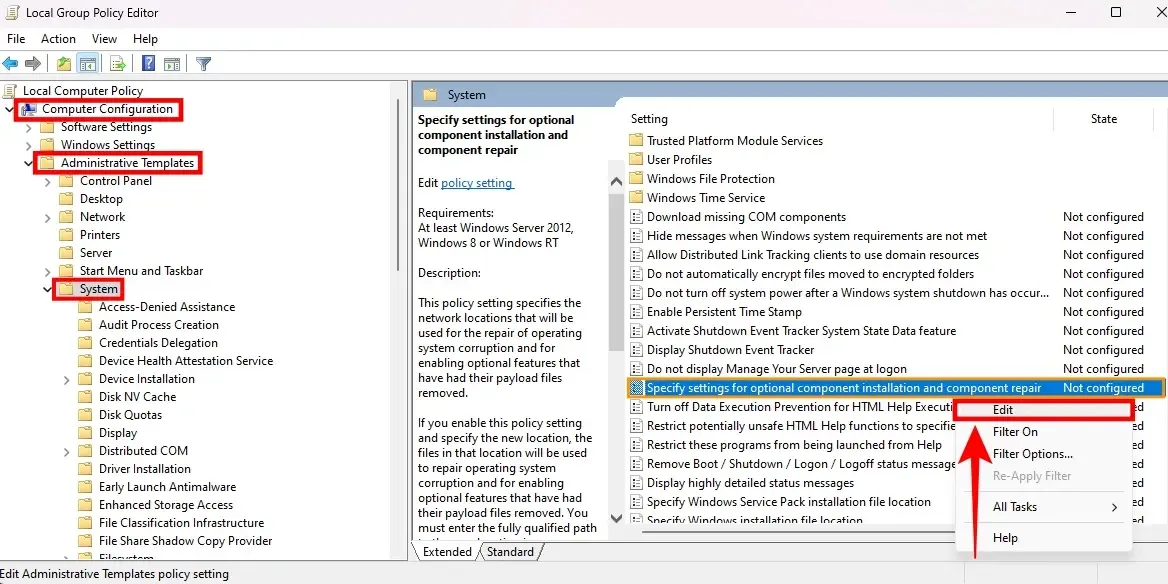
2. The Local Group Policy Editor will open. Go to Computer Configuration > Administrative Templates > System.
3. On the right side, find the setting “Specify settings for optional component installation and component repair.”
4. Right-click on this setting and select “Edit.”
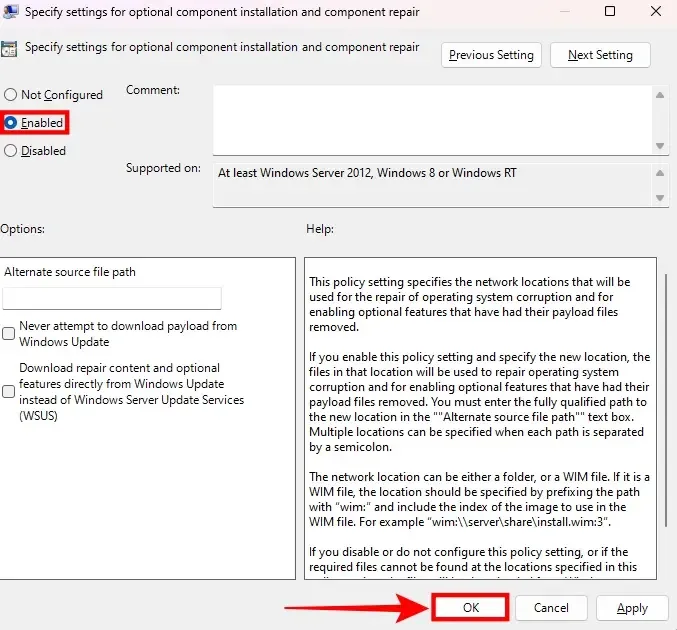
5. Click on Enable and then click OK to apply the changes.
6. Restart your PC and check if this Group Policy Editor method resolves the error 0x800f081f for you.
Option 6: Resetting Your Windows 11 Installation
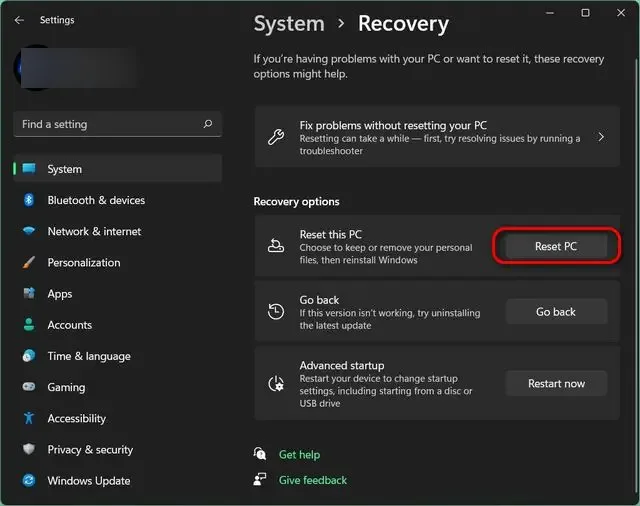
1. To resolve Windows Update install error 0x800f081f, you can reset your Windows 11 operating system environment. Follow the steps outlined in the linked guide.
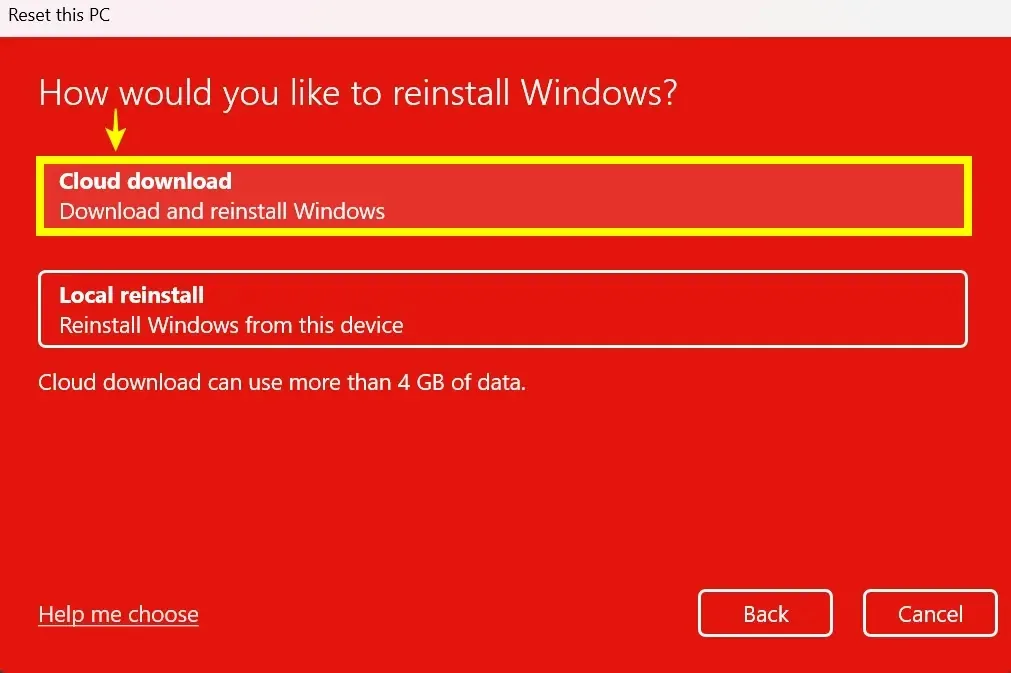
2. During the reset procedure, choose Cloud download to fetch the latest build of Windows 11.
3. Alternatively, you can perform a clean installation by manually reinstalling Windows 11. For this, you’ll need a USB drive with a capacity of 8GB or more.
Resolving the install error 0x800f081f can be challenging, but these solutions can help you fix the issue on your Windows 11 PC quickly. While you’re at it, explore the exciting new features coming with the Windows 11 24H2 update later this year. I hope this blog might have helped you resolve this issue, share your thoughts in the comment section below.


