If you’ve exhausted all troubleshooting methods and still can’t resolve a particular issue with your Windows 11 installation, reinstalling Windows might be your last resort. However, reinstalling Windows and setting it up again from scratch can be a tedious process. The good news is that it’s possible to reinstall Windows 11 without losing your data, and there are several ways to do it. Let’s explore how you can reinstall Windows 11 without losing your data.
When we talk about “data,” we’re referring to your downloaded apps and their data, as well as your stored files. Some Windows 11 reinstall options allow you to keep both your apps and files, while others only preserve the installed apps. While all of these options are designed to work smoothly, we recommend backing up your files as a precaution in case something unexpected happens.
Method 1: Reinstall Windows 11 Using Settings
Windows 11 provides an option to reinstall your current version of Windows through Windows Update while maintaining your apps, their data, and your files. This process replaces crucial Windows files to address any issues you may be experiencing. To utilize this feature:
1. Navigate to Settings > System.
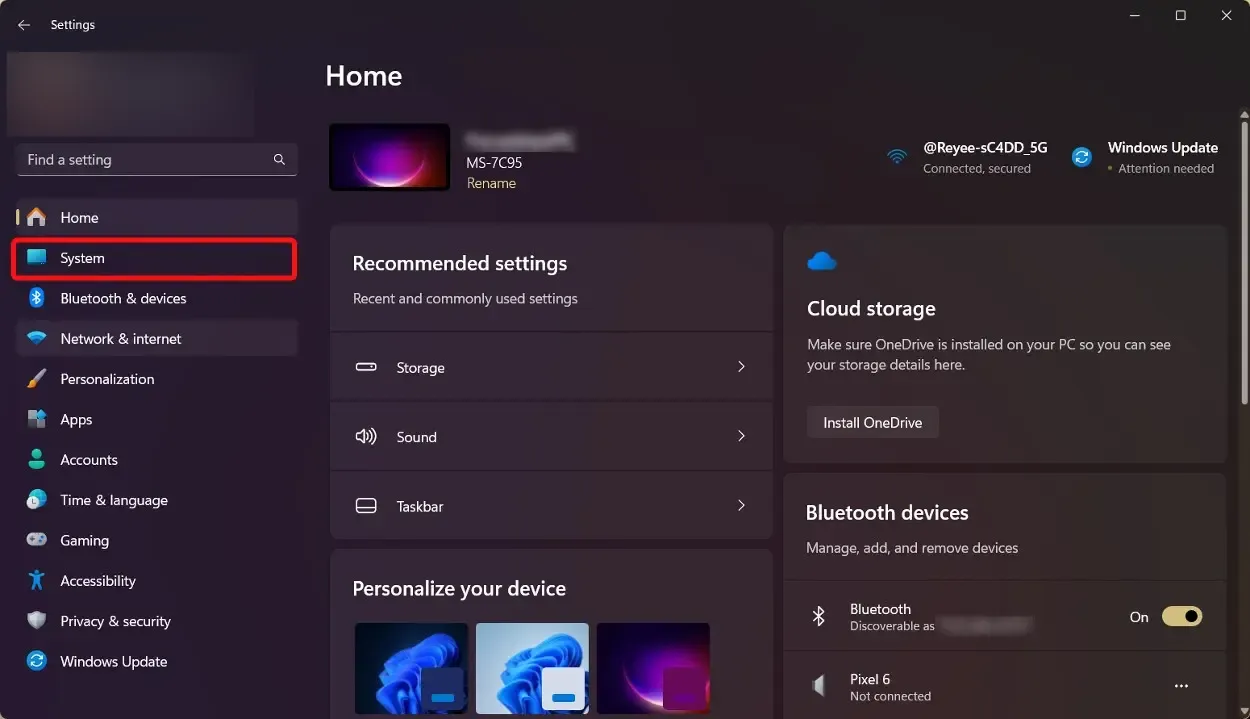
2. Select Recovery > Reinstall now.
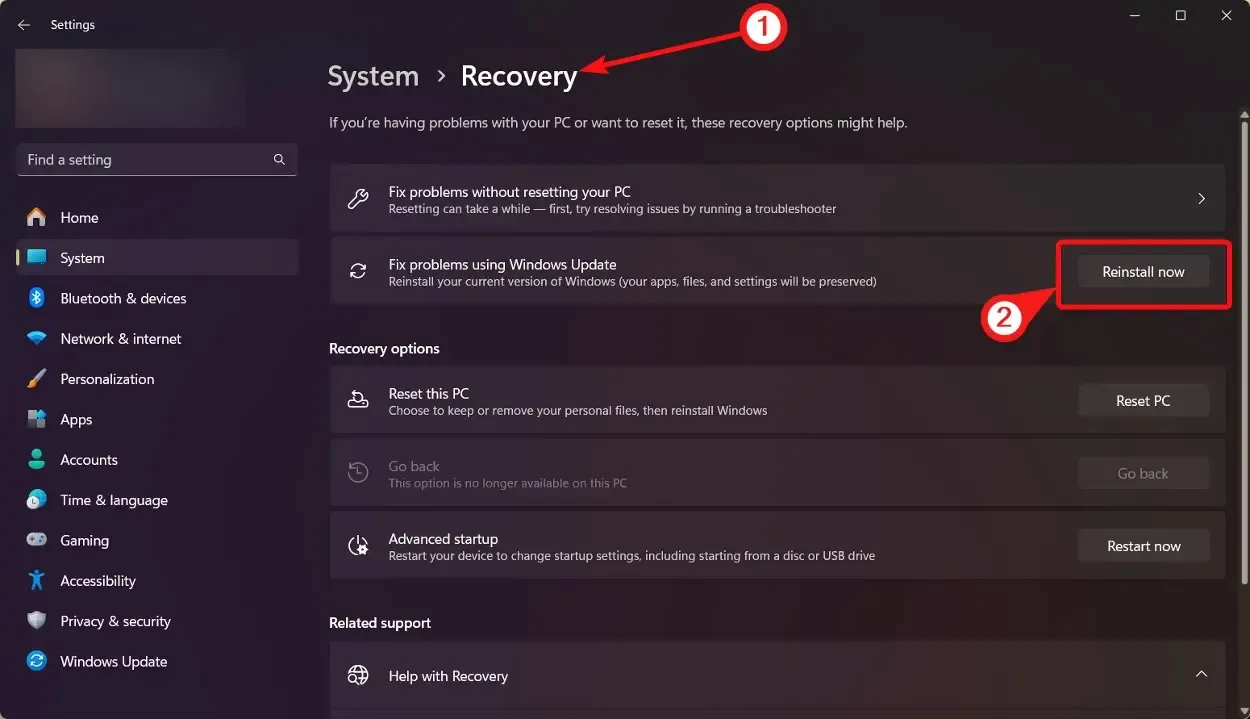
3. Click OK when prompted with the “Fix problems using the Windows update” dialog box.
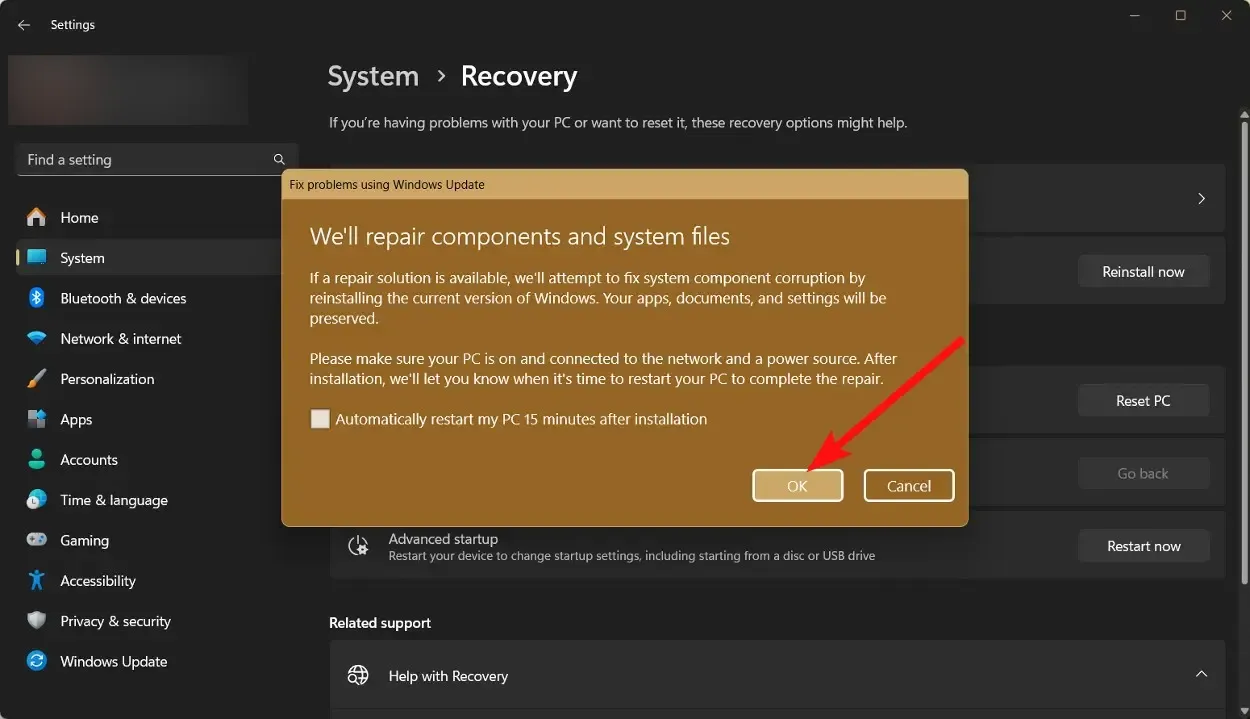
4. Windows will then start reinstalling itself and will restart several times. Depending on your PC and internet speed, it should not take long before you boot into a fresh copy of Windows 11 with all your data preserved.
Method 2: Reinstall Windows 11 Using the Creation Tool
The Media Creation Tool is a long-established Windows utility that allows you to create a bootable Windows USB drive or burn Windows onto a CD. Additionally, it can be used to reinstall Windows 11 without losing your personal data, apps, and files. Here’s how to use it:
1. Download the official Windows 11 Media Creation Tool from here and click “Download Now.”
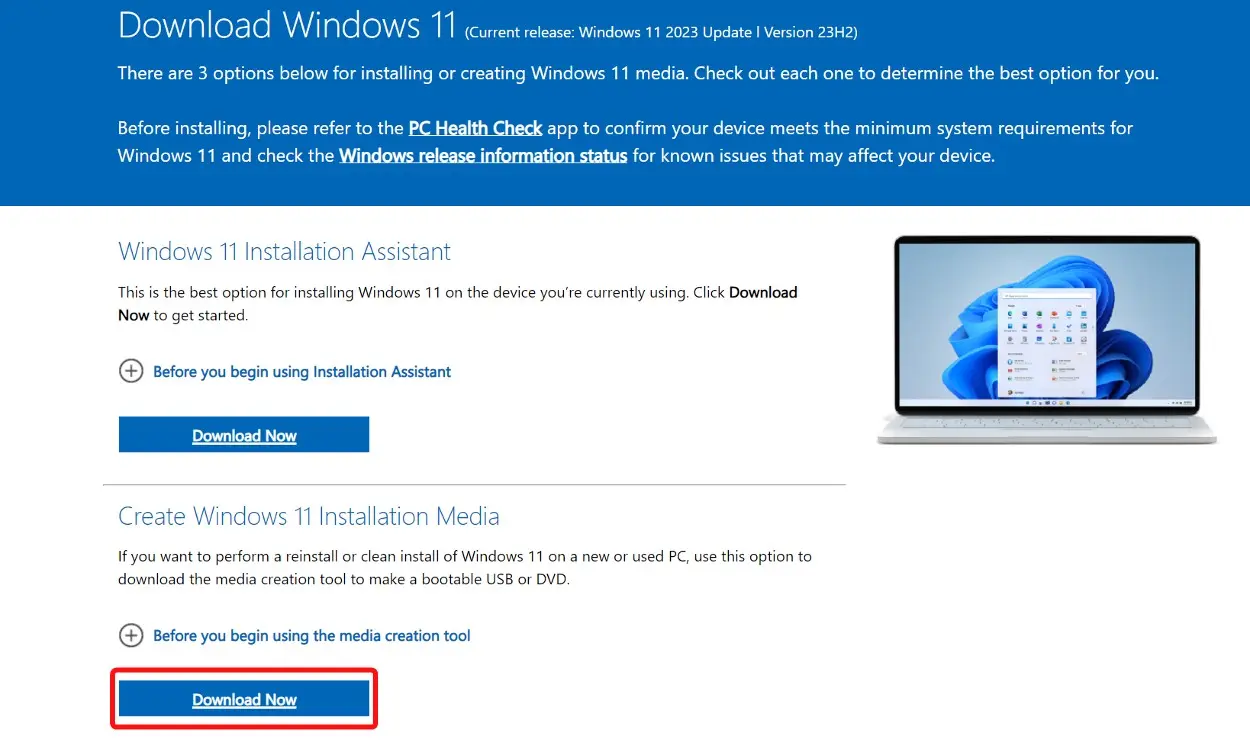
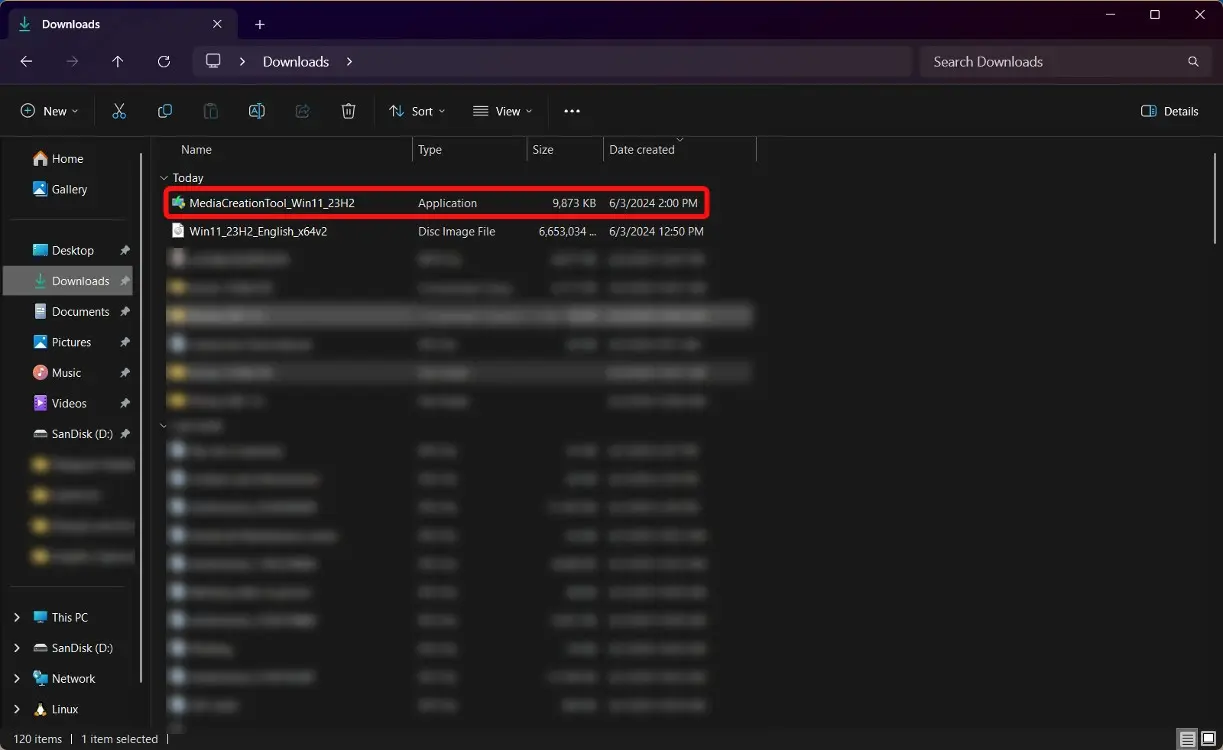
2. After the download is complete, double-click the file to launch it.
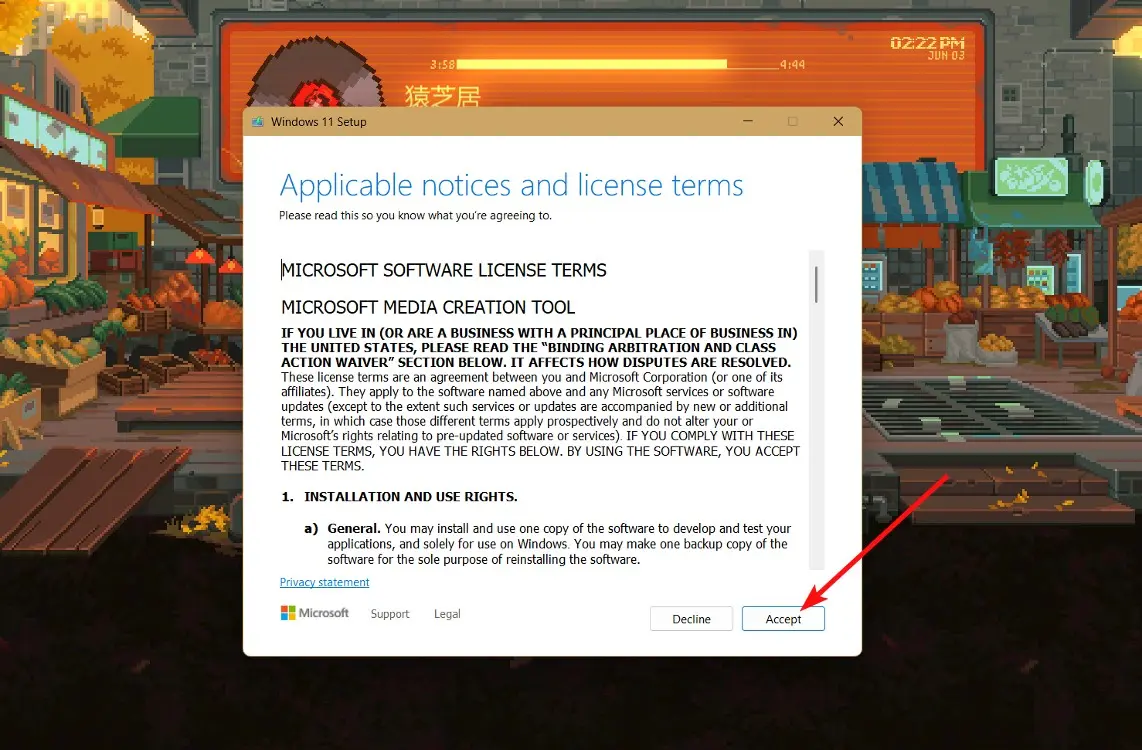
3. When the program opens, click on “Accept” to proceed.
4. Connect a USB drive to your PC with at least 16GB of space.
5. Select your preferred language and click “Next.“
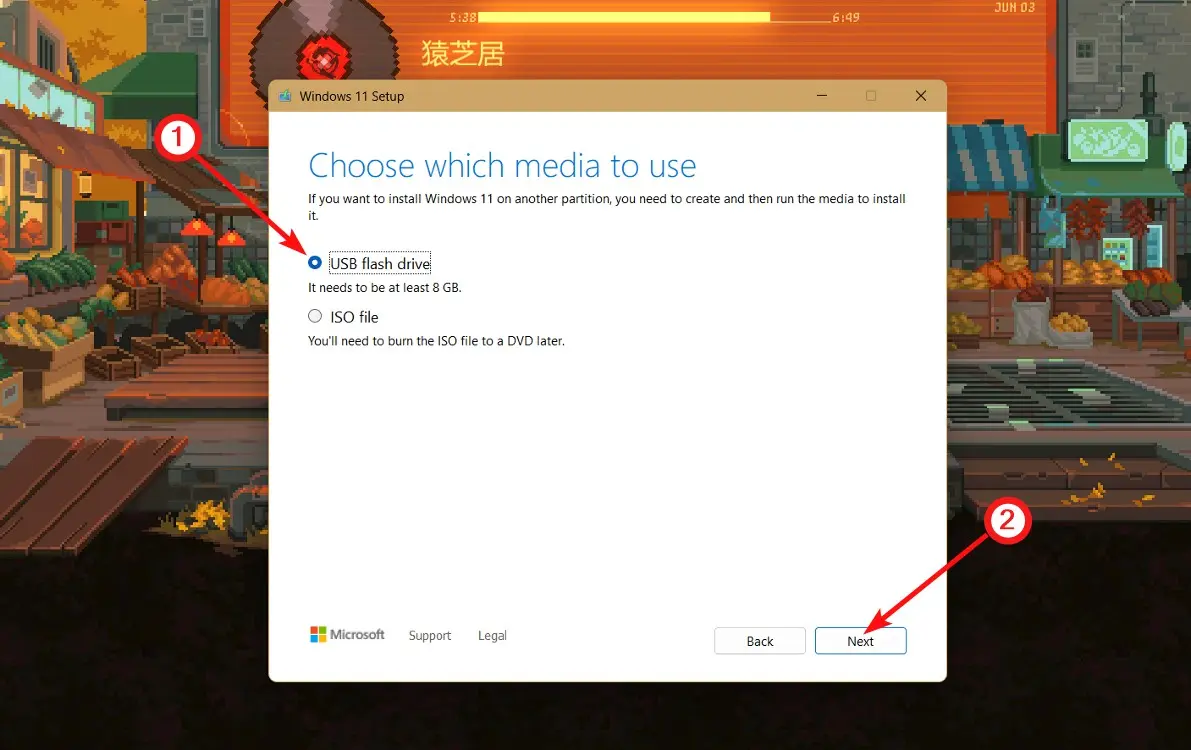
6. Choose “USB flash drive” and click “Next.“
7. Select your USB drive from the list and click on “Next.” Ensure that it is formatted to exFAT and not NTFS to appear on the list.
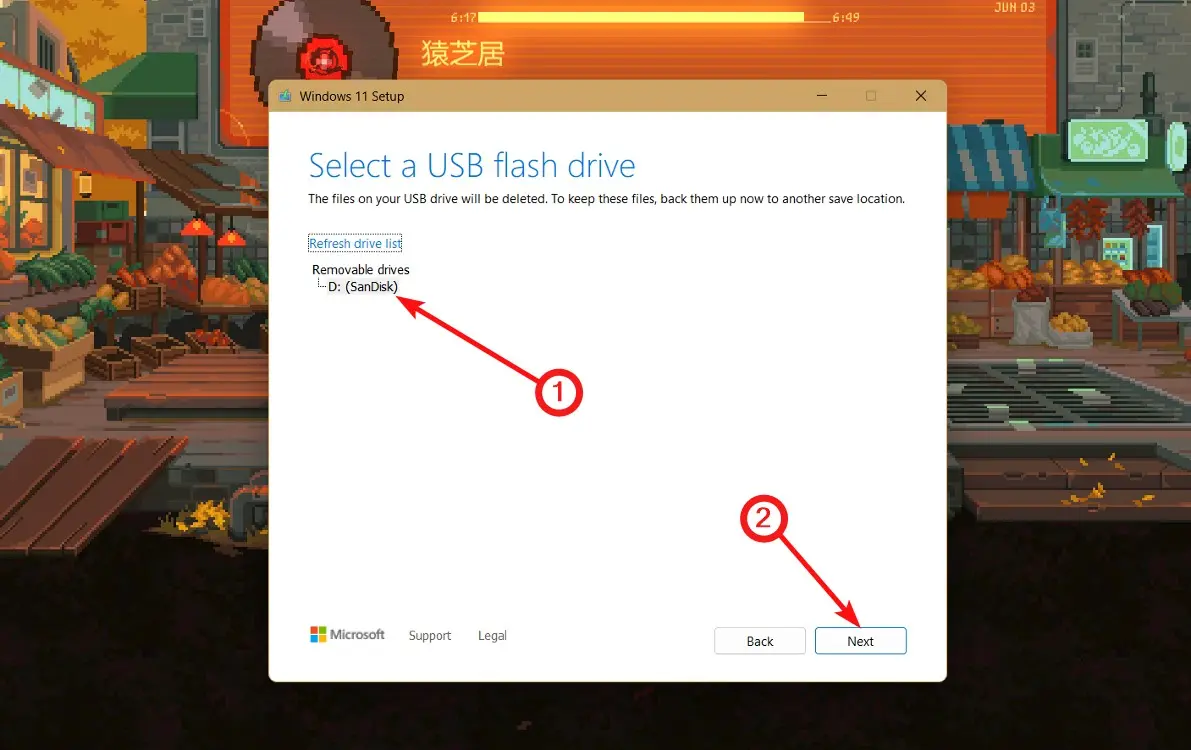
8. Click “Next” to begin preparing your USB drive as a bootable drive.
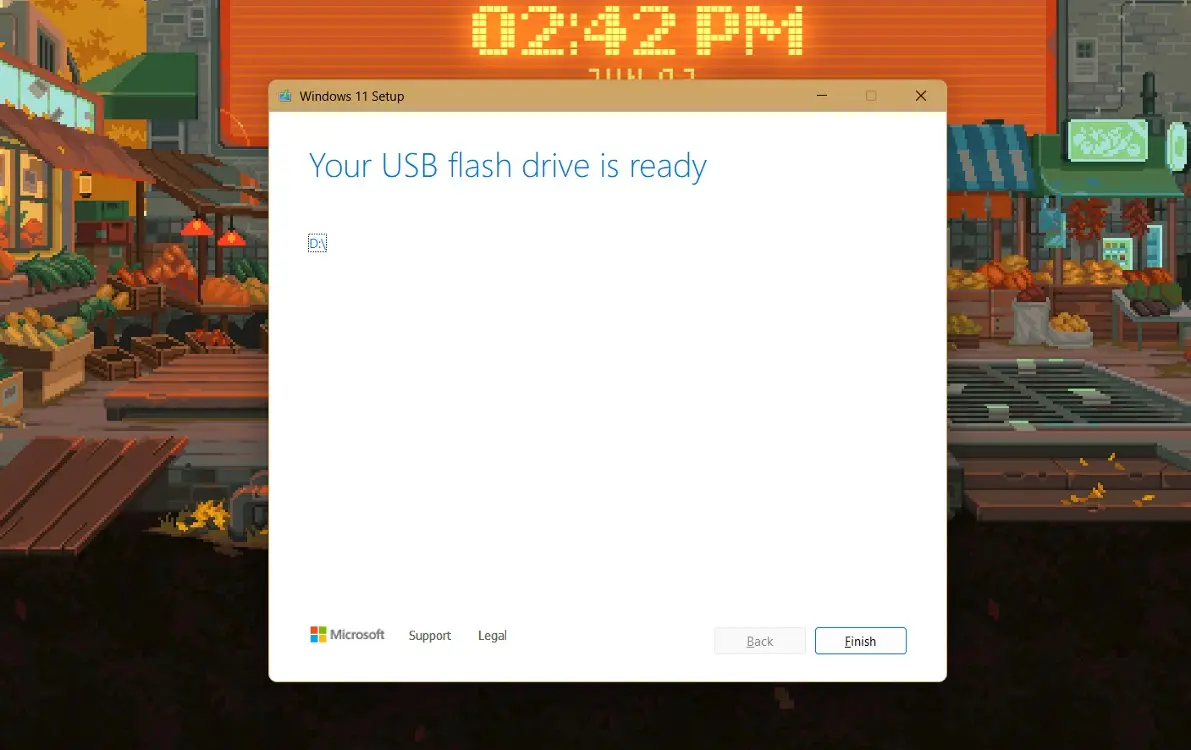
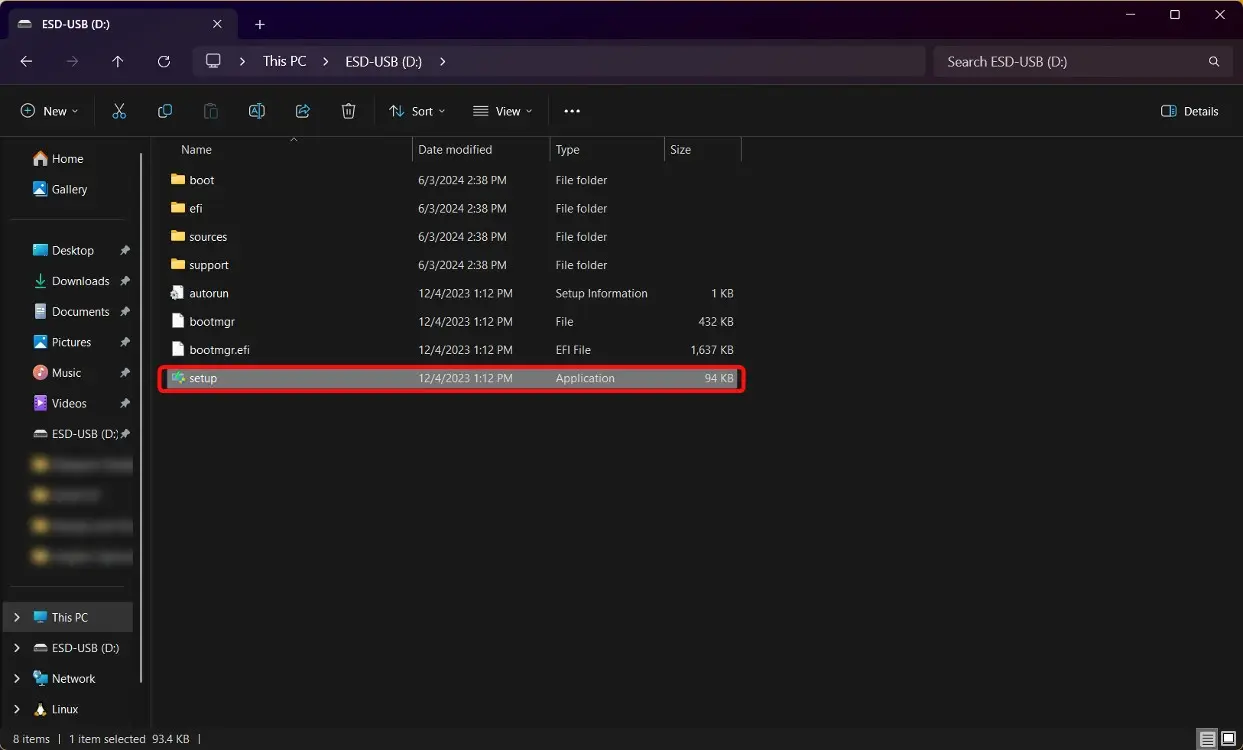
9. Once the tool is installed, open “This PC” from your desktop and double-click on your USB drive.
10. Double-click on the setup program to launch it and accept the terms and conditions.
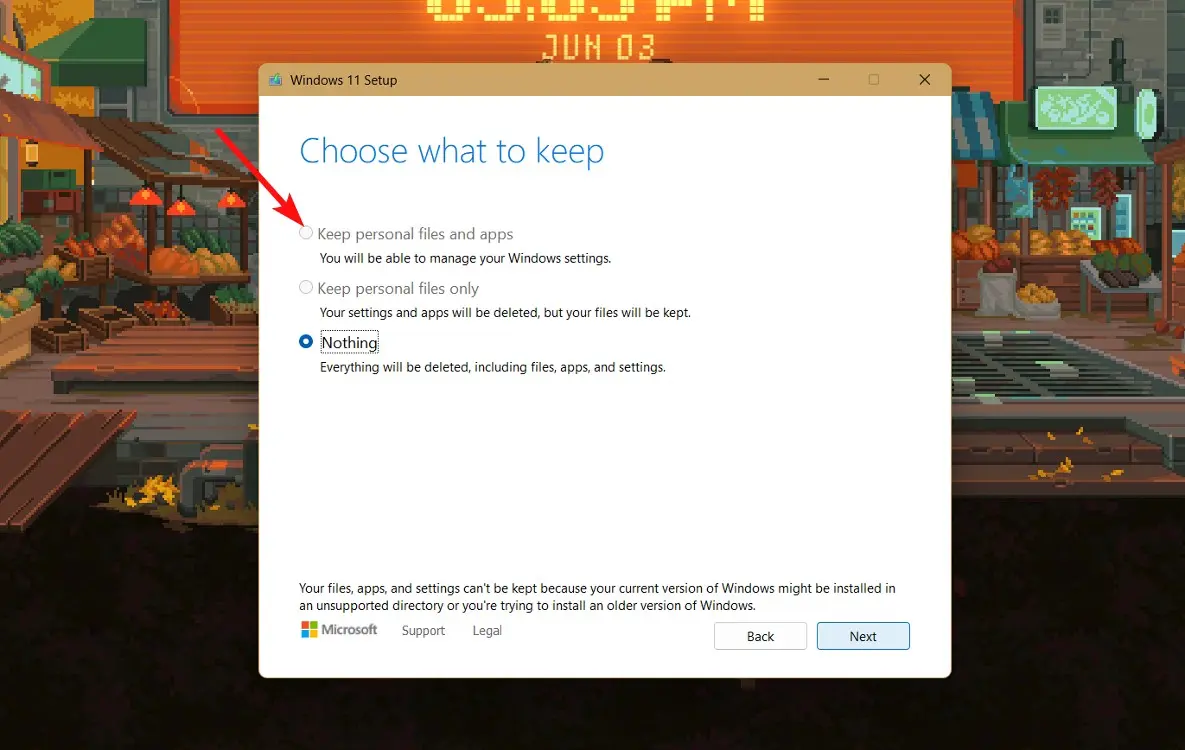
11. Select the “Keep personal files and apps” option and click on “Next.” Note that this option may be greyed out in the screenshot due to being on an Insider build. It should be clickable on the latest stable version. If it’s not, update your Windows and try again.
12. Click on “Install.” Windows will restart several times and install a fresh copy while preserving all your files and apps.
Method 3: Reset Windows 11 and Opt to Keep the Data
Before proceeding with a reinstall of Windows 11, consider a system reset as a faster alternative to restore Windows 11 to its factory settings while preserving your personal files. Here’s how to do it:
1. Navigate to Settings > System.
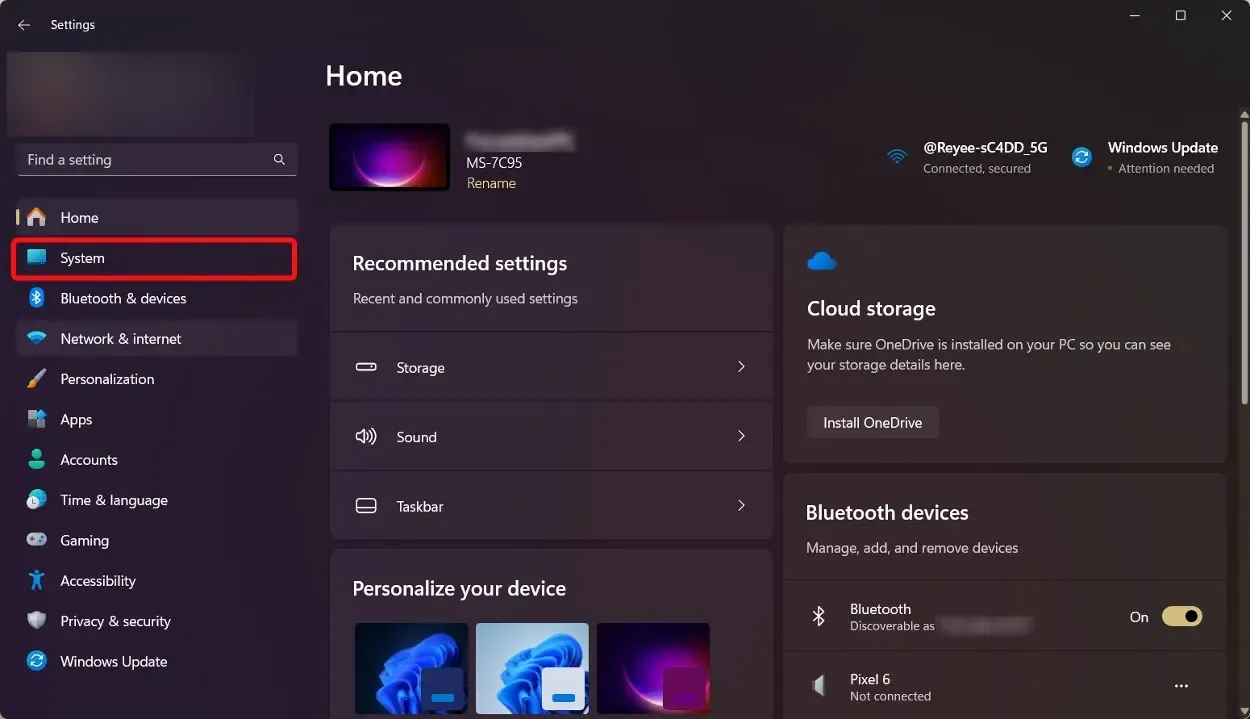
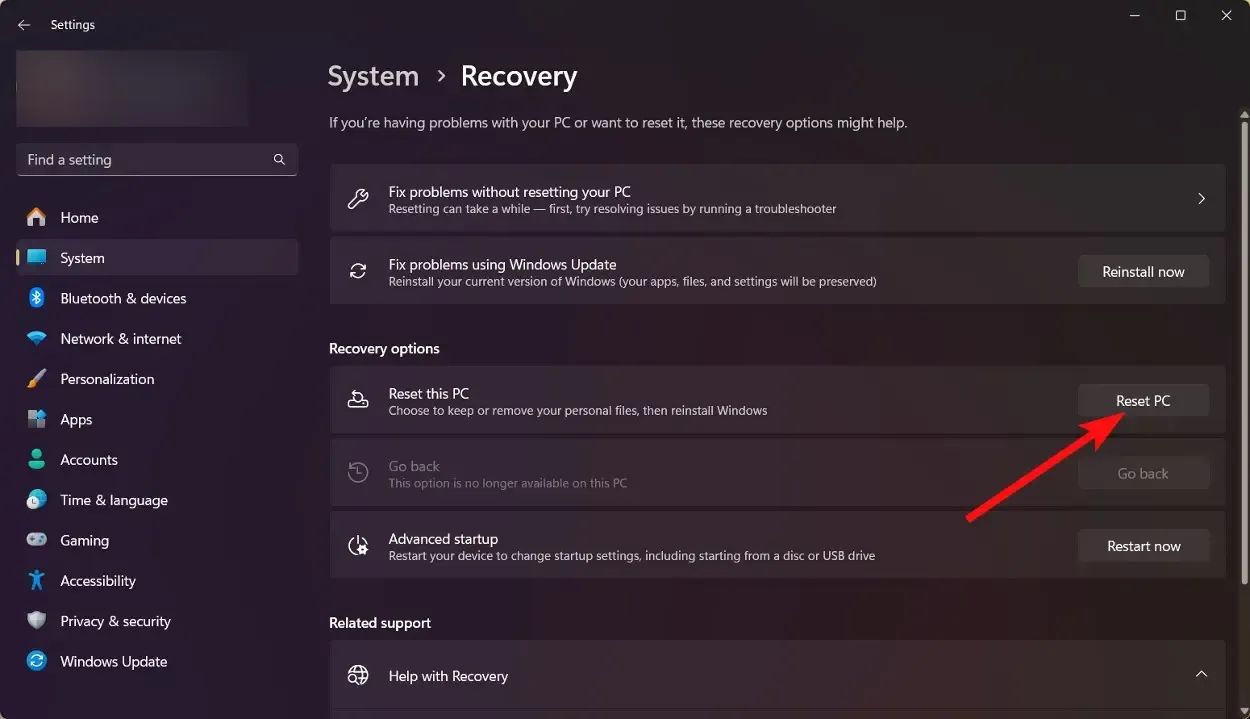
2. Select Recovery > Reset PC.
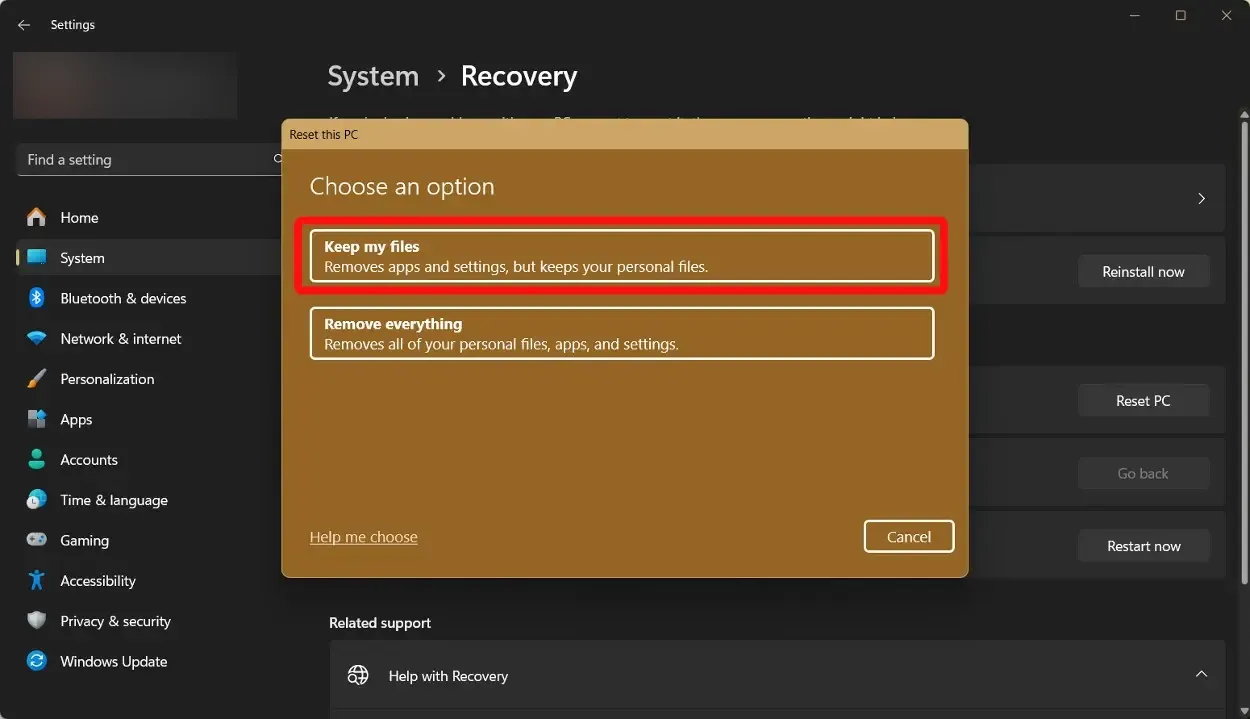
3. Choose the “Keep My Files” option. This will remove apps and settings but retain your personal files.
4. The Windows 11 reinstallation process will begin. Your PC may restart several times before booting into Windows 11 with factory settings, while also preserving your data on the disk.
Here are some methods you can use to reinstall Windows 11 without losing your app data or personal files. If reinstalling Windows doesn’t resolve your issues, you may consider a reinstall that involves wiping your data. In such cases, it’s important to back up your data to the cloud or an external drive.
Have you successfully resolved your Windows issues by reinstalling it using the methods mentioned above? Share your experience in the comments below.


