
I’ve used touchscreen Windows laptops in the past, but I rarely use the touch functionality now. When these laptops overheat, the touchscreen can become erratic, so it’s best to disable it. If you’re experiencing similar issues or don’t frequently use the touch feature, here’s how to permanently disable the touchscreen on Windows 11 and 10 devices.
1. Touch Screen on Windows 10 and 11 Device Manager
First and foremost, you can disable the touchscreen on Windows 11 and 10 using Device Manager. By turning off the touchscreen driver, you effectively stop it from functioning. Here’s how to do it:
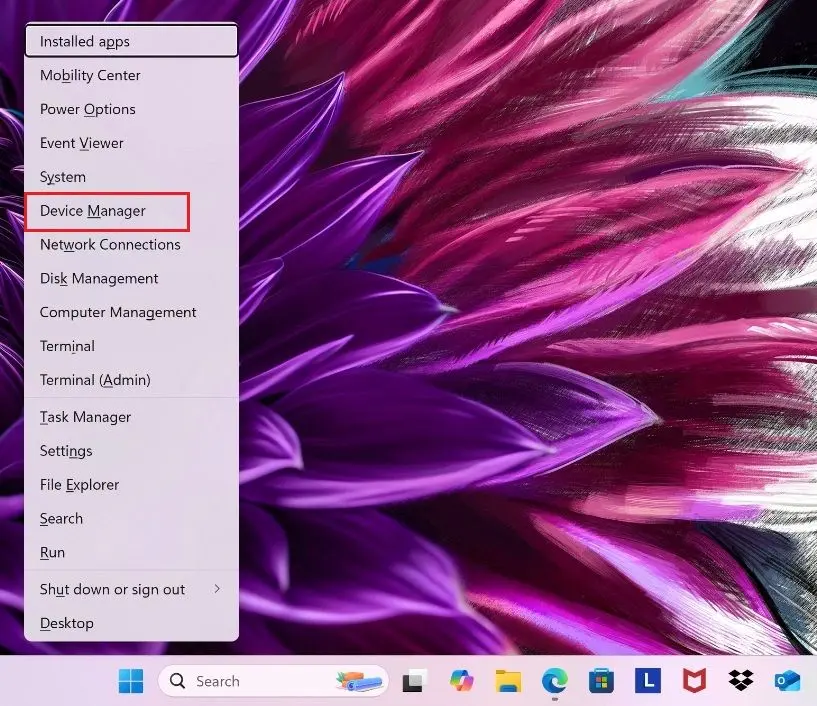
- Press Windows + X to open the Quick Link menu.
- From the list, click on Device Manager to open it.
- Next, expand Human Interface Devices and scroll through the list.
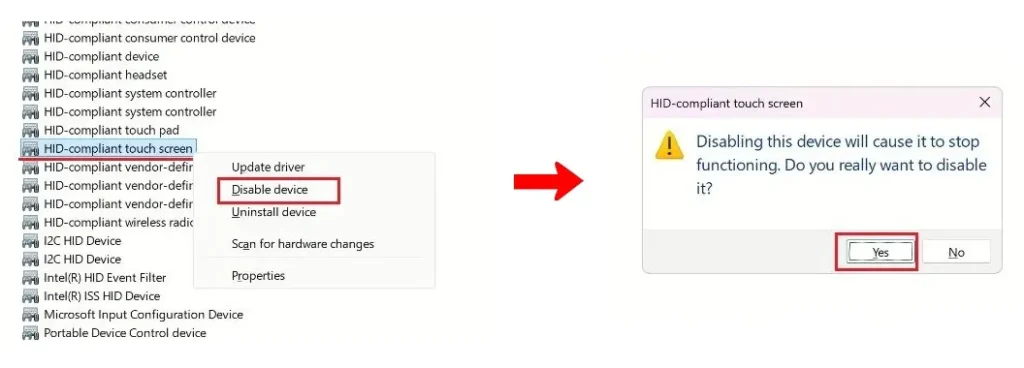
- Look for HID-compliant touch screen and right-click on it.
- Select Disable device from the context menu.
- If there are other entries related to the touch screen, go ahead and disable those as well.
- Finally, click Yes when prompted to confirm and turn off the touch screen on your Windows 10 or 11 PC.
You can re-enable the touch screen on your Windows laptop at any time by right-clicking the same listings you disabled earlier and selecting Enable device from the context menu.
2. Disable the Touch Screen on Windows 10 and 11 Using PowerShell
You can also use PowerShell to disable the touchscreen driver on Windows 10 and 11 PCs. With just a single command, you can instantly turn off touch input on your Windows laptop. Here’s how:
- Open the Start menu and search for “PowerShell”.
- Then, click “Run as administrator” in the right-hand pane.
- In the PowerShell window, paste the following command and press Enter:
Get-PnpDevice | Where-Object { $_.FriendlyName -like "*touch screen*" } | Enable-PnpDevice -Confirm:$false
- This command will automatically disable the touch screen on your Windows laptop.
- If you want to re-enable the touch screen later, run the following command in PowerShell:
Get-PnpDevice | Where-Object { $_.FriendlyName -like "*touch screen*" } | Enable-PnpDevice -Confirm:$false3. Permanently Turn Off Touch Screen on Windows Laptops Using Registry Editor
If the touch screen keeps re-enabling after a reboot or a Windows update, you can permanently disable it using the Registry Editor. By modifying the “TouchGate” value, you can turn off touch input effectively. Here’s how to do it:
- Open the Start menu and search for “registry”.
- From the search results, click on “Registry Editor” to open it.
- In the Registry Editor, paste the following path into the address bar and press Enter:
- This will take you directly to the “Touch” registry entry.
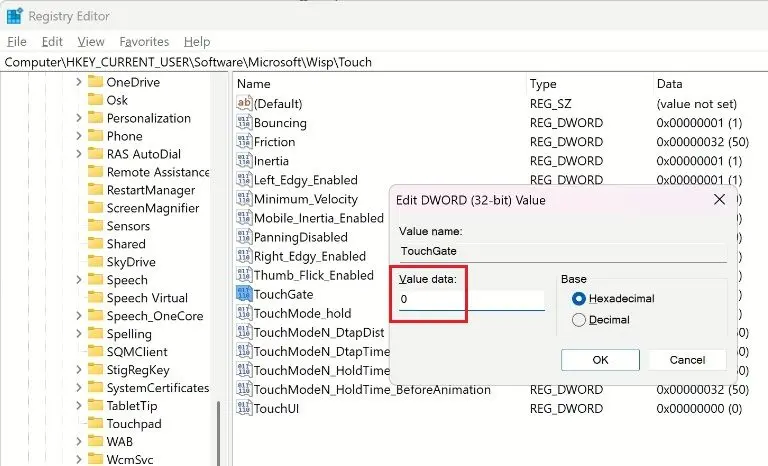
Computer\HKEY_Current_USER\Software\Microsoft\Wisp\Touch

- On the right side of the Registry Editor, locate “TouchGate” and double-click to open it.
- Change the Value data to
0and click “OK” to save the change. - Now, restart your Windows laptop, and the touch screen will be disabled.
These are three methods to disable the touchscreen on Windows 10 and 11 laptops. Many users have found that the setting in Device Manager doesn’t persist after rebooting. If that’s the case, adjusting the Registry value will ensure the touchscreen remains off permanently.


