AirDrop is the fastest and simplest method for sharing files, photos, and links between Apple devices. Whether you want to transfer photos, contacts, links, documents, notes or Apple Maps locations- AirDrop makes it simple. Before you can start sending or receiving files, you need to turn on AirDrop. If you’re new to Apple ecosystem, don’t worry it’s really easy! Here’s a quick and easy guide to help you get AirDrop working on your iPhone, iPad, and Mac.
How Does AirDrop Work?
Apple’s AirDrop uses Wi-Fi and Bluetooth to detect nearby Apple devices and transfer files between them. You can choose to accept files from everyone, only from contacts, or block all incoming AirDrop requests, preventing your device from receiving or sending files via AirDrop.
Apple gives you three options to control who can see your device when using AirDrop:
- Receiving Off: Your device can’t receive files from anyone.
- Contacts Only: Only people, who are saved in your contacts can see your device.
- Everyone for 10 Minutes: Any nearby Apple device can see your device.
If you choose “Receiving Off,” your iPhone, iPad, or Mac will not accept files via AirDrop. To exchange files using AirDrop, you must choose either “Contacts Only” or “Everyone for 10 Minutes.”
Methods to Turn AirDrop On or Off on Your iPhone and iPad
Turning on and using AirDrop on your iPhone and iPad is very easy. You can easily manage this from the Control Center or by accessing the Settings app. Here’s how:
Method 1: By Using the Control Center
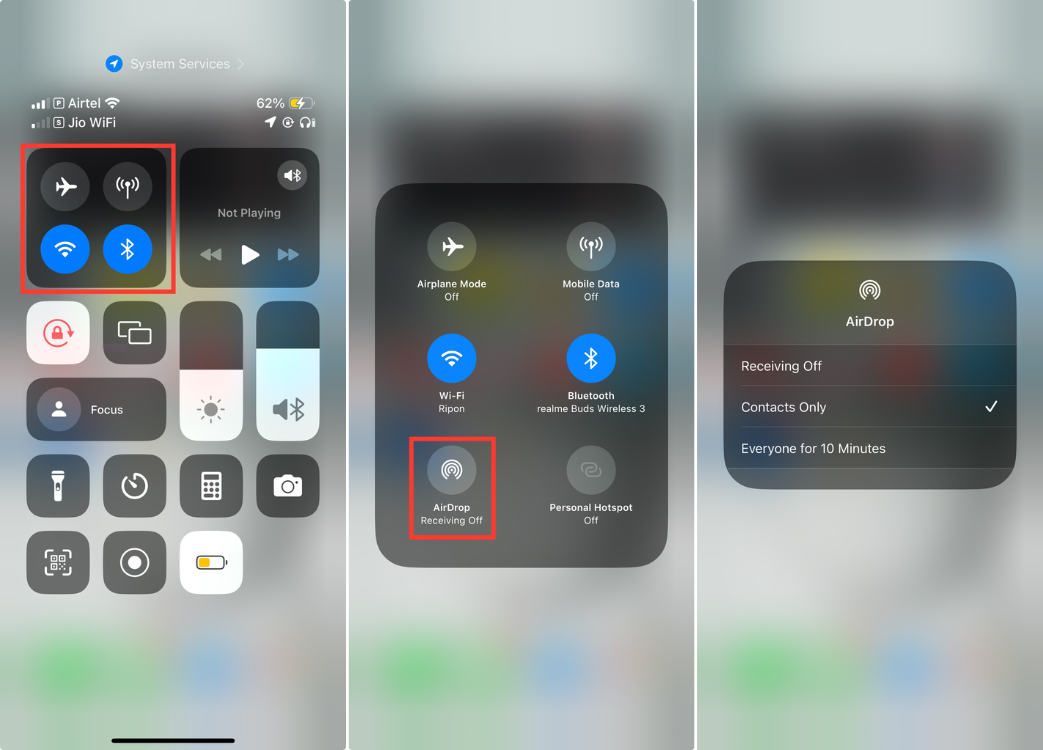
The Control Center is the fastest way to enable or disable AirDrop on your iPhone and control who can send you files. Here’s how to do it:
1. Swipe down from the top-right corner from your iPhone screen to open the Control Center.
2. Long-press the network settings block, which includes the Airplane Mode, Mobile Data, Wi-Fi, and Bluetooth icons.
3. Now, Click on the AirDrop icon and select either “Contacts Only” or “Everyone for 10 Minutes.”
4. When the AirDrop button turns blue then it’s enabled.
Method 2: Using the Settings App
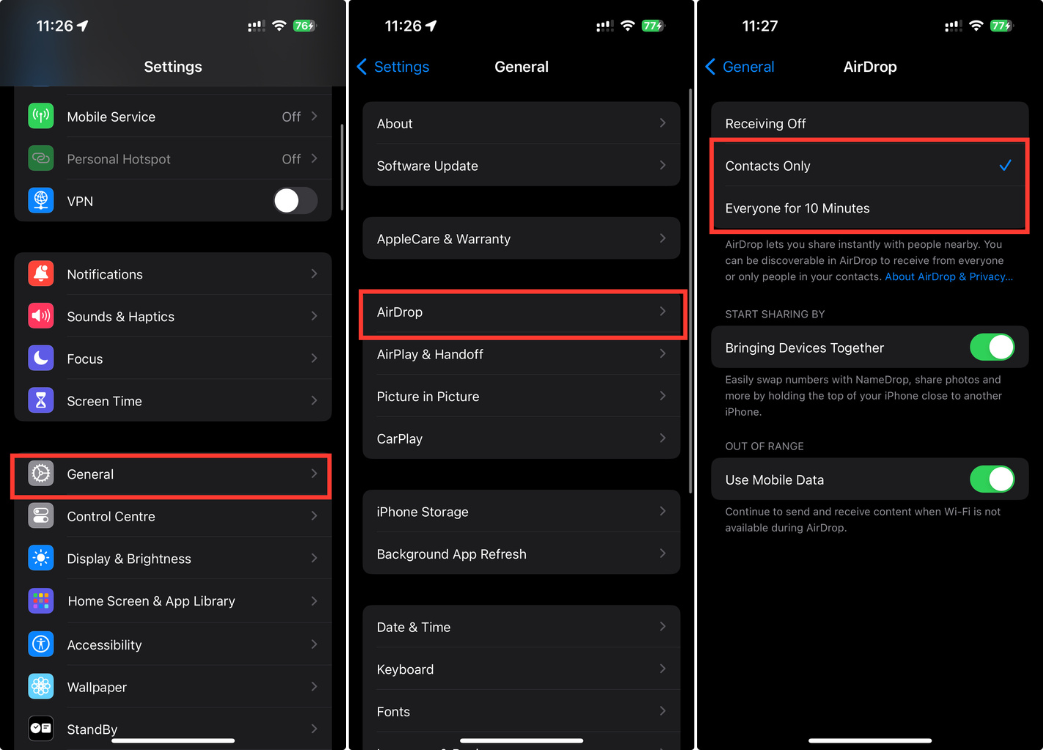
You can also turn on AirDrop through the Settings app. Here’s how:
1. Open the Settings app on your device and then go to the General section.
2. Tap on AirDrop and select the option that works best for you.
Turn On AirDrop on Your Mac
Just like on your iPhone and iPad, turning on AirDrop on your Mac is really simple. AirDrop uses Wi-Fi and Bluetooth to transfer items, so ensure both are enabled on your device. If they aren’t enabled, you’ll be prompted to turn them on when you attempt to share something.
Here are three easy ways to turn on AirDrop on your Mac. Let’s go through each one individually.
Method 1: By Using the Control Center
The latest macOS versions have a Control Center, making it easy to manage AirDrop settings on your Mac.
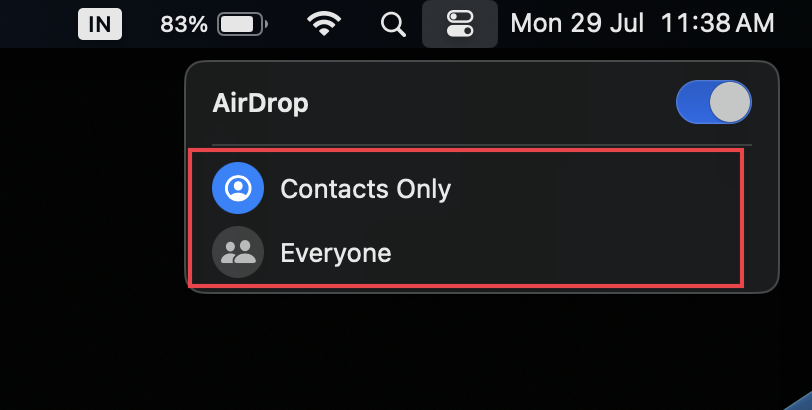
1. Click on the Control Center icon in the Menu Bar, at the top of your Mac’s display.
2. Click the AirDrop icon to turn it on or off. If the AirDrop icon is blue, it means AirDrop is turned on.
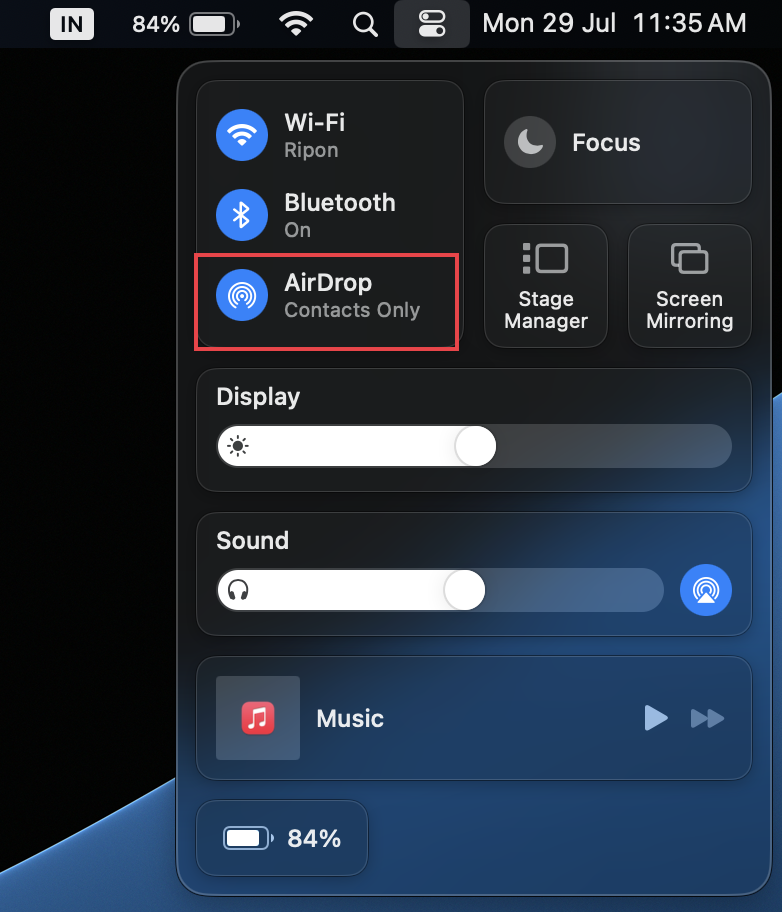
3. To adjust your AirDrop settings, tap the small arrow next to AirDrop and choose either “Contacts Only” or “Everyone” according to your preference.
Method 2: By Using the System Settings
If you’re using an older version of macOS that doesn’t have a Control Center, you can enable AirDrop through System Settings or Finder.
1. Open System Settings from the Dock and after that go to the General section in the left sidebar.
2. Then click on AirDrop & Handoff.
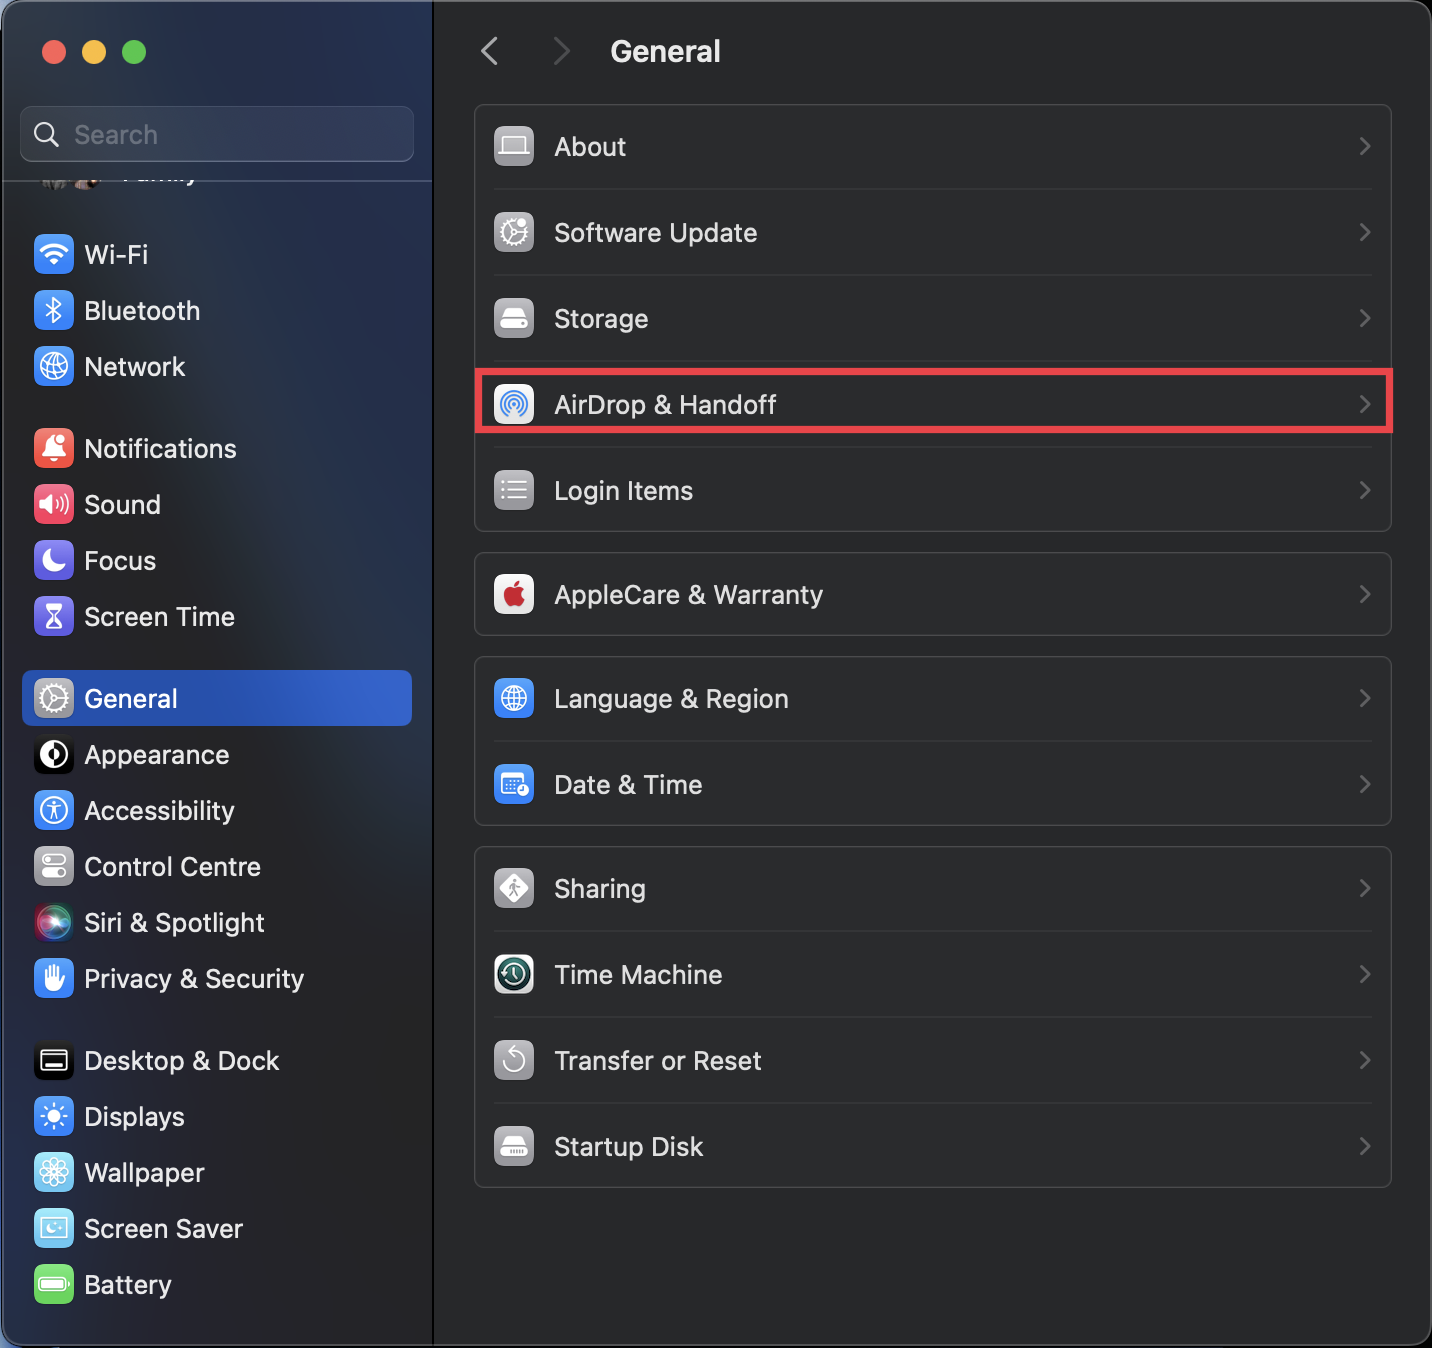
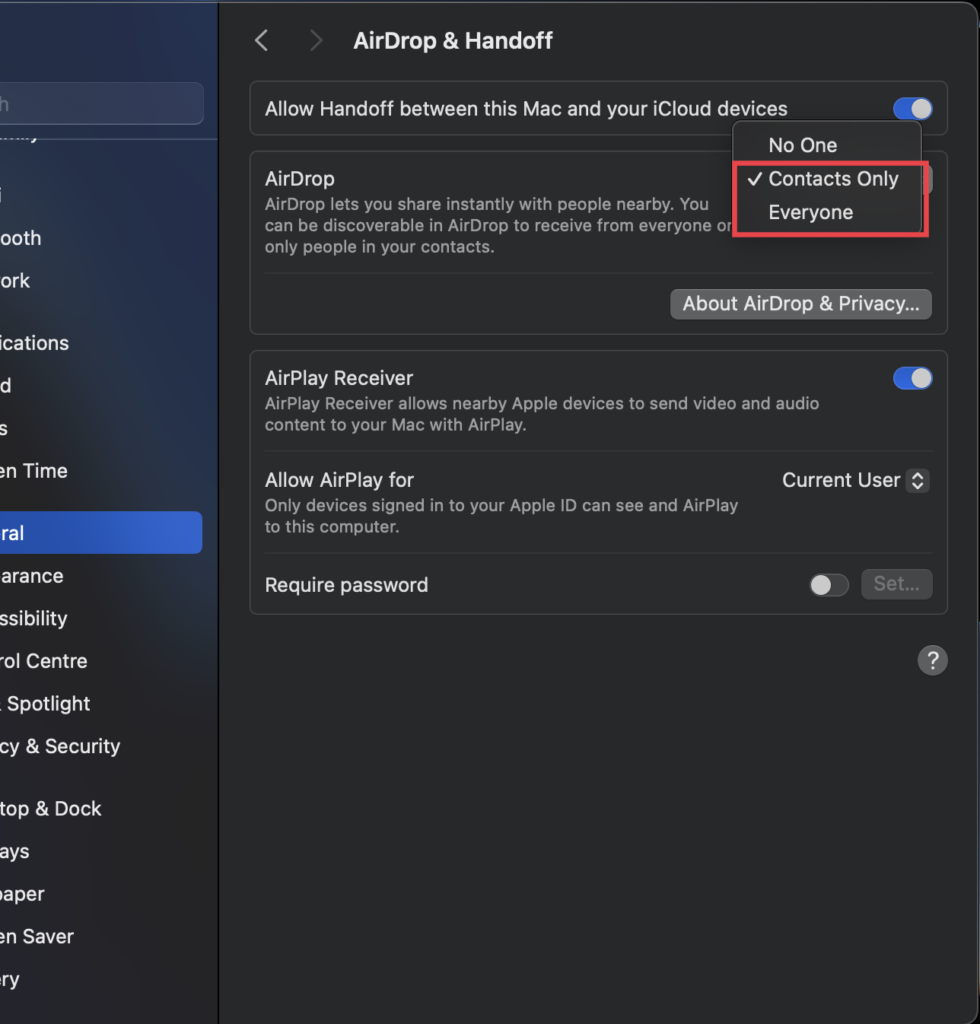
3. Next, click the drop-down menu next to “AirDrop” and select either “Contacts Only” or “Everyone” based on your needs.
Method 3: By Using Finder
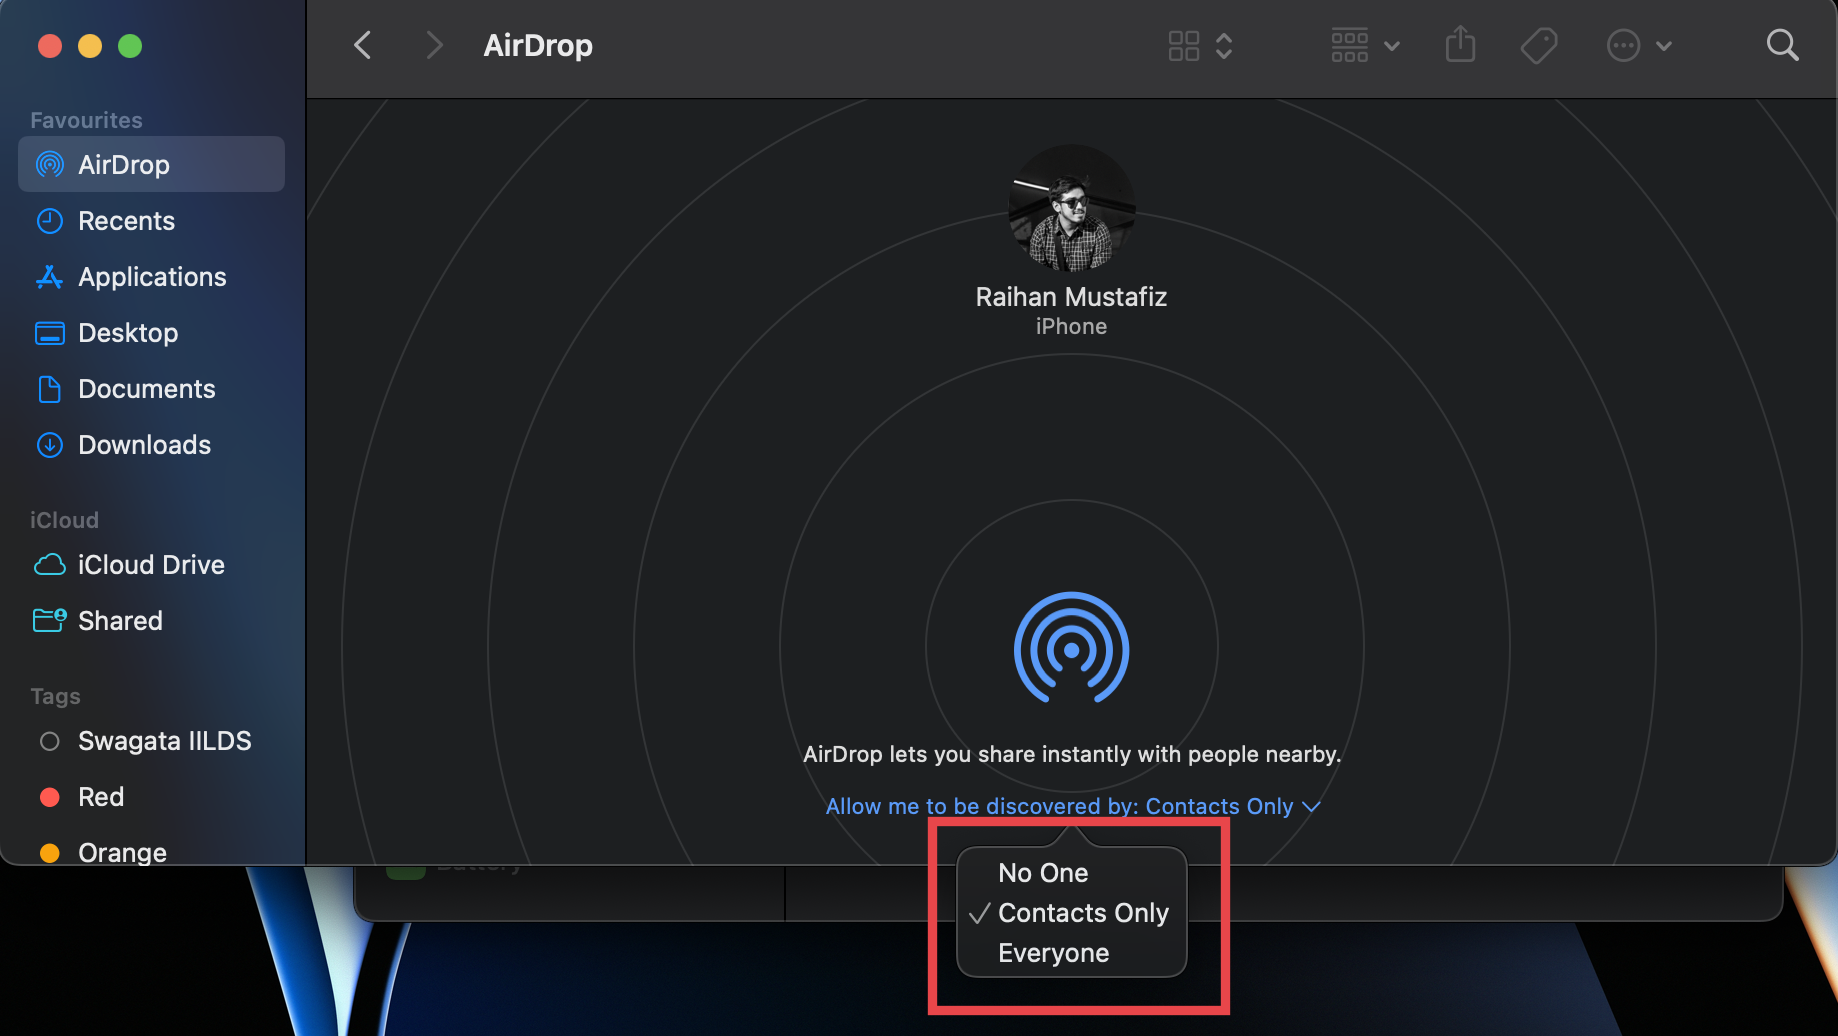
1. Open Finder from the Dock.
2. Click on the AirDrop tab in the left sidebar.
3. Click the drop-down menu next to “Allow me to be discovered by” and choose either “Contacts Only” or “Everyone.”
That’s how you can enable or disable AirDrop on your iPhone, iPad, and Mac. Whether you use Control Center, the Settings app, or Finder (for Macs), you should be able to send and receive files easily. Do you use Airdrop for sending files? Write your opinion and if the post is helpful to you or not in the comment section.

0 Comments