Looking to benchmark your GPU and evaluate its performance? Utilize 3DMark’s synthetic tests, in-game benchmarks, content creation tests, and more. In this guide, we’ll demonstrate how to benchmark your graphics card across various tests and how to monitor FPS in games using MSI Afterburner & Rivatuner Statistics Server (RTSS).
Once the benchmarking process is complete, you will have a clearer understanding of your graphics card’s performance in various situations. Benchmarking your GPU is a valuable method to assess its optimal performance. Additionally, you can compare your GPU to others based on the benchmarking scores.
Prior to initiating the benchmarking process, make sure you have installed the latest driver updates. Discover how to update drivers for Intel Arc, AMD, and NVIDIA GPUs here. With that step completed, here is a guide on testing your GPU performance using different benchmarking applications.
Test GPU Performance with 3DMark Benchmark
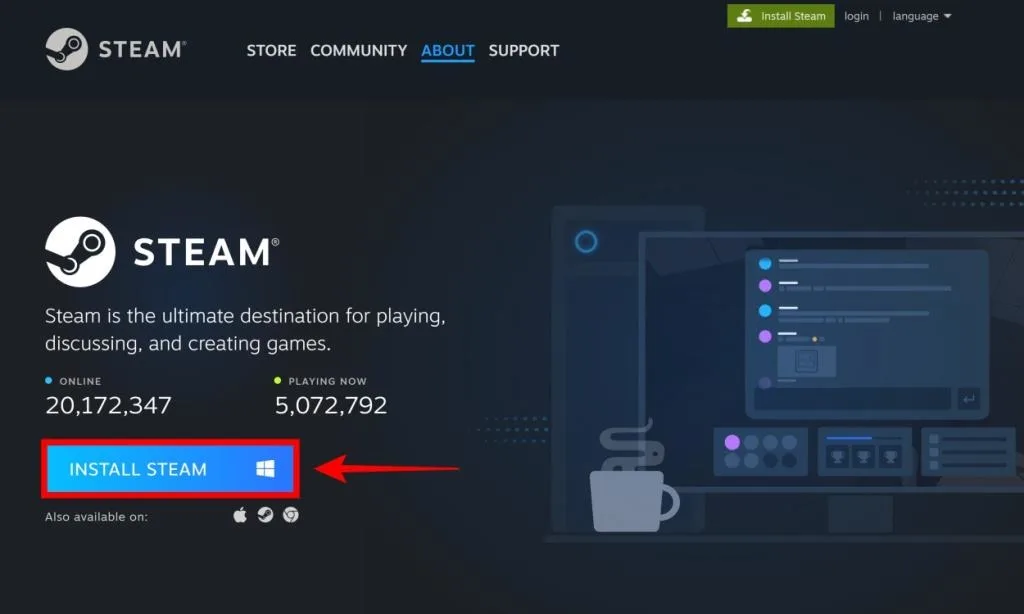
- To begin, ensure Steam is installed on your PC to download 3DMark. If you don’t have Steam, download it from here. Sign in with an existing or new account before proceeding.
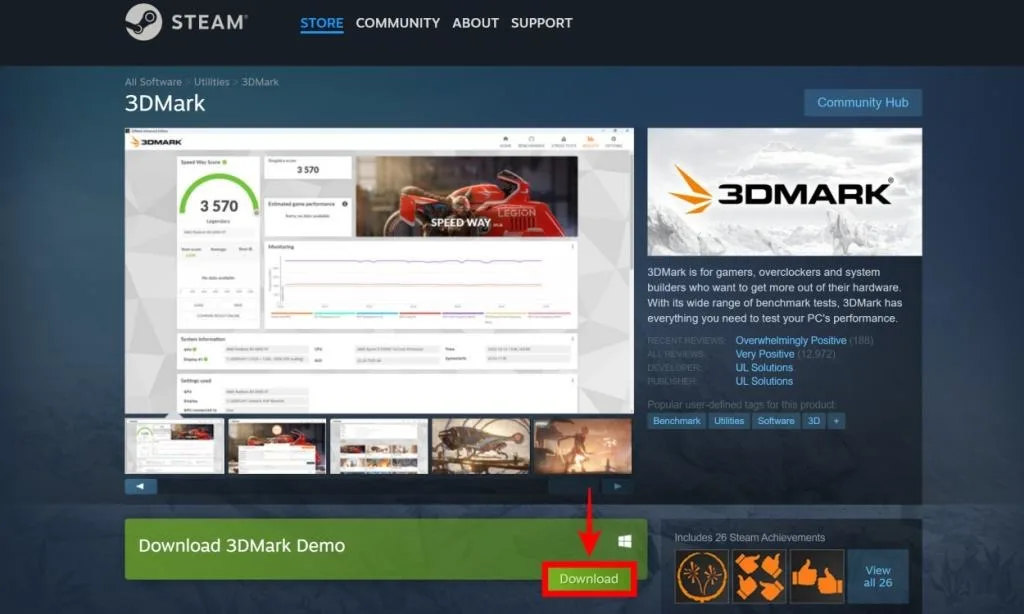
- Once Steam is running, download 3DMark. While the software is paid, some benchmarks are free to run. Select Download Demo and follow on-screen instructions for installation.
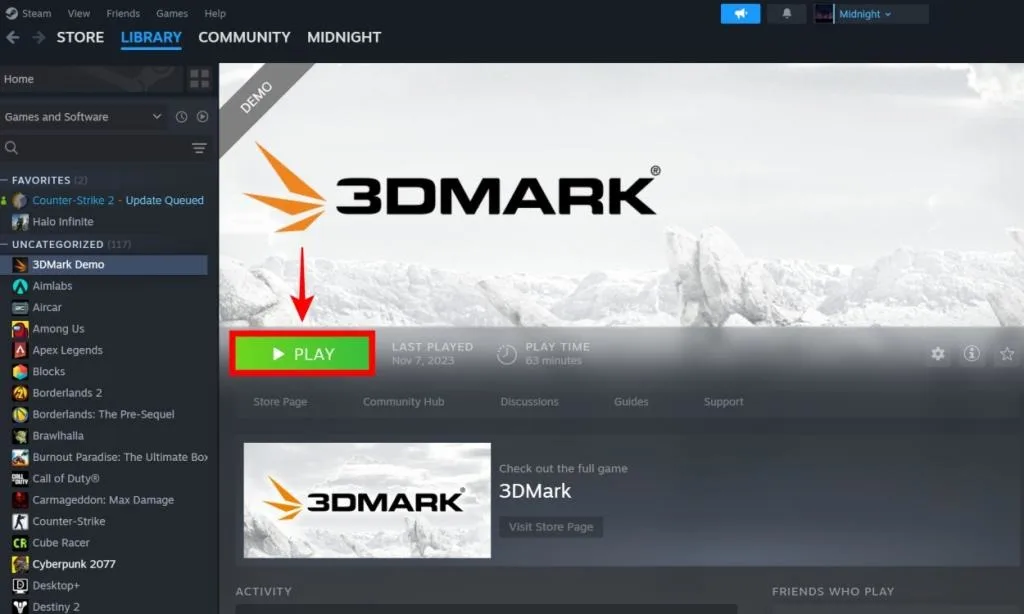
- After downloading, navigate to Library > Games & Software, choose 3DMark Demo, and click Play to launch the benchmarking software.
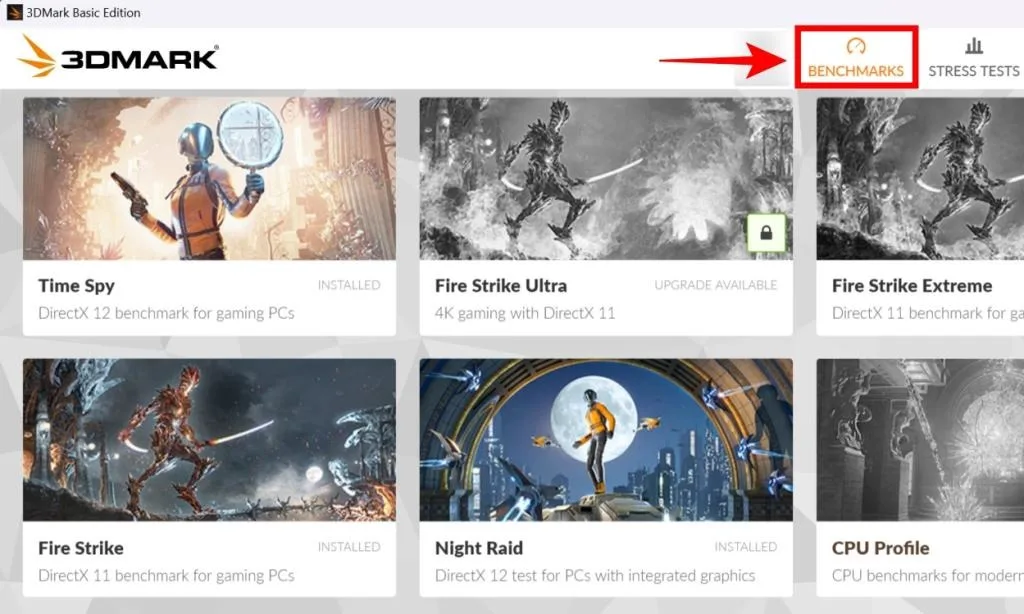
- In the 3DMark app, access Benchmarks to view various scenarios and select your preferred benchmark. The demo version offers three free benchmarks: Time Spy, Fire Strike, and Night Raid.
- Select a benchmark and click Run to test your GPU. You can customize settings like resolution and VSync under ‘Custom run,’ available in 3DMark Advanced.
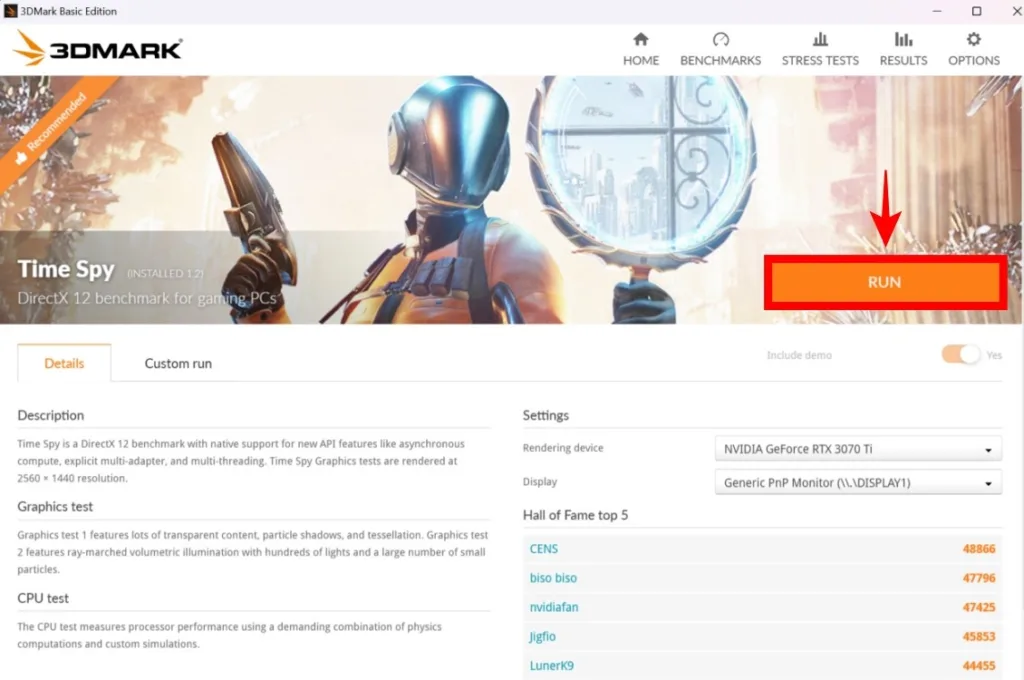
- Upon completion, view your graphics card scores. Compare them on the 3DMark website by entering your system’s GPU and CPU specs to see average results. Example scores include Nvidia GeForce RTX 4070 Super and AMD’s Radeon RX 7800 XT.

By comparing your test score to this average, you can gauge the expected performance based on your system specs. If your score matches or surpasses the average in 3DMark’s public database, your system is likely performing optimally.
Top 3DMark Benchmarks to Run
3DMark Time Spy (1440p) is a widely used GPU benchmark in hardware reviews and enthusiast tests. It’s accessible for free in the 3DMark Demo.
Furthermore, 3DMark’s Time Spy Extreme ($9.99) is an excellent benchmark to assess your graphics card’s performance, even at 4K resolution. While similar to Time Spy, it operates at a higher render resolution, making it more challenging.

For a contemporary benchmark assessing the latest graphics advancements, consider 3DMark’s Port Royal test ($2.99). This test focuses on ray tracing at 1440p. While AMD and NVIDIA GPU performance may differ across games, this test allows for an objective comparison of their RT performance.
Use PugetBench for Benchmarking Content Creation Workloads.
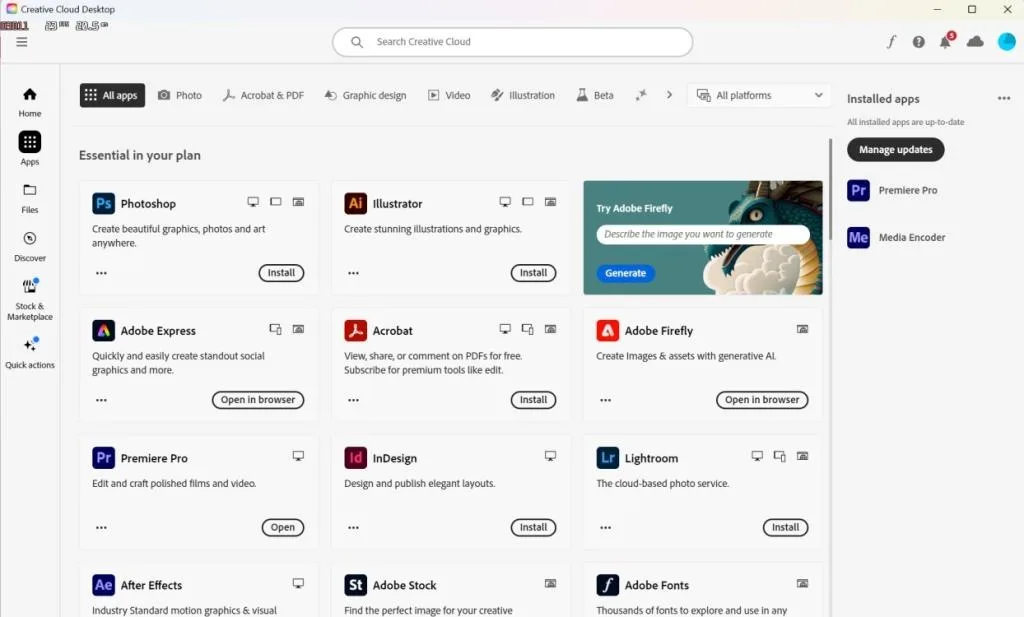
- Begin by installing Creative Cloud (download here) on your system.
- Then, proceed to install Adobe Photoshop, After Effects, or Premiere Pro (based on the workload you wish to benchmark) through the Creative Cloud application.
Note:
Keep in mind that Adobe’s content creation tools suite is paid. For a free alternative, we have also covered running the Blender benchmark after this segment.
- Download PugetBench for creators from this link. This tool allows you to benchmark your system.
- After downloading, launch PugetBench. In the left sidebar, choose the Adobe software you wish to benchmark, such as Premiere Pro. Click on the download assets button.
- This process may take a while and could be slower than anticipated due to server speeds. Once the assets are downloaded, click on Start Test at the bottom right. Avoid touching your PC’s input devices as the benchmark will run automatically.
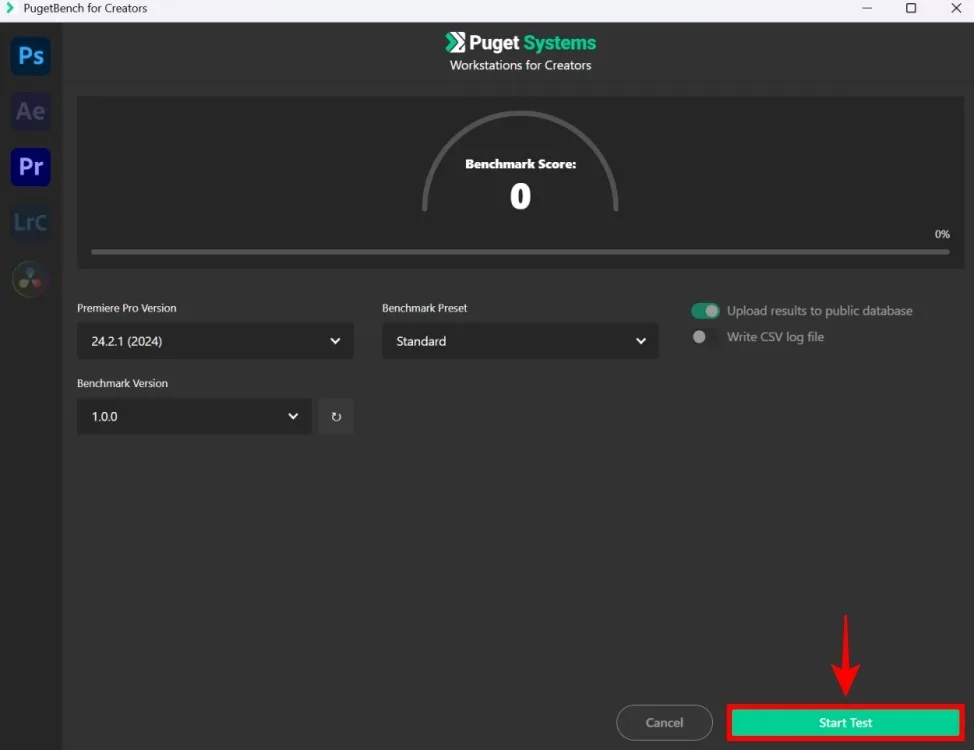
The benchmark will run for an extended period, evaluating various aspects like GPU effects, RAW performance, and others. Upon completion, it will provide you with the results and a link to your PC’s benchmark, which will be uploaded to the Puget database.
Run Blender Benchmark to Evaluate GPU Performance.
- First, download the official Blender benchmark from the following link.
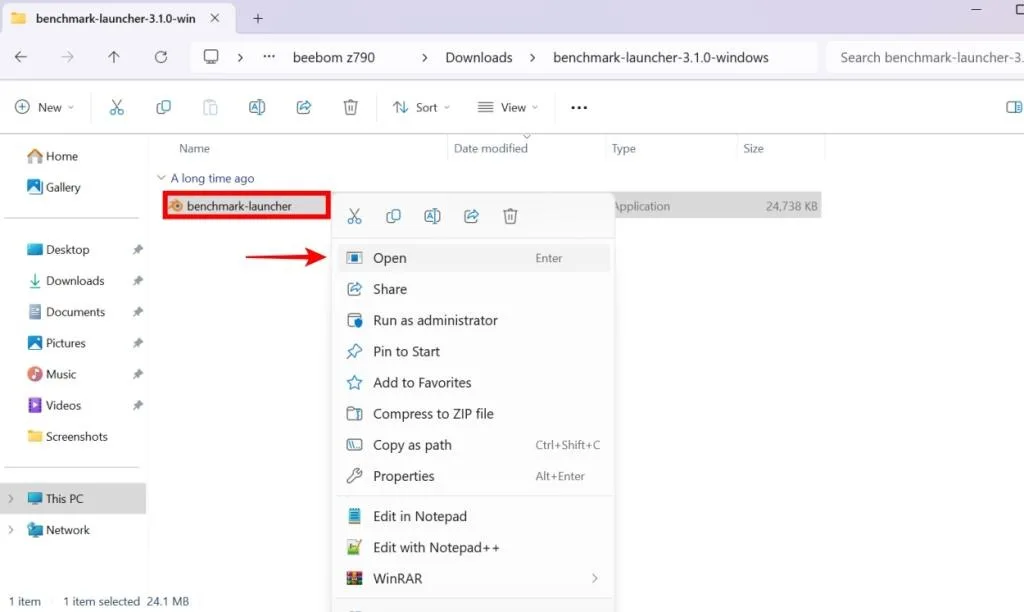
- Then, extract the file (.zip) and open the benchmark-launcher file.
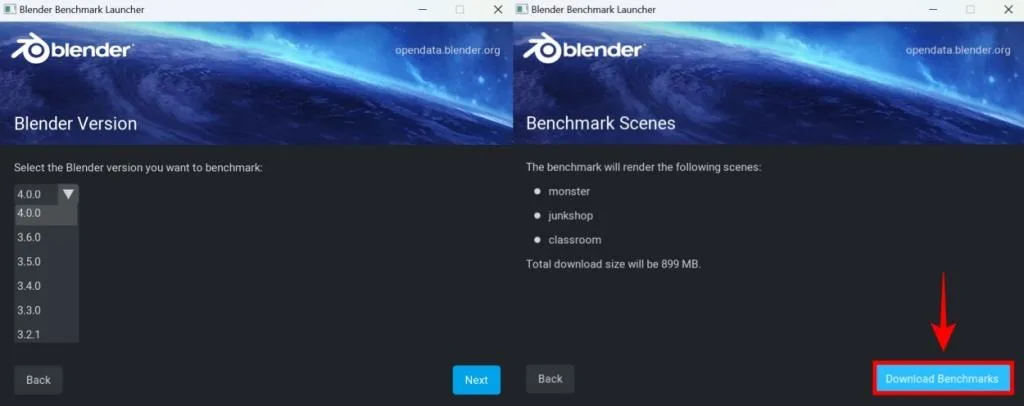
- Continue clicking Next to proceed beyond the instructions and choose the Blender version for benchmarking (it’s advisable to opt for the latest version).
- Click Next once more, and the application will indicate that it intends to benchmark your GPU using several scenes. If you are using the software for the first time, it will download these scenes, which might require some time.
- When you reach the Benchmark Devices section, make sure to designate your GPU as the selected device. Refer to our guide on verifying your GPU if necessary.
- Lastly, click on Start Benchmark to initiate the Blender benchmark test.

Once the benchmark is complete, you will receive a report indicating the number of samples per minute processed by your GPU and a final median score. Visit the Blender public database to access benchmark scores from different systems.
How to Monitor In-Game FPS Using MSI Afterburner
- Download and install MSI Afterburner from the provided link. Remember to extract the files before launching the setup.
- During installation, you will be asked to install the RivaTuner Statistics Server (RTSS), which is essential for enabling the in-game FPS monitoring feature.
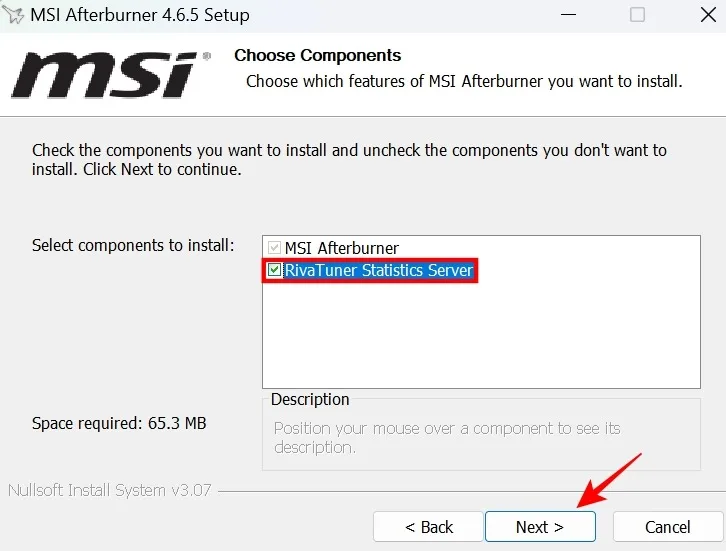
- Ensure to install RTSS alongside MSI Afterburner when prompted.
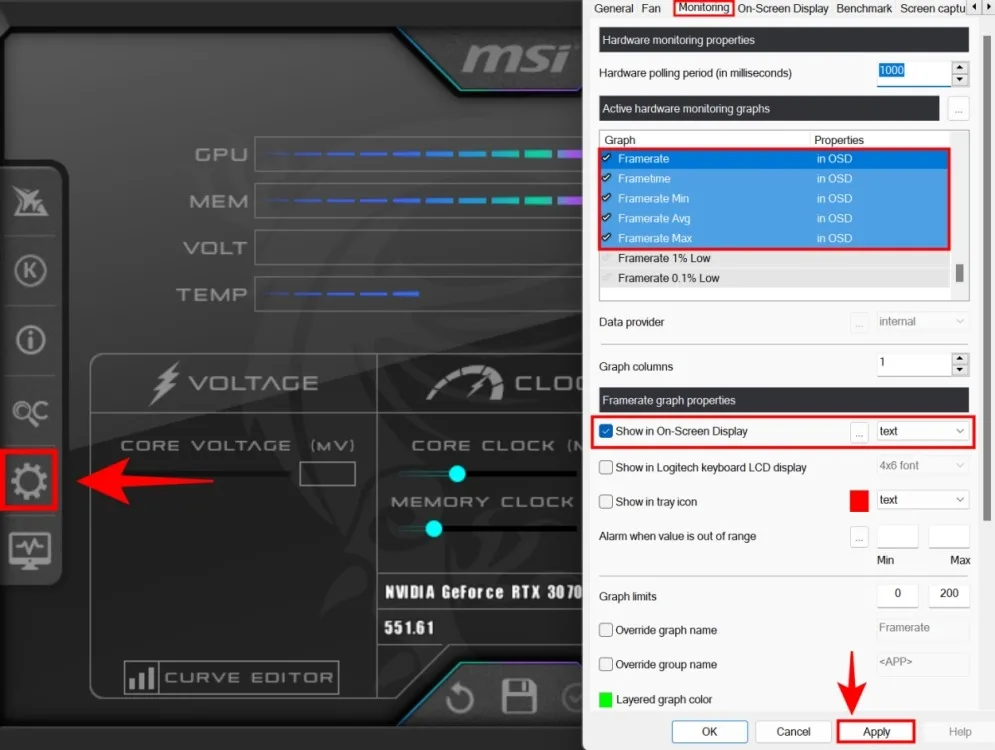
- After installation, open MSI Afterburner, go to Settings > Monitoring, enable Framerate, and activate additional options like Frametime and FPS statistics such as Minimum/Average/Maximum by checking the corresponding boxes. Click Apply to save the settings.
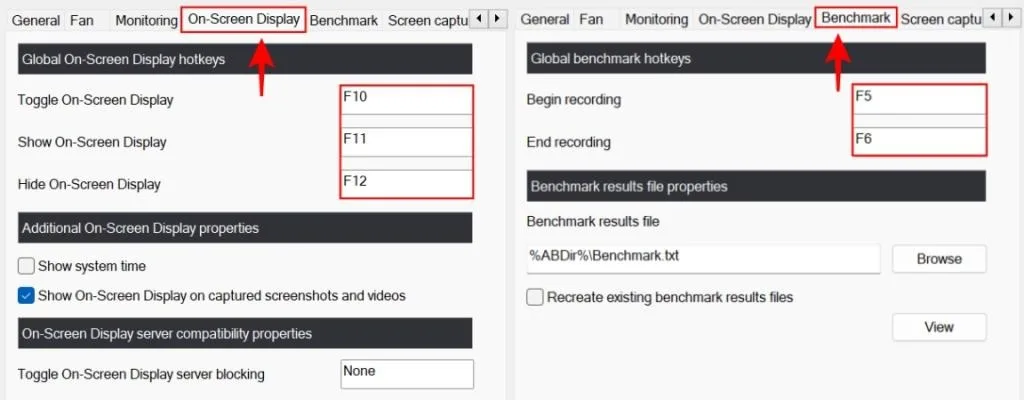
- Proceed to the On-Screen Display tab to set keyboard shortcuts for toggling the MSI Afterburner overlay, displaying system stats and FPS monitoring.
- Then, access the Benchmark tab to assign keyboard shortcuts for recording and ending benchmarks. Remember to specify the storage location for benchmark results.
- Launch a game and use the designated key to activate the overlay and view FPS. Press the key for Begin recording to log FPS data, including minimum, average, and maximum values.
- After testing, press the key for End recording. Locate the benchmark file in MSI Afterburner’s installation directory to view the FPS benchmark for the tested game.
Top Graphics-Intensive Video Games for Testing GPU Performance
- Here are some demanding PC games to assess your graphics card’s gaming performance. For instance, Cyberpunk 2077 features an RT Overdrive mode, offering a glimpse of ray tracing technology.
- While high-end GPUs like the GeForce RTX 4090 are typically tested at 4K for GPU-intensive games, Cyberpunk 2077 showcases the RTX 4090’s capabilities even at 1440p due to its demanding nature.

Below are several recommended PC games to test your GPU’s performance, some of which include built-in benchmarking:
- Cyberpunk 2077
- Hogwarts Legacy
- Resident Evil 4 Remake
- Forza Motorsport
- Microsoft Flight Simulator
- Red Dead Redemption 2
In RT Overdrive mode, FPS can be notably low without technologies like DLSS, FSR, and XeSS, even on top-tier GPUs. It’s worth mentioning that the higher-quality RT setting may not deliver optimal performance on AMD Radeon GPUs.


0 Comments