

The Steam Deck is a popular handheld option. To store more games, consider upgrading its storage. Valve supports right-to-repair, but improving the SSD is challenging. To avoid accidental damage, learn how to smoothly upgrade the SSD. Materials Required for Upgrading Your Steam Deck SSD
Before upgrading your Steam Deck’s SSD, gather the following items.
Some basic tinkering knowledge is helpful. Remember to remove the microSD card from the Steam Deck to prevent damage. Follow the list below and instructions to upgrade smoothly:
- 8GB USB Stick
- USB-A to USB-C Dongle
- A 2230-sized NVMe SSD
- Philips head screwdriver
- Tweezer
- Steam Deck charger
- Spudger
Note: You can install up to 2TB NVMe SSDs. With all items ready, proceed to the next steps.
How to Upgrade Your Steam Deck SSD
Begin the SSD upgrade for your Steam Deck. Refer to guides like iFixit for assistance. Follow the steps below to open and upgrade your deck:
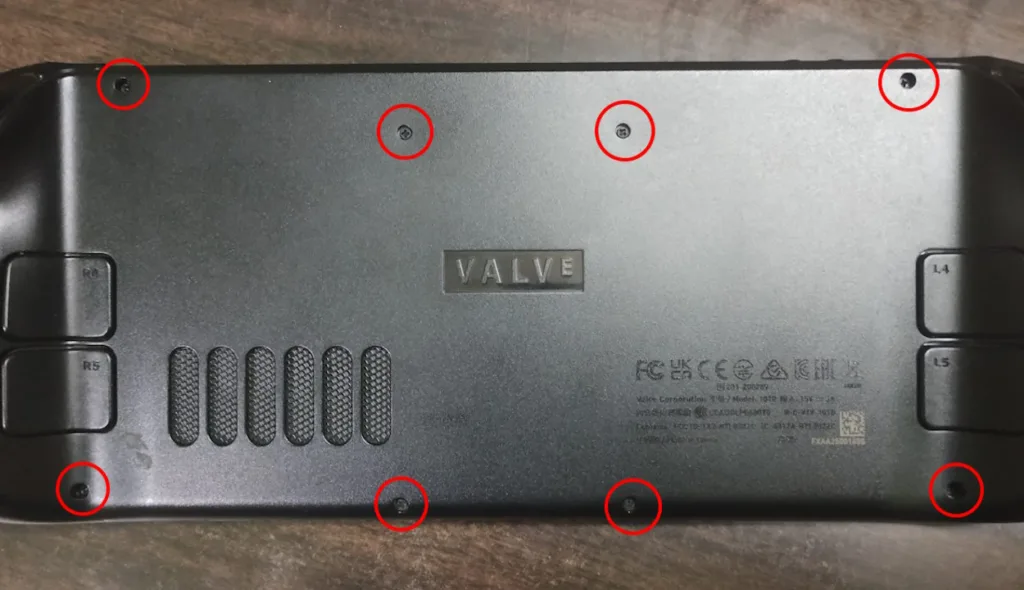
- Turn the Steam Deck around and unscrew the eight Philips head screws on the back.
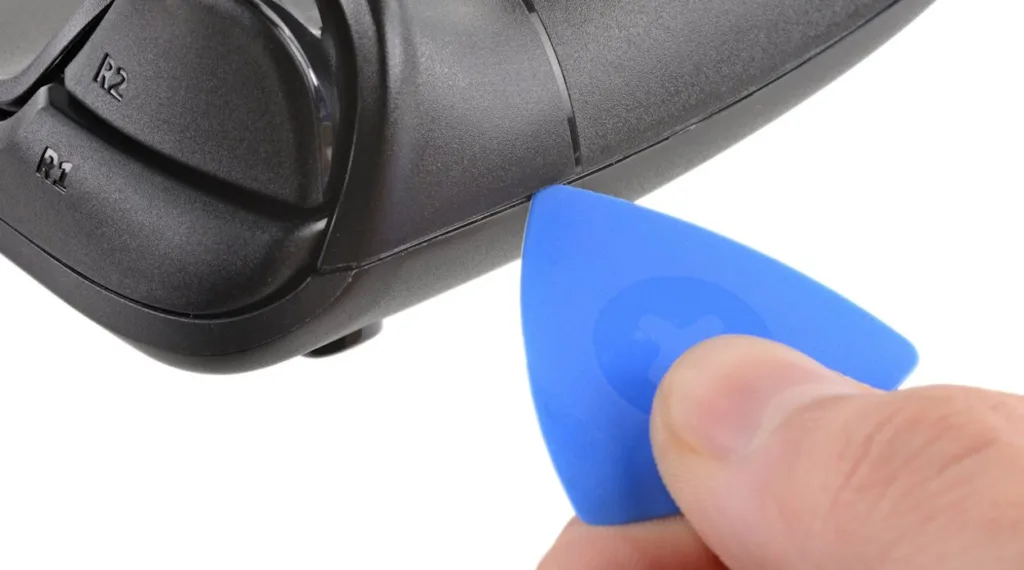
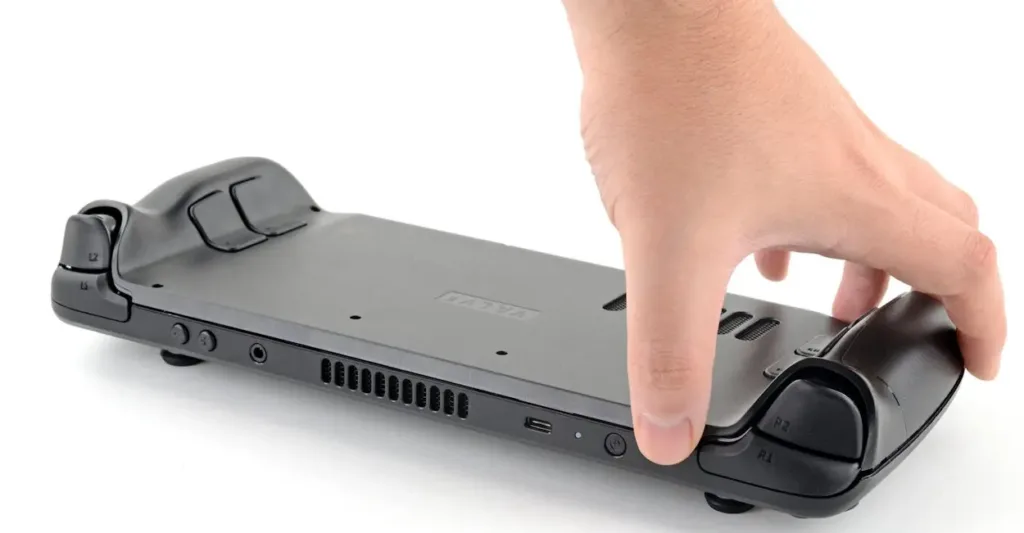
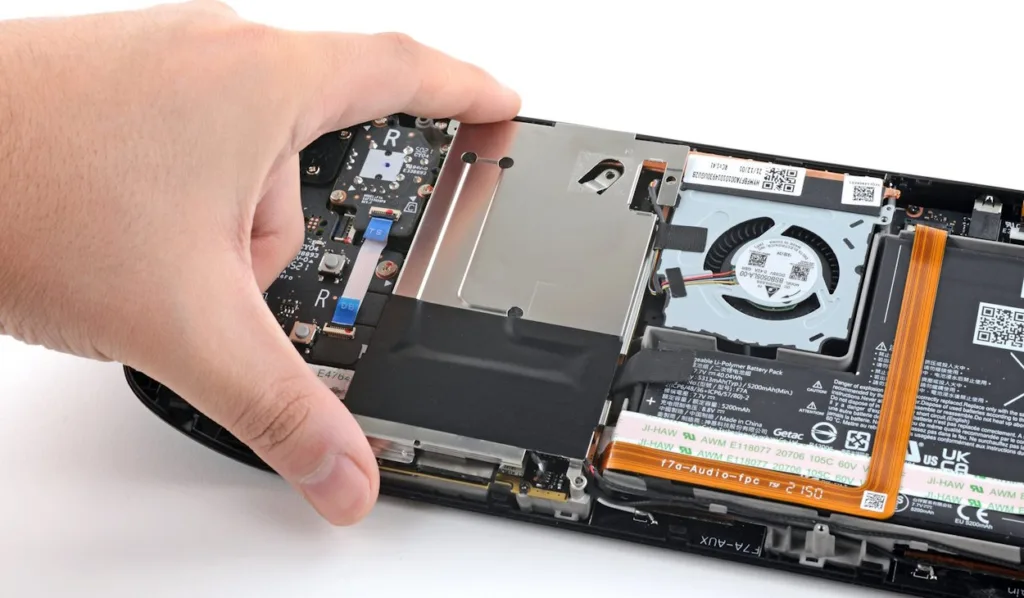
- Use the plastic spudger to gently open the back cover.
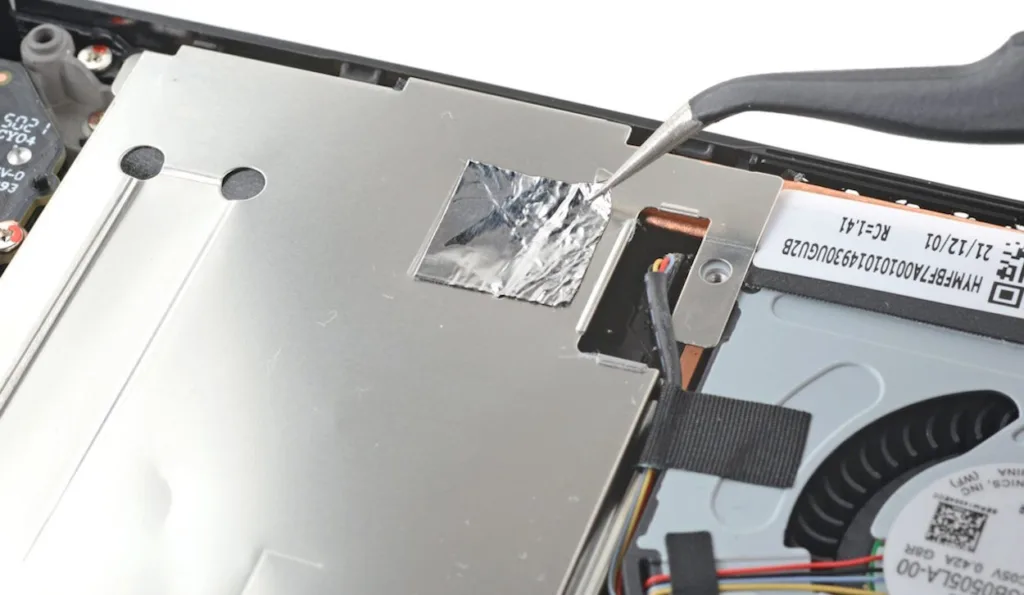
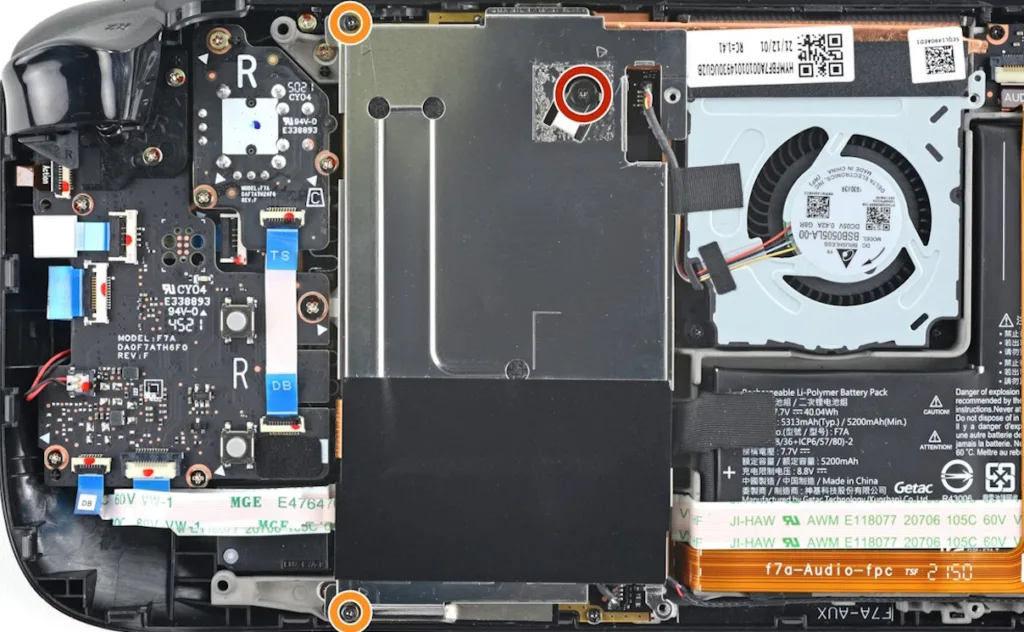
- Remove the tin foil covering the motherboard carefully.
- Unscrew and remove the metal shielding shown below.
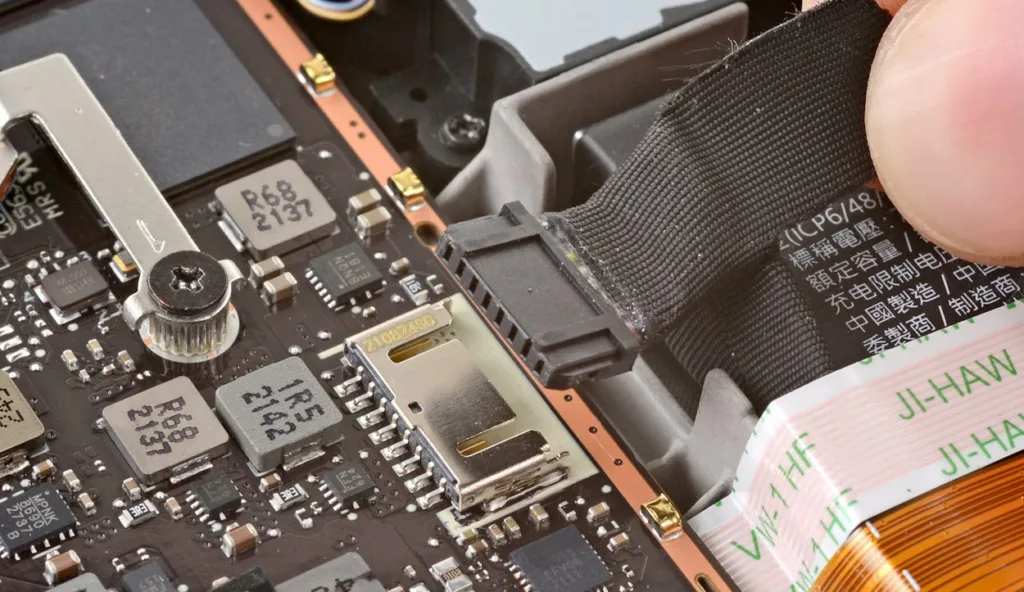
- Disconnect the battery by pulling the tab away from the motherboard.
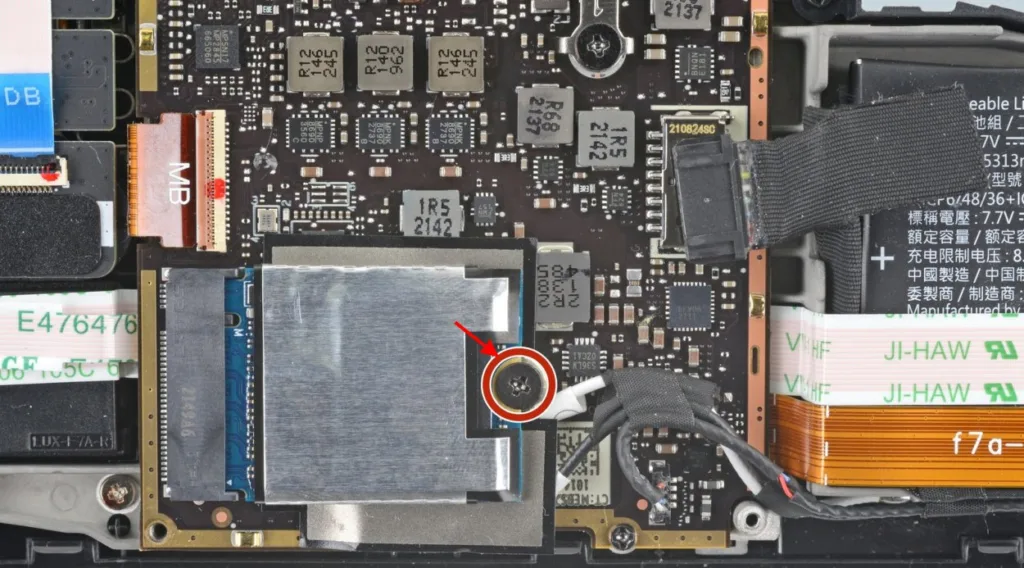
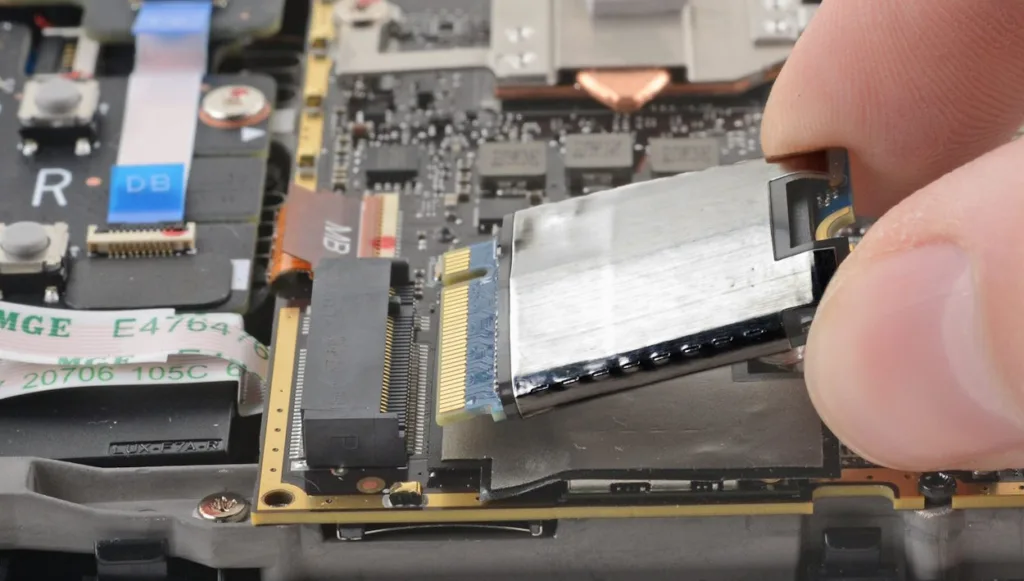
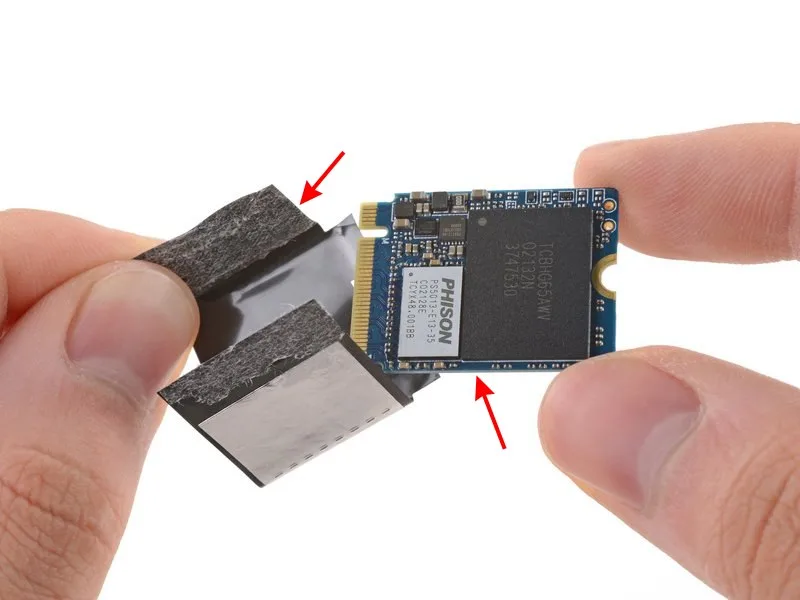
- Remove the singular screw to access the SSD. Carefully handle the foil shielding.
- Place the foil shielding on the new SSD, insert it into the NVMe slot, and secure it with screws. Reverse the process to reassemble the Steam Deck.
You have completed the first part of the SSD upgrade. You finished the first part of the SSD upgrade.
Installing SteamOS on Your New Steam Deck SSD
After upgrading your Steam Deck, install the OS on the new SSD using these steps:
- Download Rufus on your PC to create a bootable pen drive. Connect the USB Pen Drive.
- Download the SteamOS ISO image from the provided link.
- Use Rufus to prepare a bootable pen drive with the ISO file.
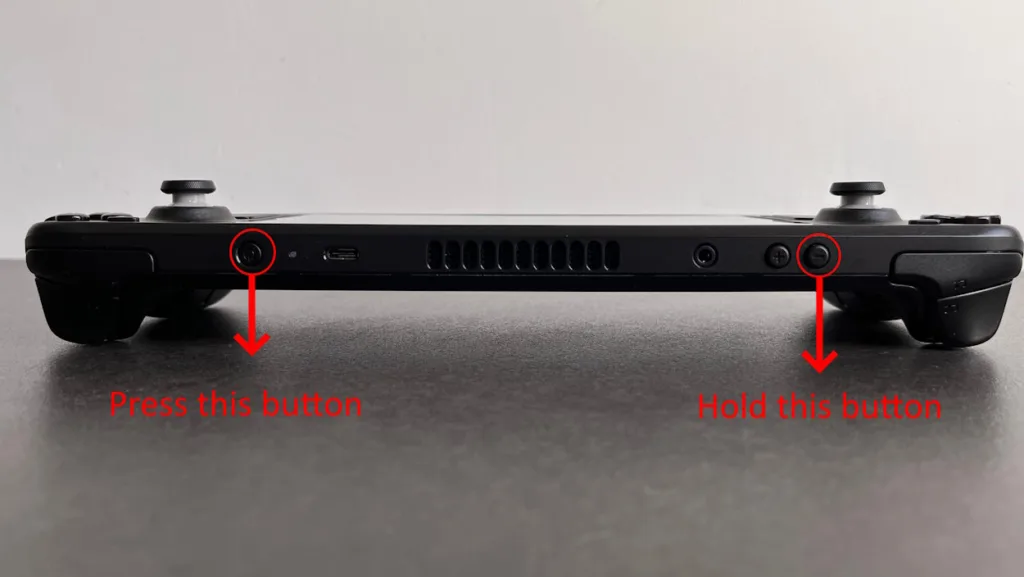
- Connect the bootable pen drive to the Steam Deck using the USB-C adapter. Boot into the BIOS by holding the volume button and pressing the power button.
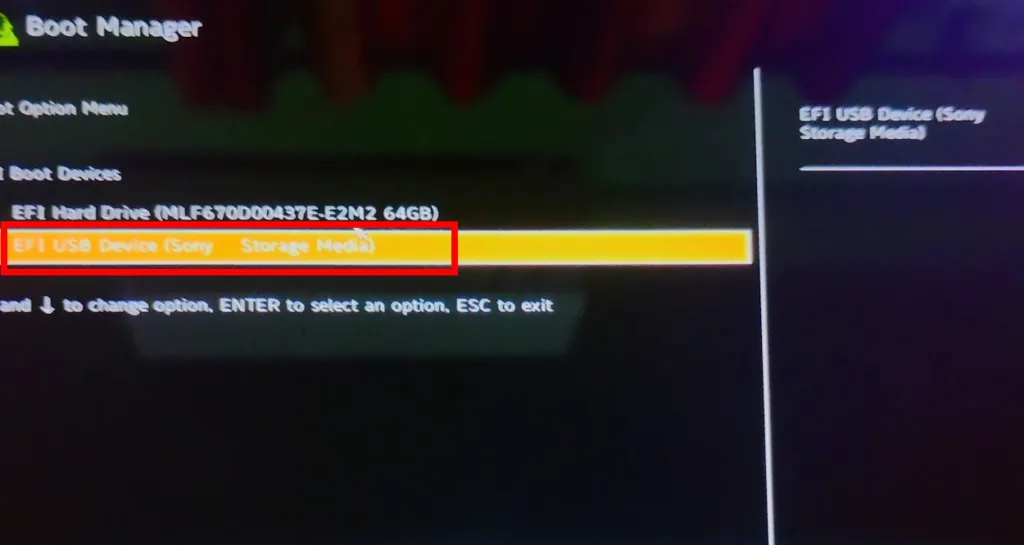
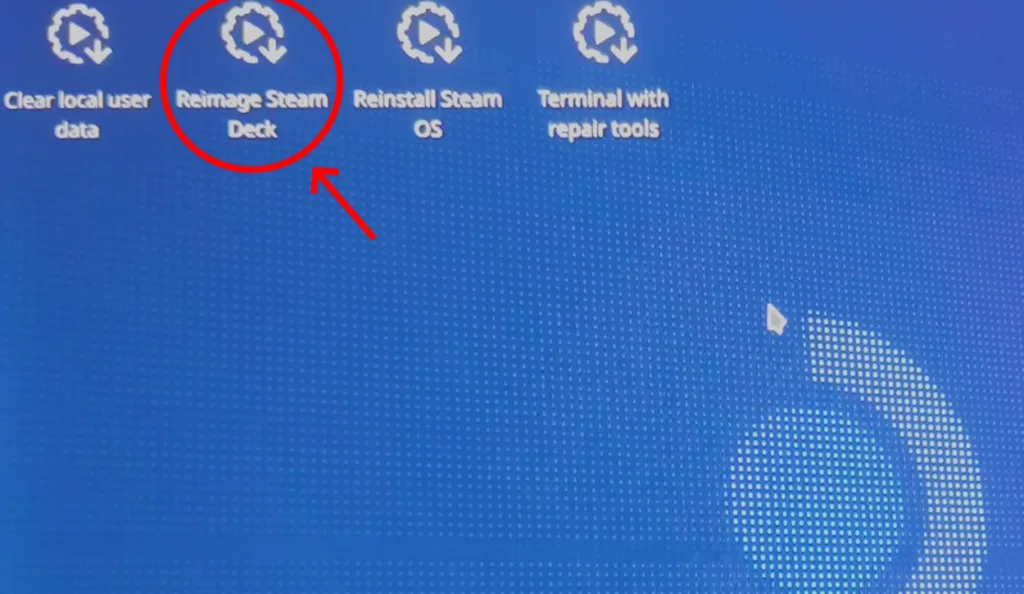
- In the BIOS, select the bootable pen drive as the boot device. Boot into “Steam Deck’s USB environment.”
- Choose “Reimage Steam Deck” to install the operating system. Follow the on-screen instructions.

Congratulations on successfully upgrading your Steam Deck’s SSD. The process, though it may seem complex, is straightforward. Share your experience in the comments if you faced any challenges.


