
If you’re seeking guidance on resetting your Apple AirTag, you’ve landed in the right spot. Whether you’re reassigning it to a different item, preparing it for sale, troubleshooting connectivity concerns, or simply aiming for a clean slate, understanding the process of resetting your AirTag is crucial. This guide will navigate you through the straightforward steps, cutting through any confusion, and ensuring a smooth reset of your AirTag.
Removing AirTag from Apple ID
You can detach an AirTag from an Apple ID using an iPhone, iPad, or iPod Touch. However, it's not feasible to remove an AirTag from its associated Apple ID via Mac or Find My on the web.
Even with the introduction of iOS 17 enabling AirTag sharing, these devices remain linked to a single Apple ID. Therefore, to reset an AirTag, the initial step involves removing it from your Apple ID. Here’s the process:
- Launch the Find My app on your iPhone and access the Items section by tapping the button at the bottom.
- Choose the specific AirTag you wish to detach from your Apple ID.
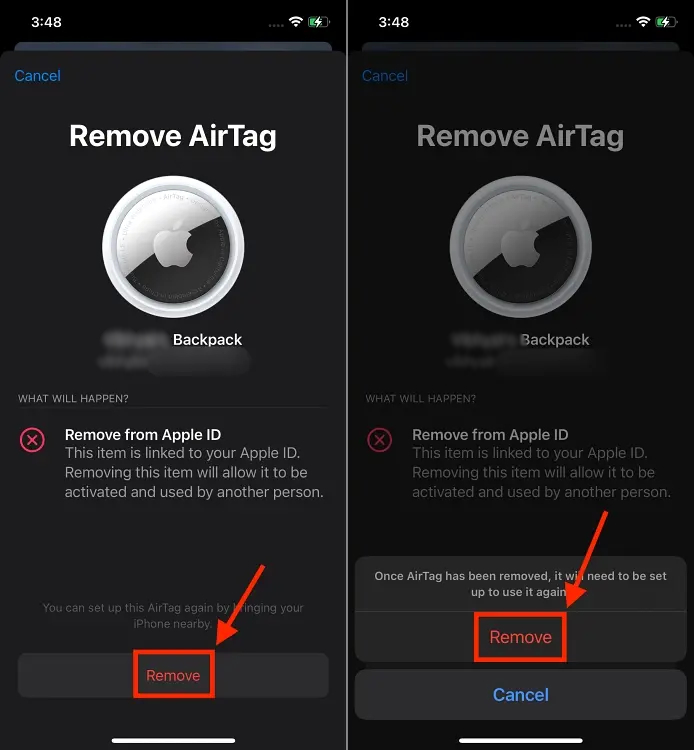
- Scroll to the bottom of the screen and locate the Remove Item button.

- Tap Remove on the Confirmation screen and confirm by selecting Remove again on the subsequent prompt that appears.
Once the AirTag is successfully removed from your Apple ID, it resets to its factory settings. From this point, you’re able to pair the AirTag with a new Apple ID.
Manually Resetting AirTag
Before initiating a manual reset of an AirTag, ensure that you've followed the steps outlined earlier to remove it from its previously linked Apple ID. It's important to note that an AirTag cannot be paired with a new Apple ID unless it has been successfully removed from its previous association.
If the AirTag was removed from its previous Apple ID while out of Bluetooth range, and you’ve acquired it from someone else, you’ll need to perform a manual reset before pairing it with your Apple ID. Here are the steps to do so:
- Use your thumb to press down on the stainless steel cover of your AirTag and rotate the cover counterclockwise until it reaches its limit and stops rotating.
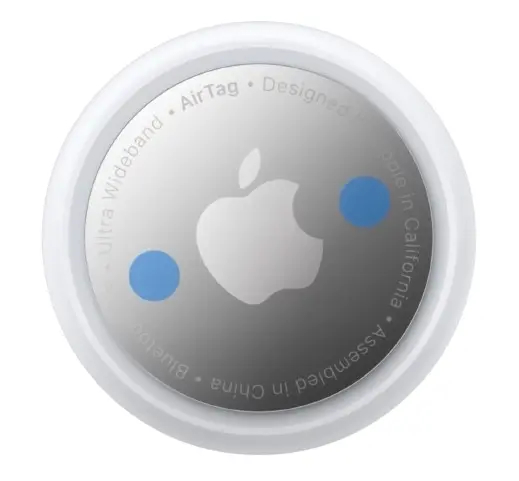
- Remove the stainless steel cover followed by the battery of the AirTag, gently pulling it out.

- Reinsert the battery and press it down until you hear a sound, signifying the successful connection of the battery to the AirTag.
- Repeat the process of removing, inserting the battery, and pressing it down four times. Each time you insert the battery, you’ll hear the same sound.
- On the fifth insertion, listen for a different sound, indicating that the AirTag is now prepared to pair.
- Align the three tabs on the cover with the corresponding slots on your AirTag, place the cover, and press down on it.
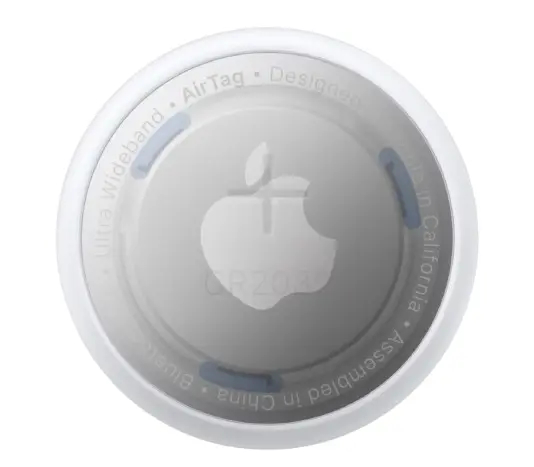
- Rotate the cover clockwise until it reaches its limit and stops rotating.
Once the AirTag has been reset, whether for personal use or to be handed to someone else, the setup process is straightforward. Simply follow the standard setup procedure to pair the AirTag with your iPhone via the Find My app.
Following these steps, the AirTag is now reset and ready to be paired with either the same Apple ID or a different one without any complications.


