
Given that Google provides a mere 15GB of storage for Drive, you can’t afford to let unnecessary clutter accumulate. While managing unwanted files on Google Drive is relatively straightforward, dealing with emails is a major challenge. That’s likely why you’re here, seeking a way to delete all Gmail messages at once. If so, keep reading to learn how to accomplish this task.
How to Mass Delete Emails on Gmail (PC)
If you’re feeling overwhelmed by junk emails in your Gmail account and don’t know where to begin, you might consider deleting all your emails and starting fresh. Here’s how to go about it:
- Navigate to Gmail using your web browser. After signing in, choose the email category you wish to delete from the left panel.
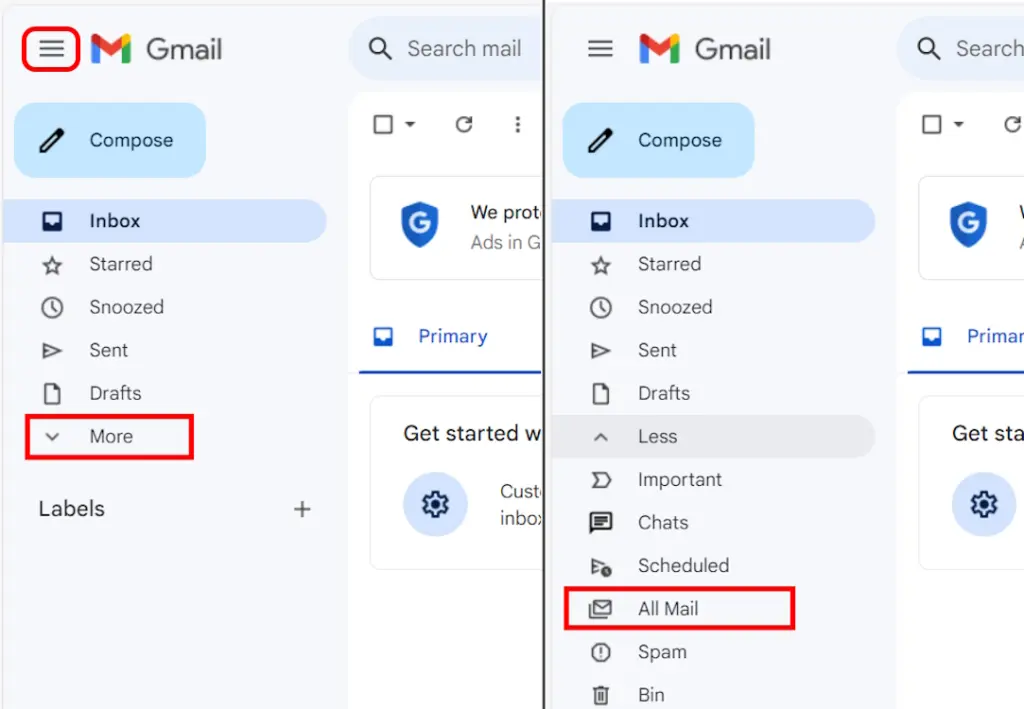
- If your left panel is collapsed, expand it by clicking the hamburger menu located in the top-right corner. Next, to delete all your emails, click on the More drop-down button.
- Navigate to the All Mail category and click on it.
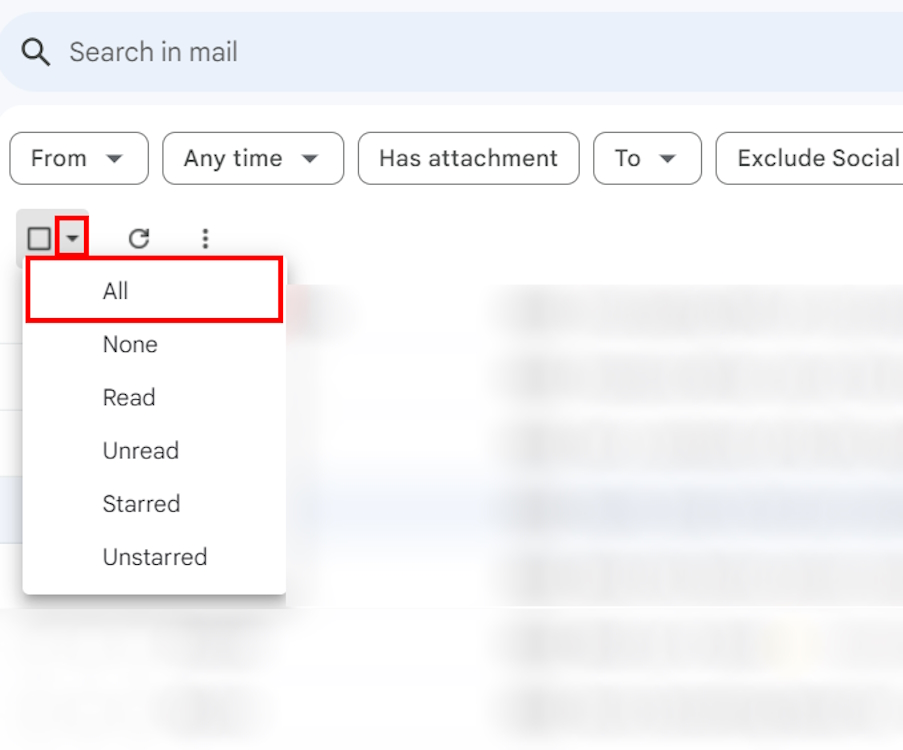
- At the top of your emails, locate the central checkbox and the adjacent small drop-down arrow icon. Click on the arrow icon and choose the types of emails you wish to delete in bulk. In this instance, select the “All” option to delete all emails.
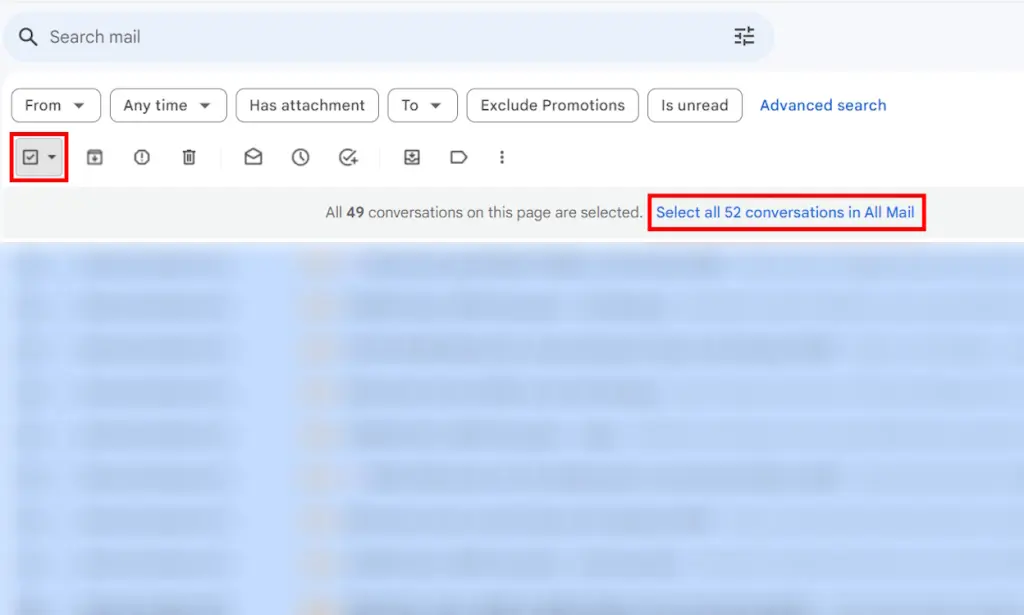
- To select all your emails, including those beyond the initial 50 displayed on a single page, click on the message that reads “Select all [total number of emails] conversations in All Mail“ at the top.
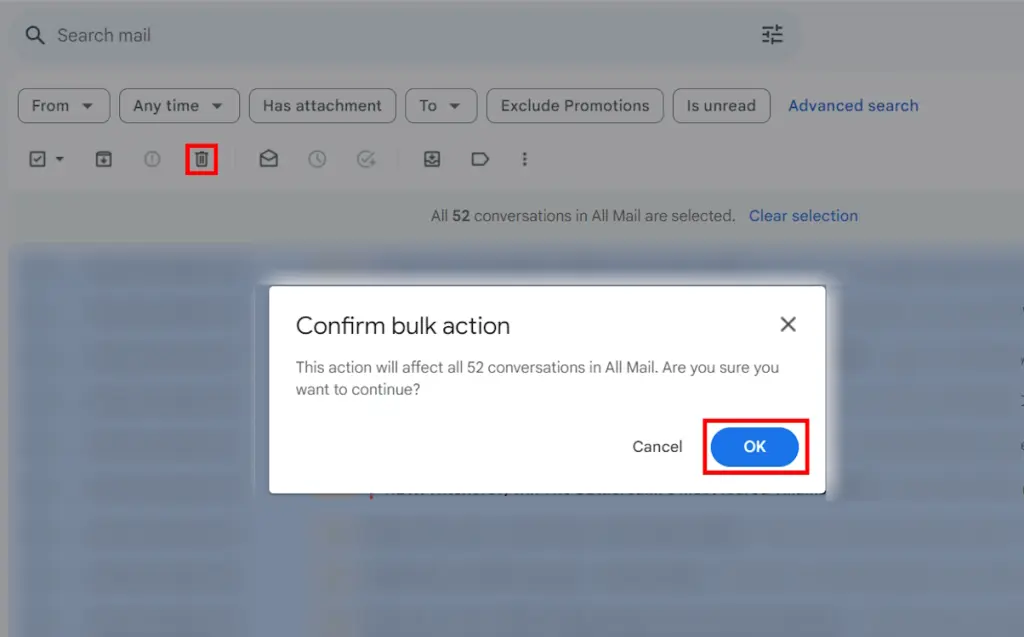
- Afterward, click on the delete icon located at the top, which is represented by a recycle bin icon, and then confirm by clicking OK on the pop-up window that appears.
Bulk Delete Emails Using Advanced Search.
Suppose you prefer not to delete all your emails at once, instead focusing on organizing specific categories like read, unread, starred, inbox, or emails within a particular timeframe. In that scenario, you can utilize Gmail’s Advanced Search feature to filter and sort out these emails. Here’s a detailed guide on how to complete this task:
- When accessing Gmail through a web browser, click on the Advanced Search icon located next to the search bar at the top of the Gmail interface.
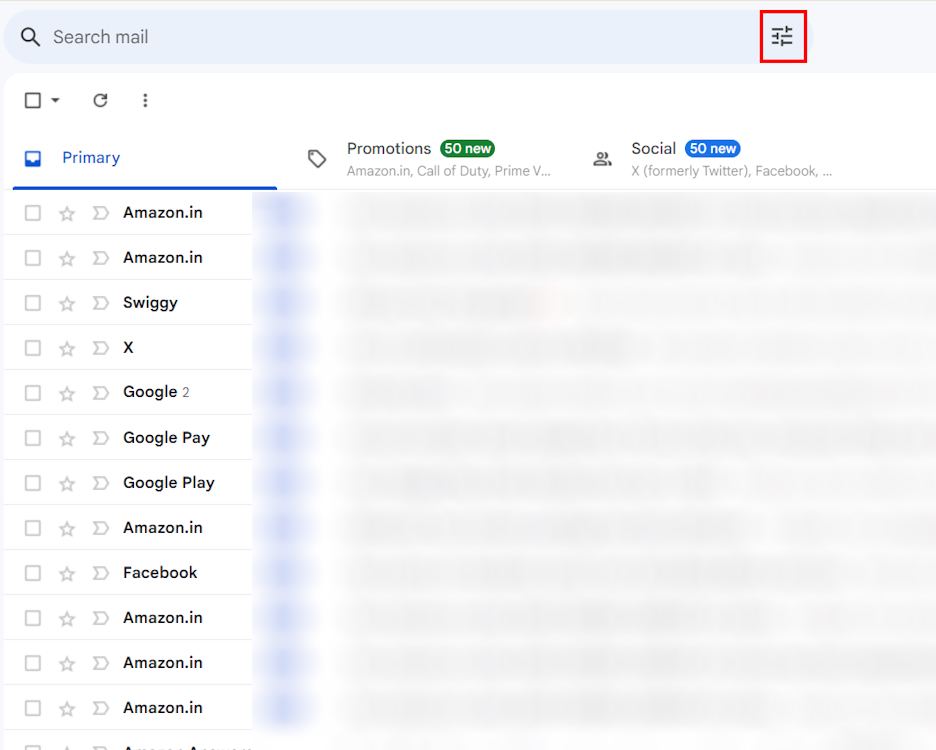
- An extensive window with numerous customizable settings will appear, potentially overwhelming at first glance.
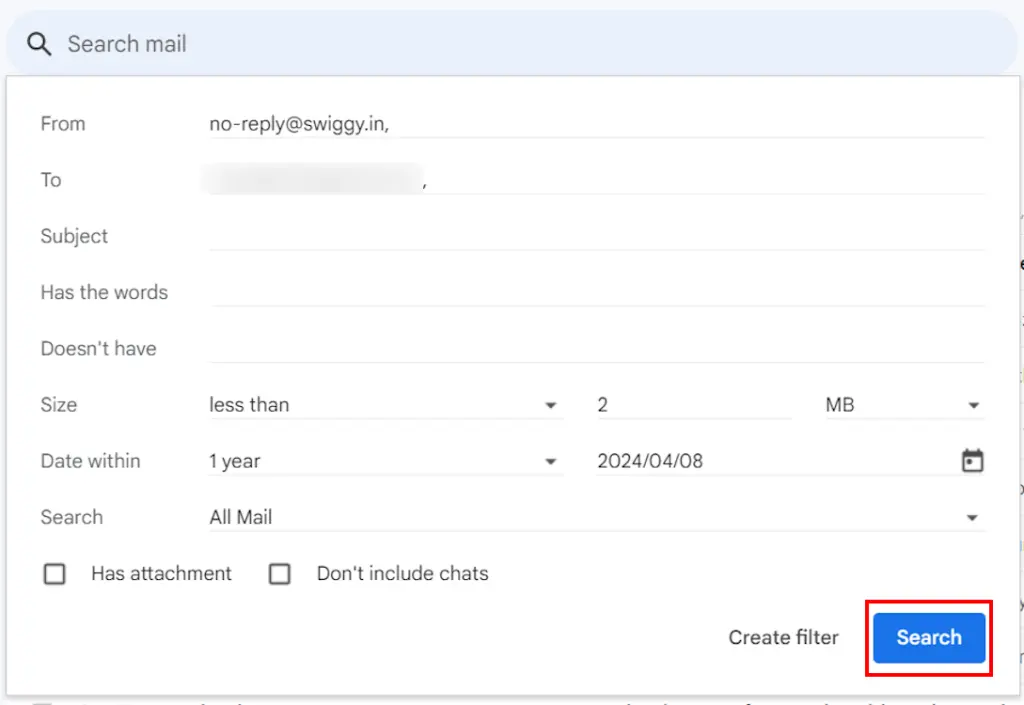
- Now, you need to tap on each setting and define it accordingly. You can also choose a custom timeframe, select a category or subject, and ensure to narrow down the search criteria as much as possible.
To simplify comprehension, we’ve segmented this panel into distinct sections. Here’s how you should configure these settings:
Delete Emails From Specific Sender and Recipient.
Start by navigating to the Advanced Search panel where you’ll find the From and To sections. If you’re receiving too many promotional emails from your bank, enter their email IDs in the From box. As for the To box, you’ll enter your own Gmail address. The To box is particularly useful when you want to delete emails that you’ve sent to yourself for backup purposes.

Erase Emails with Particular Keywords.
Once you’ve input the sender’s email address, you can then proceed to define the subject of the emails you wish to remove. This step can be somewhat challenging since you may not always know the subjects of most spam emails.
Following that, proceed to specify the troublesome words like “discounts” and “offers” typically found in these promotional emails. Input these words into the ‘Has the words’ field. Conversely, if you can identify words that these emails definitely won’t contain, you can specify those in the ‘Doesn’t have’ section. This additional step helps further refine your search criteria.

Remove Emails Based on Their Size.
Next, let’s focus on setting criteria based on the size of the emails you wish to remove. It’s common to send images and files to yourself, which can quickly accumulate and consume your Google Drive storage. To avoid this, specify the size of these files using the following method:

Choose the appropriate combination from the drop-down menu, which includes options like greater than/less than and MB/KB/Bytes.
Delete Emails Within a Specific Date Range.
Specify the date range of the emails you want to delete to narrow down the search and avoid deleting recent important emails. For example, if you want to delete older emails from 2021-2023 while keeping 2024 emails, you can do that here.
Within the “Date within” drop-down menu, you can choose to target emails from up to 1 year ago. Next, using the calendar box adjacent to it, if you select January 2021, it will target emails ranging from January 2020 to January 2021.

Delete Emails Based on Categories
At last, you can specify the category of emails you wish to delete. Click on the drop-down menu next to the Search option. This menu displays all categories, including any custom labels you’ve made. Just select the desired email category to refine your search further.

After you’ve set all these categories, click the Search button.
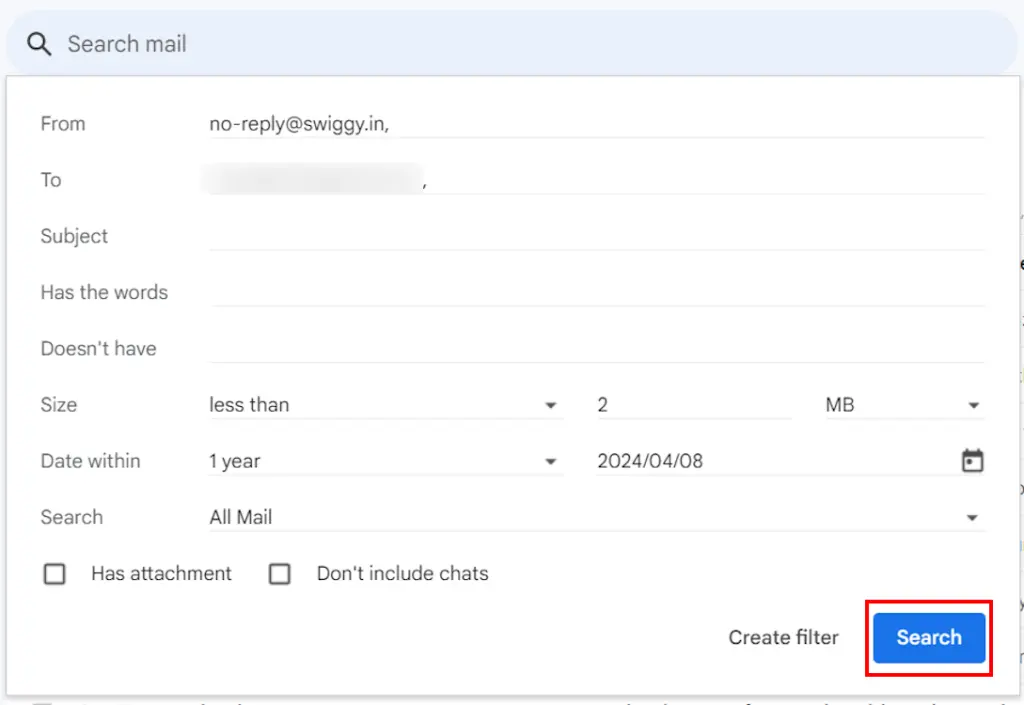
This will display all emails that meet your search criteria. Then, similar to deleting all emails on Gmail, tick the central checkbox at the top to select all these emails -> Select all conversations that match this search -> Click Delete, and then OK.
How to Bulk Delete Emails on Gmail for Android and iOS
Mass deleting your Gmail emails from your Android or iOS phone is possible, but it doesn’t function seamlessly. When you long-press an email and check the “Select all” box in the top left corner, it won’t select all your emails at once. Rather, it does so in batches of 50. You’ll need to scroll down and continue selecting emails in batches of 50, then tap the delete icon to remove them.
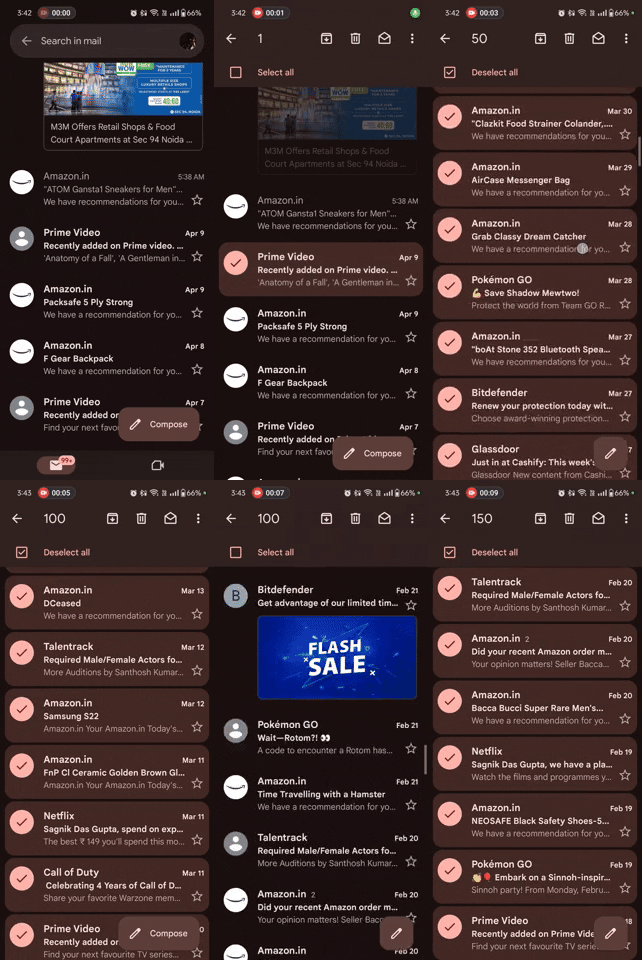
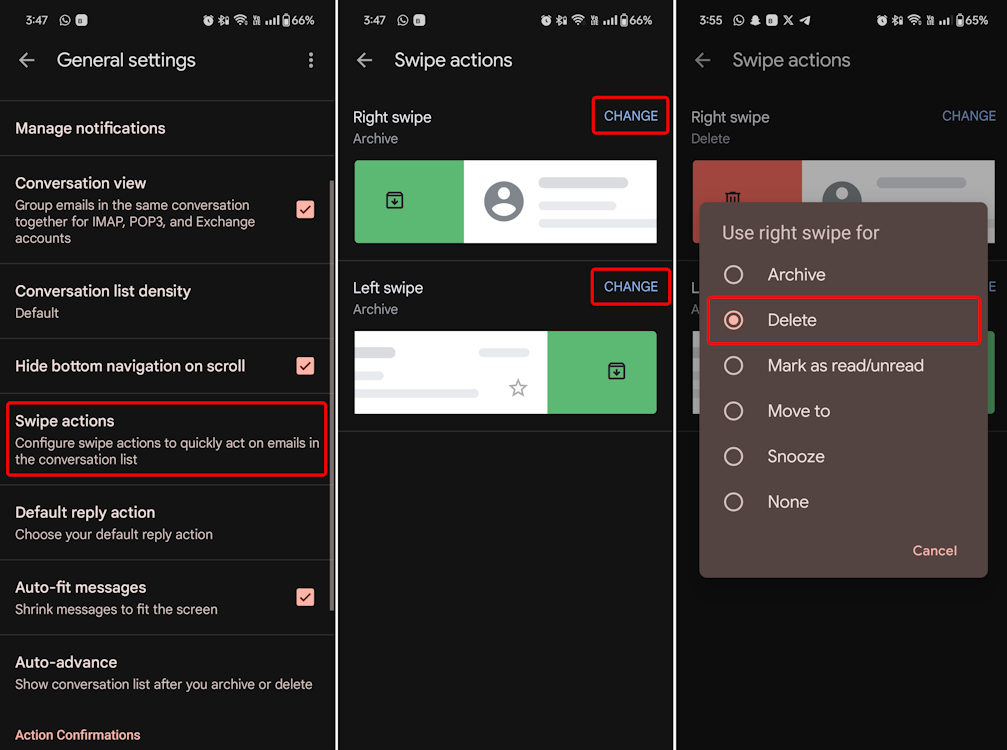
Alternatively, you have the option to individually delete emails by right-swiping on the Android and iOS mobile apps. However, note that the default swipe action archives emails rather than deleting them. The positive aspect is that you can configure it to delete emails instead. Since the interfaces of the Gmail app on iOS and Android are quite similar, I’ll use the Android version to explain the steps. Here they are:
- In the Gmail mobile app for Android or iOS, tap on the menu icon situated at the top left corner.
- Next, scroll down to locate the Settings section, then tap on General settings.
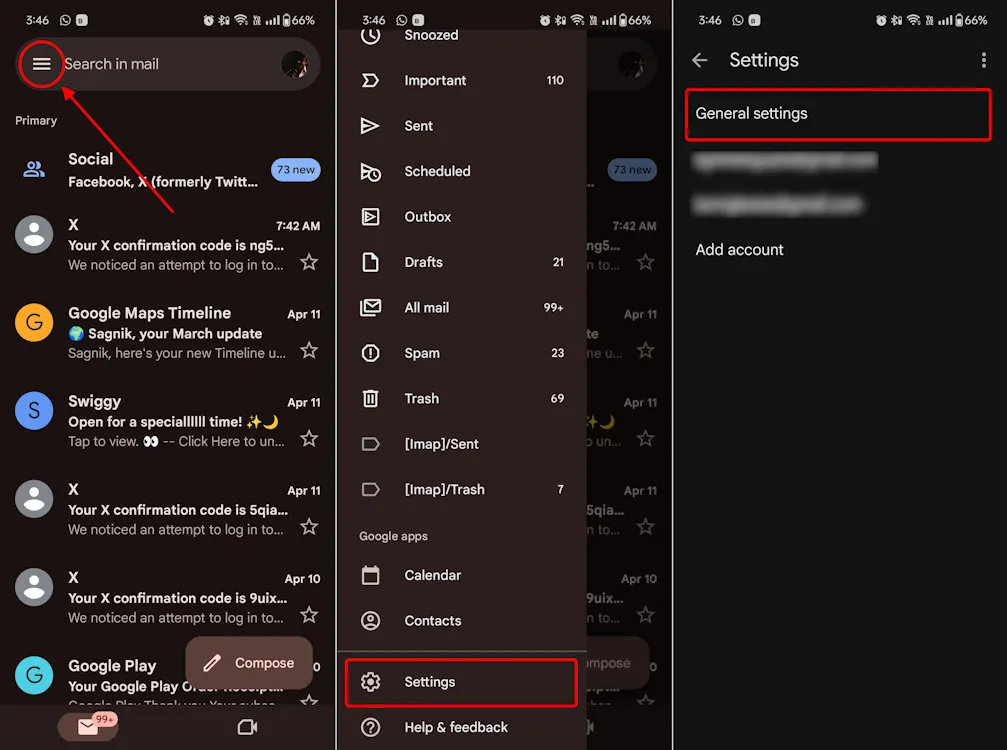
- Here, you’ll find the option to configure Swipe actions. Select it.
- Here, you can modify the Right or Left swipe actions. Choose the one you wish to adjust and opt for Delete among the provided options.
As advanced search functionalities are unavailable in the Gmail app and these manual methods can be quite time-consuming, you may find yourself needing to resort to the web version for a more efficient email clearing process.
Permanently Clear Your Emails on Gmail.
It’s important to remember that merely deleting your emails, whether on the web version or mobile, doesn’t permanently erase them. Instead, they are transferred to Gmail’s trash/bin folder. To fully eliminate them, you’ll need to empty this folder as well. Here’s how:
- Go to the Trash/Bin folder using the left panel.
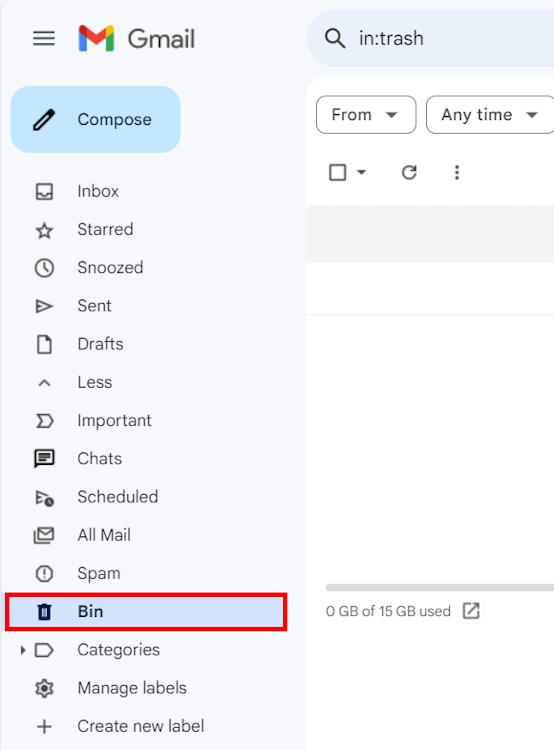
Emails that are deleted and moved to the trash in Gmail will be permanently removed after 30 days.
- Click on the “Empty Trash/Bin now“ button located at the top, and then confirm by clicking “OK“ in the pop-up window.
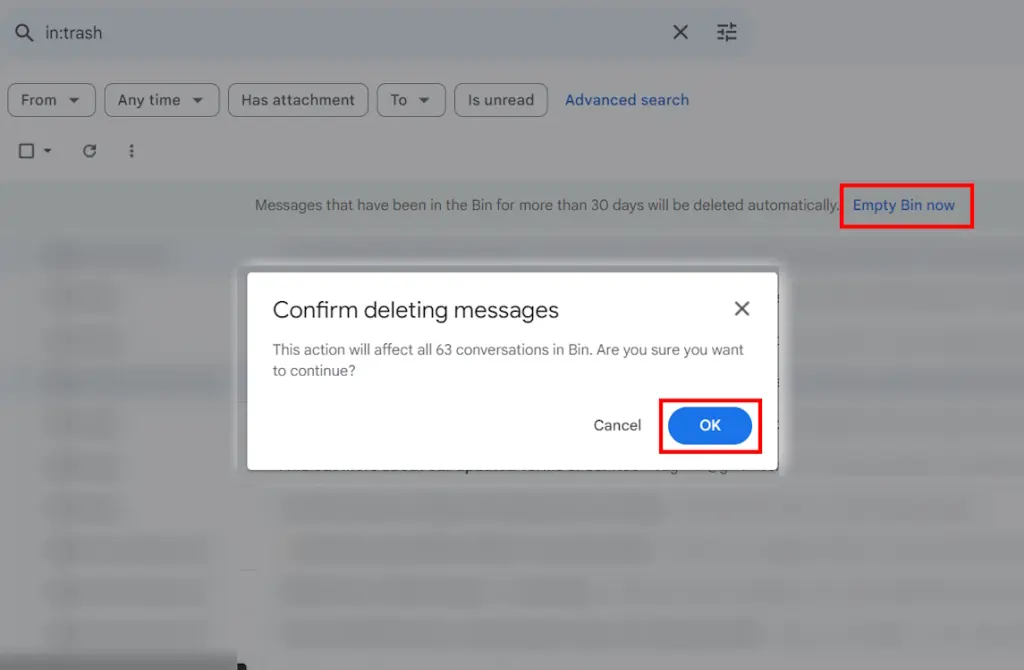
Therefore, by following these steps, you’ll permanently remove your unwanted emails from Gmail. If you have an inactive Gmail account that you no longer use, consider deleting it entirely. Keep in mind that this should be a last resort, as it will also delete your entire Google account. This includes data from associated services like Google Drive, game accounts linked.
