If you’re tired of the countless newsletters and suspicious emails flooding your Gmail inbox, you can block them to keep your Gmail tidy. You can also unsubscribe from unwanted emails or report fraudulent ones for Google to investigate. This guide will walk you through the steps to block emails on Gmail.
Blocking Emails on Gmail
Let’s start by explaining how to block emails on Gmail, which is a similar process whether you’re using the web version or mobile apps.
On a Web Browser
- Go to Gmail on your web browser and open an email from the sender you want to block.
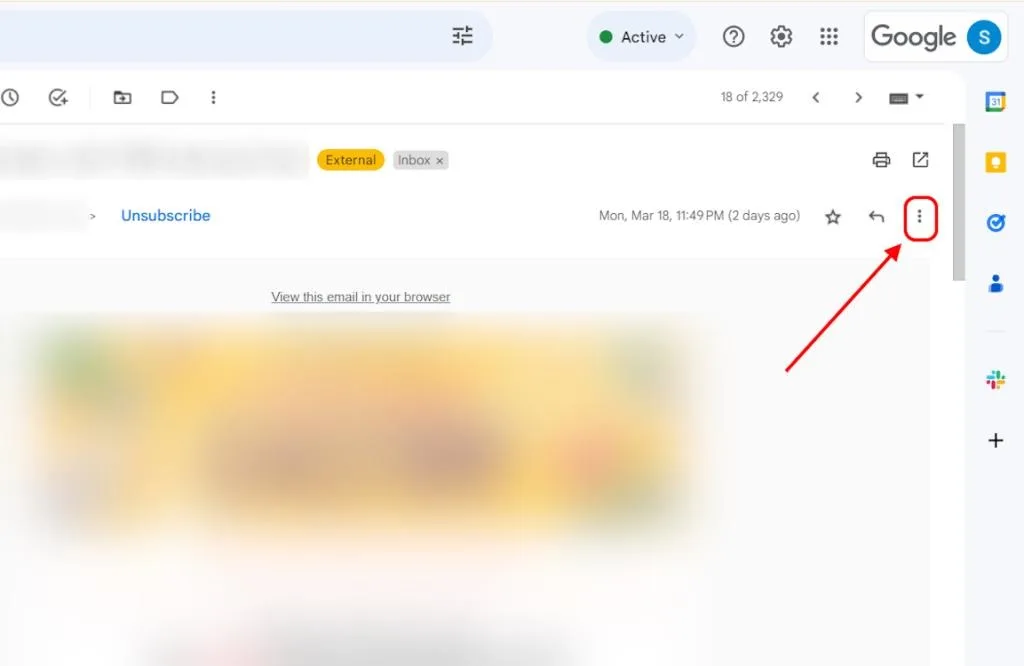
- In the email, find the three-dot menu next to the sender’s name in Gmail and click on it.
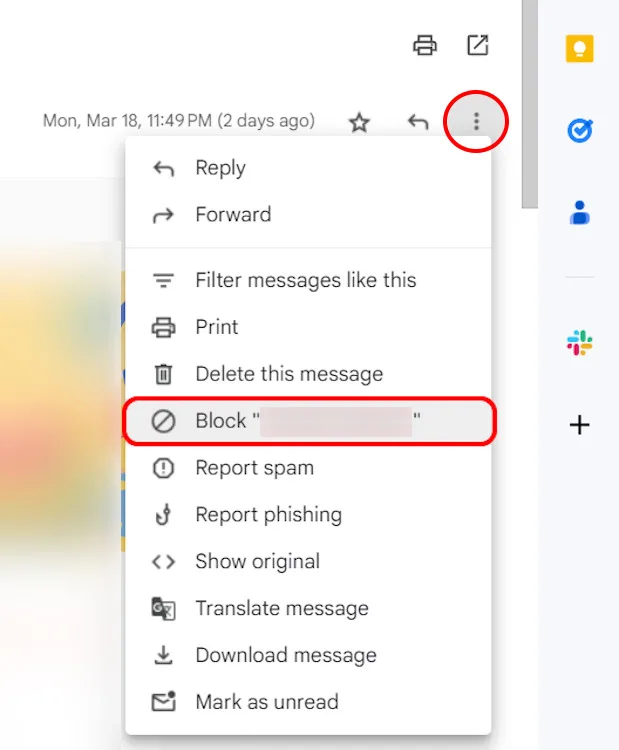
- From the options list, choose “Block [Sender’s name]“.
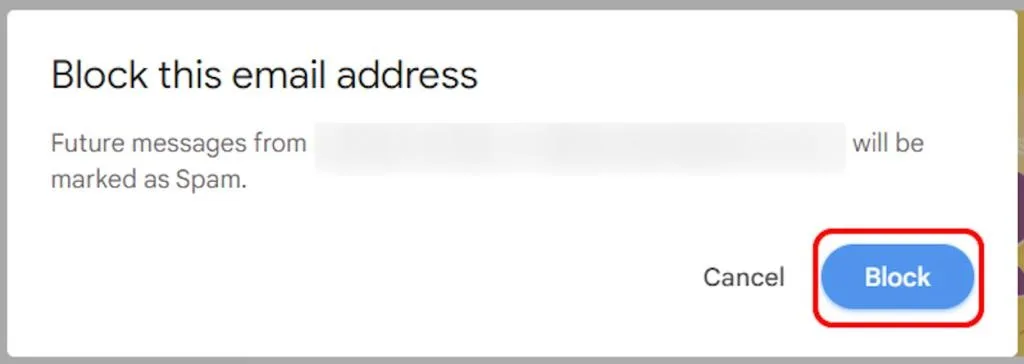
- A confirmation window will appear, click on Block again, and you’re done!
On the Android and iOS App
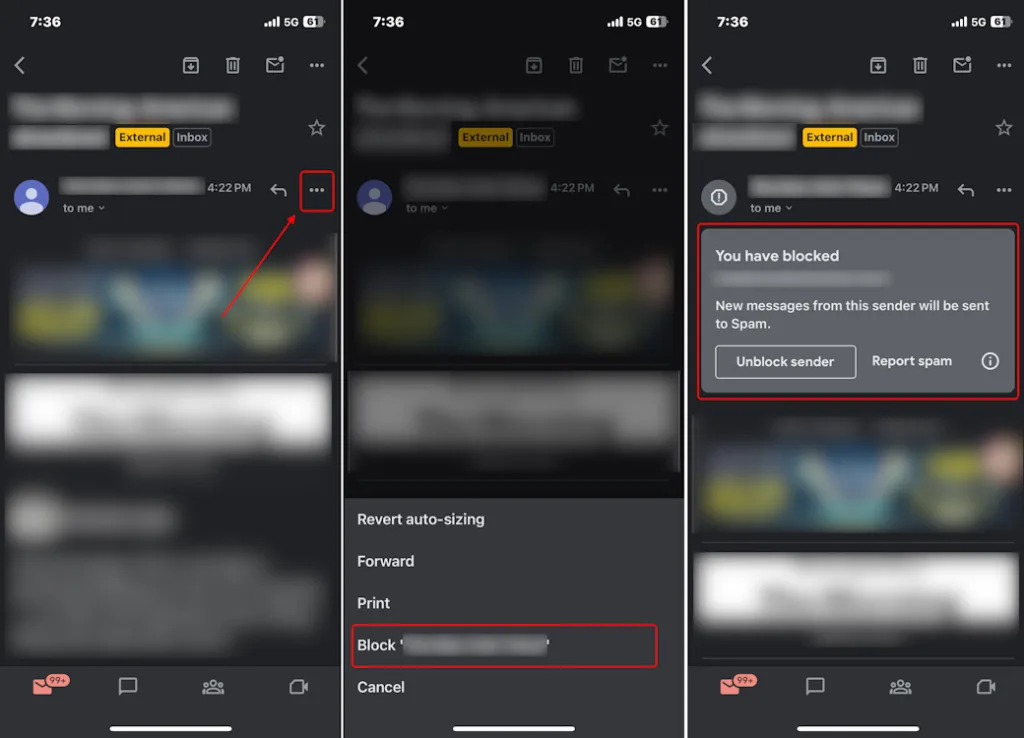
Blocking an email address follows a similar process on both Android and iOS. The Gmail app interface is consistent across both platforms. In this case, I used an Android device to guide you through the process.
Whether you’re using the Gmail app on Android or iOS, you’ll find the same three-dot menu next to the sender’s name. Tap on it, select Block [Sender’s name], then tap Block again in the confirmation window. You’ll see a grey panel confirming that the sender has been blocked.
Unblocking Emails on Gmail
Blocking emails on Gmail is not a permanent action and can be reversed. You can unblock emails on Gmail using both the web browser and mobile apps. Here’s how:
On a Web Browser
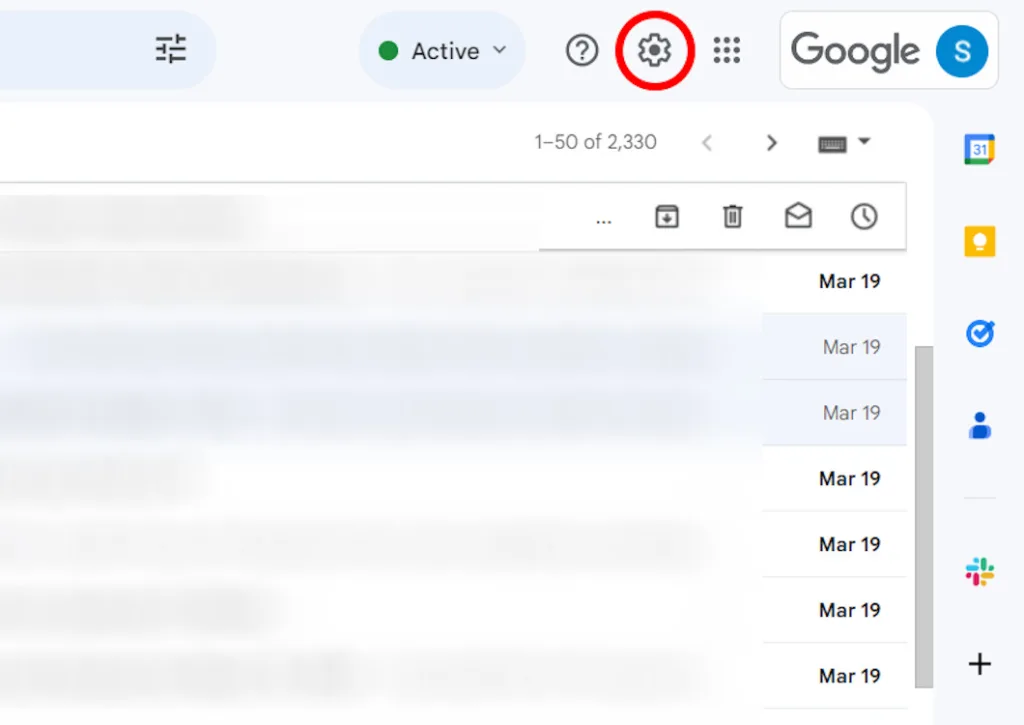
- Go to Gmail on your preferred web browser and click on the settings cogwheel icon in the top right corner.
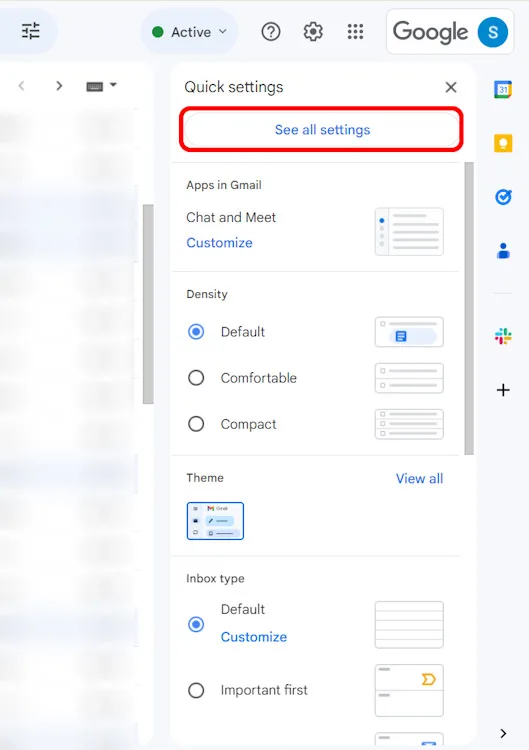
- Select “See all settings.”
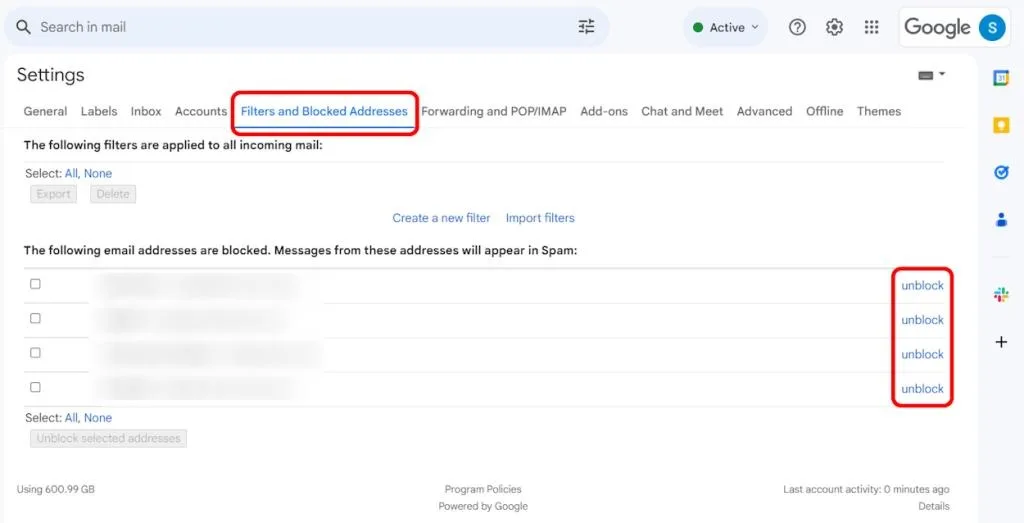
- On the next page, navigate to the Filters and Blocked Addresses section at the top.
- Scroll down to view all the email addresses you have blocked.
- Next to each blocked email address, you will find an unblock button in blue. Click on the button next to the email addresses you wish to unblock.
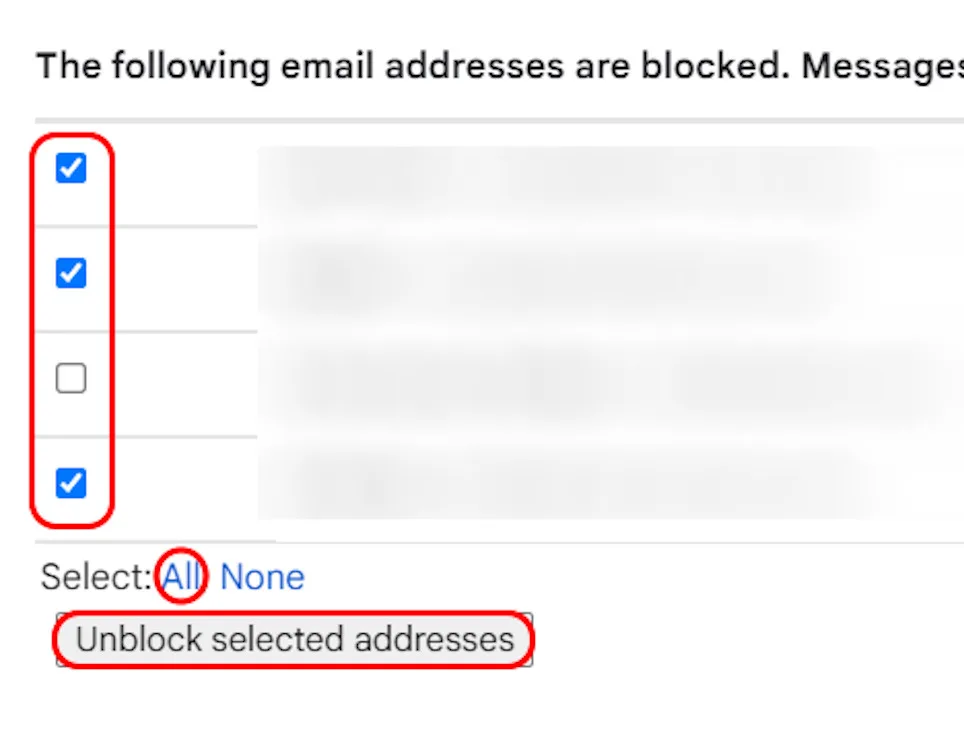
- Alternatively, if you want to unblock multiple email addresses at once, choose “All” from the sorting menu under the addresses.
- Deselect the email addresses you do not want to unblock.
- Finally, click on the “Unblock selected addresses” button at the bottom of the page.
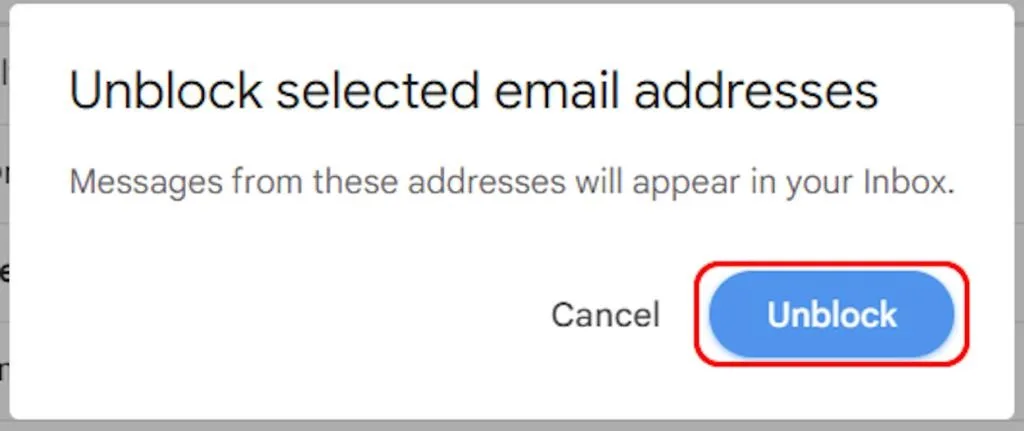
- In the confirmation window that appears, click on Unblock again.
On the Android and iOS App
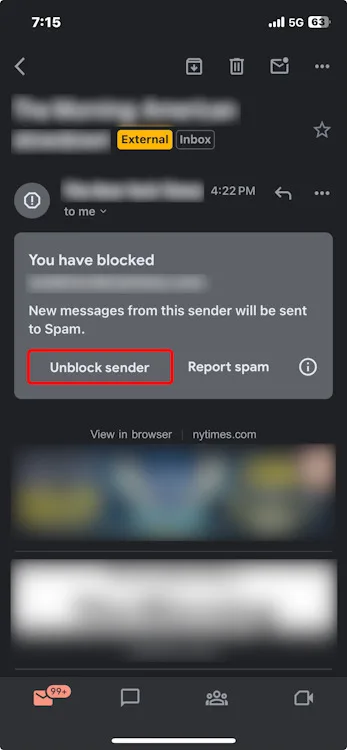
Mass unblocking is not supported on the Android or iOS mobile app versions of Gmail. You will need to manually unblock individual email addresses by locating and accessing the emails from the blocked senders. Within these emails, you will find a dedicated “Unblock sender” button in a grey panel. Simply tap on it to unblock the sender.
Unsubscribing from Emails on Gmail
Blocking should be a last resort. Before blocking a sender on Gmail, consider unsubscribing from their emails as an alternative solution. This can help resolve many issues. If you prefer to unsubscribe instead, here’s how to do it on the various platforms:
On a Web Browser
- Open an email from the sender you wish to unsubscribe from.
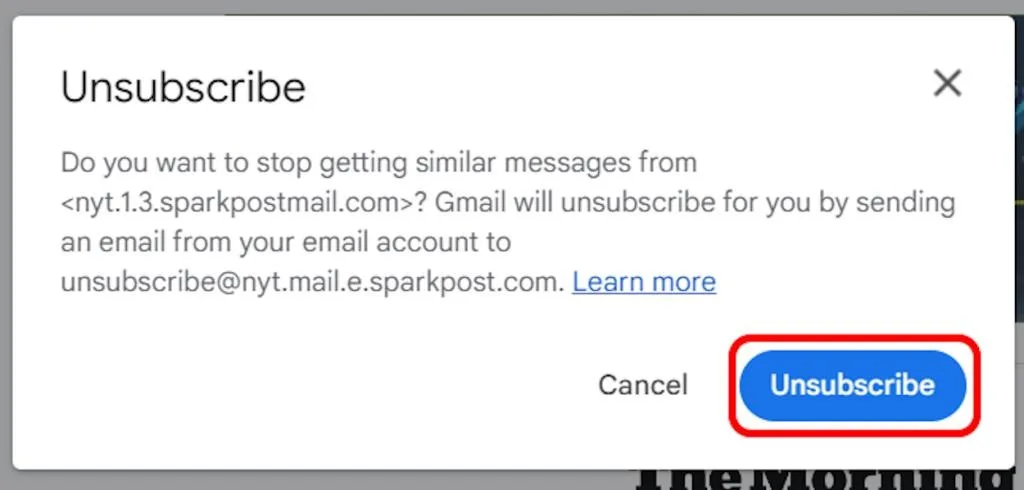
- Next to the sender’s name, you will find the Unsubscribe button highlighted in blue.
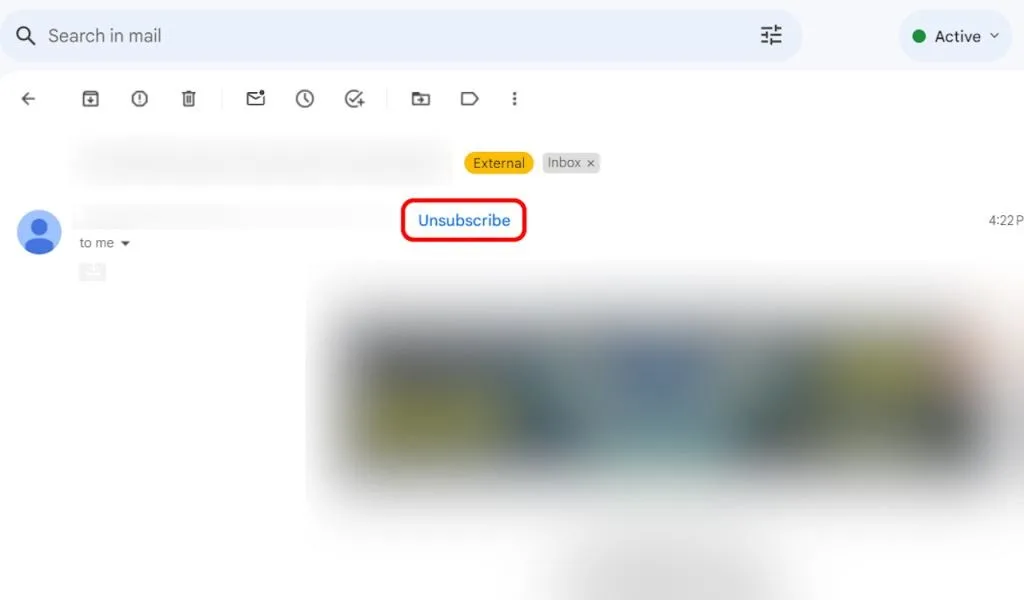
- Click on it and then confirm the unsubscribe action. Some senders may require you to visit their website for unsubscribing, in which case you will see a “Go to website” option.
On the Android and iOS App
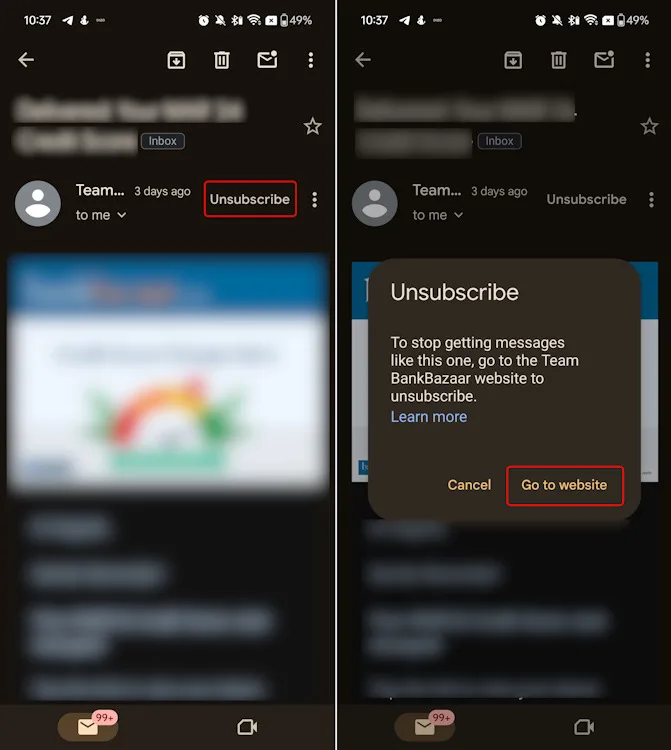
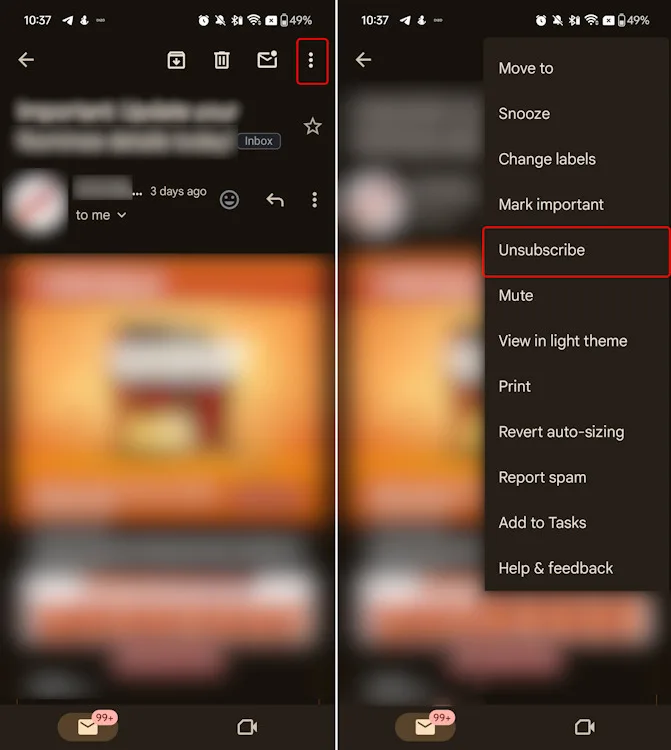
On the Gmail app for Android or iOS, similar to the web browser, you can find the unsubscribe button next to the sender’s name. For emails without the dedicated Unsubscribe button, tap on the three-dot menu in the top right corner and select the Unsubscribe option from the list.
Reporting Emails on Gmail
In addition to blocking and unsubscribing from email addresses, you can also report them. If certain senders are excessively sending emails, you can mark them as ‘spam’. By reporting emails as spam, they will be directed to your Gmail’s Spam folder, preventing them from continuously bothering you with notifications. Here’s how to report emails on both the web and mobile app versions of Gmail:
On a Web Browser
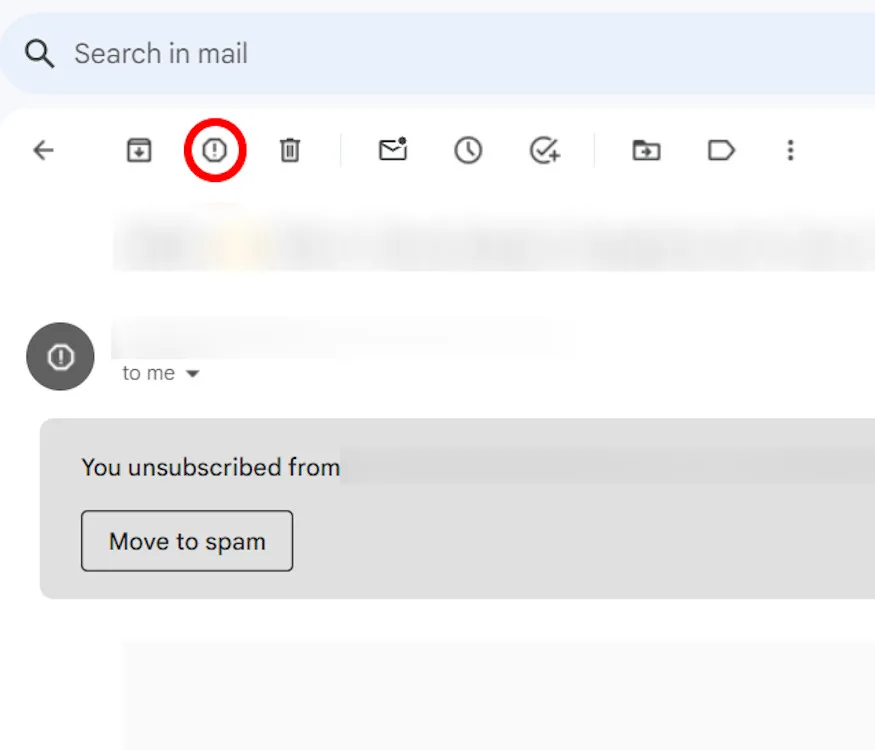
While using your web browser, access the email in Gmail that you wish to report. Upon opening an email from that specific address, you will notice the Report spam exclamation icon at the top panel. Clicking on this icon will report the email and relocate it to your Spam folder.
Furthermore, in the web version of Gmail, you have the option to report an email as a phishing attack. To do so:
- Click on the three-dot menu next to the sender’s name in Gmail.
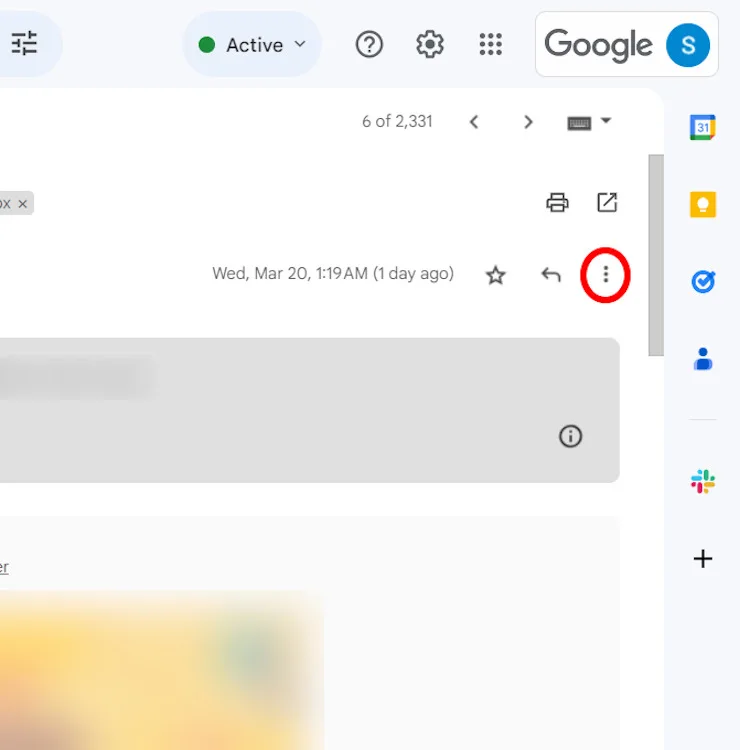
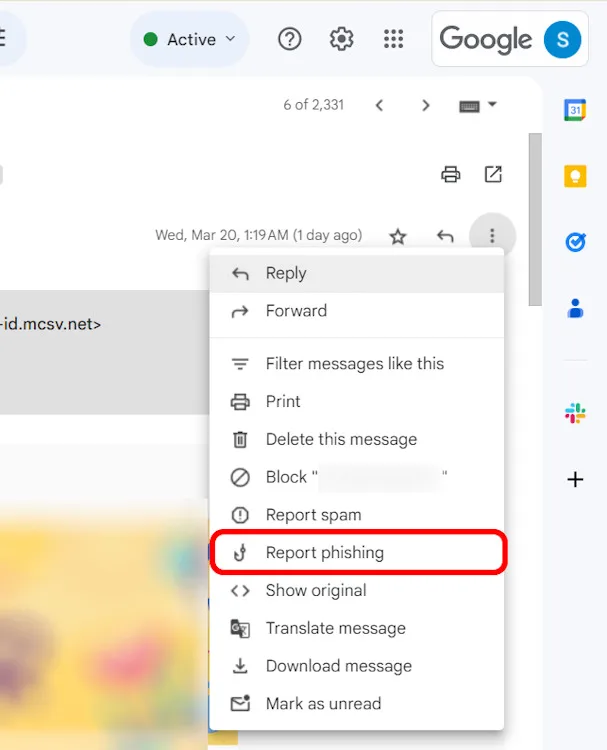
- Choose “Report phishing” from the options provided.
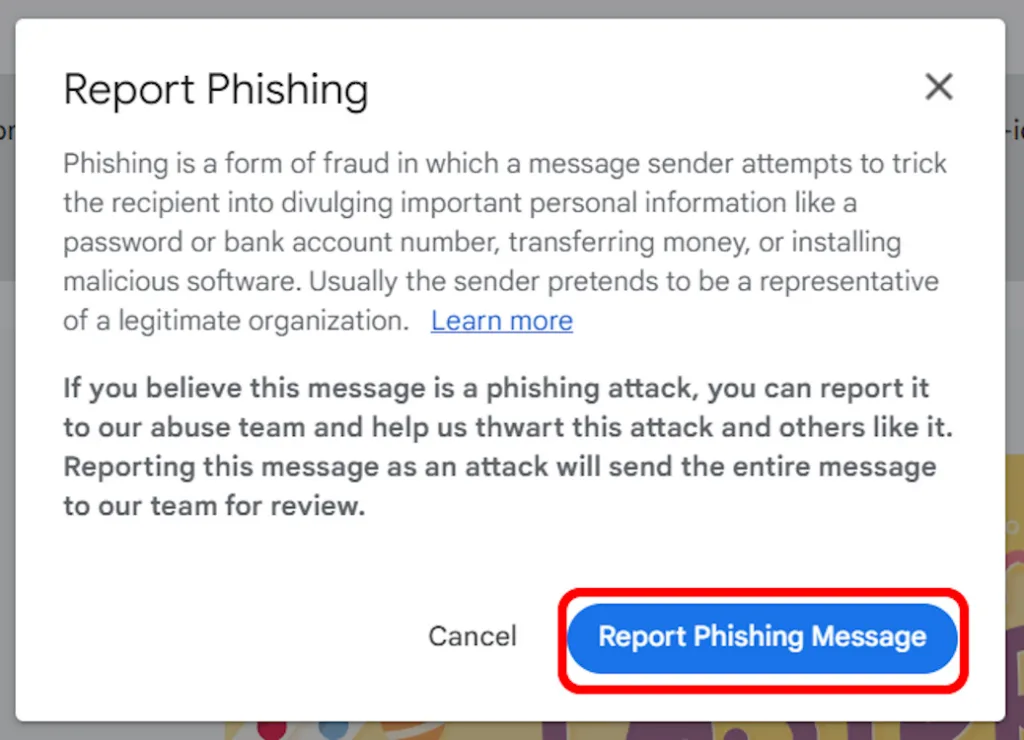
- In the confirmation dialog, select “Report Phishing Message” to complete the process.
- After reporting an email as a phishing attack, it will be categorized as such and transferred to your Spam folder.
On the Android and iOS App
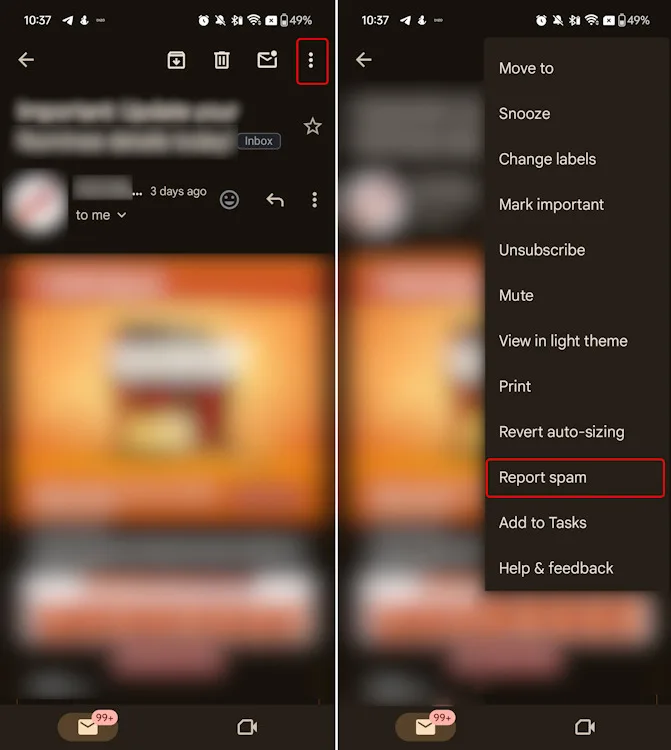
- go to the email you wish to report and tap on the three-dot menu at the top right corner of the screen.
- Select “Report spam” from the options to move the email to your Spam folder.
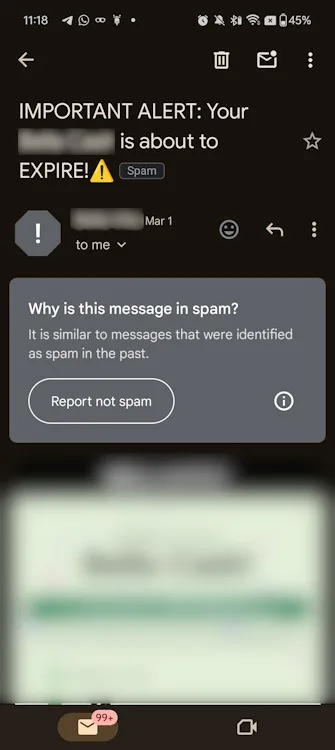
If you mistakenly reported an email as spam or phishing, you can rectify it by going to your spam folder, selecting the email, and choosing “Report not spam.” This can be done on both the web browser and the Android/iOS mobile apps.
This concludes the guide. If you are considering deleting your Gmail account and starting fresh, refer to the comprehensive guide linked within. Feel free to drop a comment below for any further assistance or queries you may have.


