Gone are the days when you had to rely solely on third-party apps for screen recording on Android devices. Since Android 11, screen recording on Android has been effortless. Whether you’re new to Android or just need a refresher, this guide will have you recording your screen in no time. Let’s get started!
How to Use the Built-in Android Screen Recorder
The native Android screen recorder is easy to access and works similarly across all smartphone brands. Just ensure that your device is running Android 11 or above, as the built-in screen recorder was introduced with this version.
To outline the steps, let’s use a OnePlus 11R running Android 14. Here’s a quick rundown:
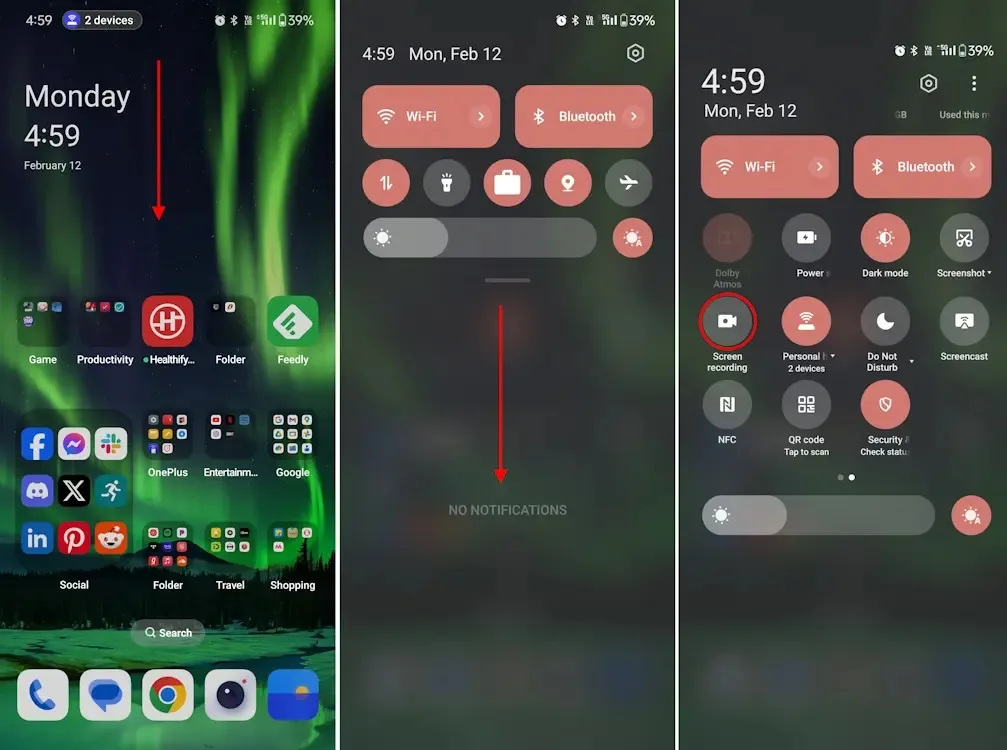
1. Swipe down twice on the home screen to launch the Quick Settings panel.
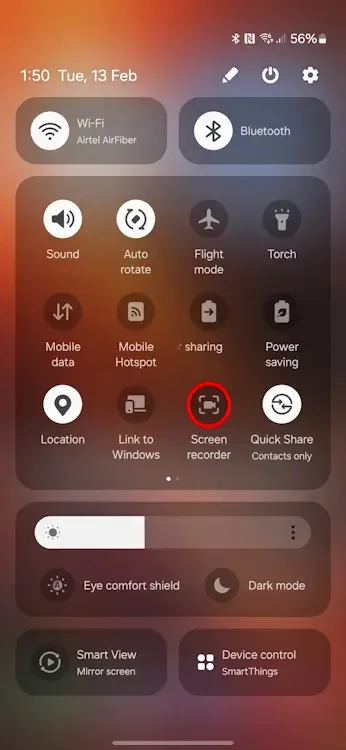
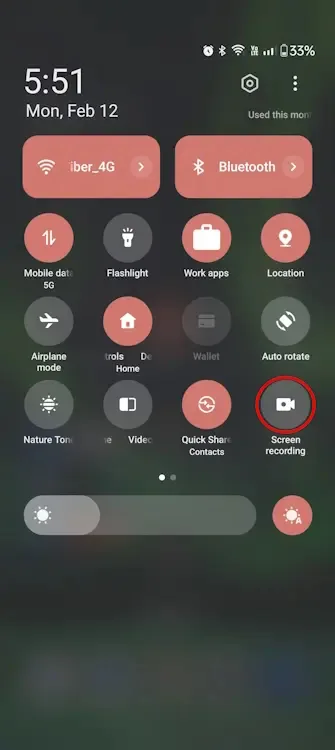
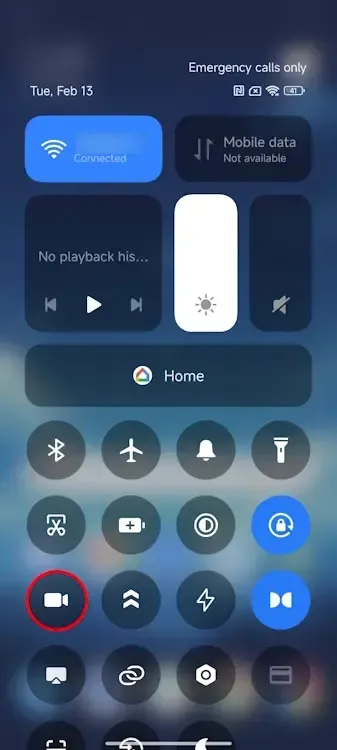
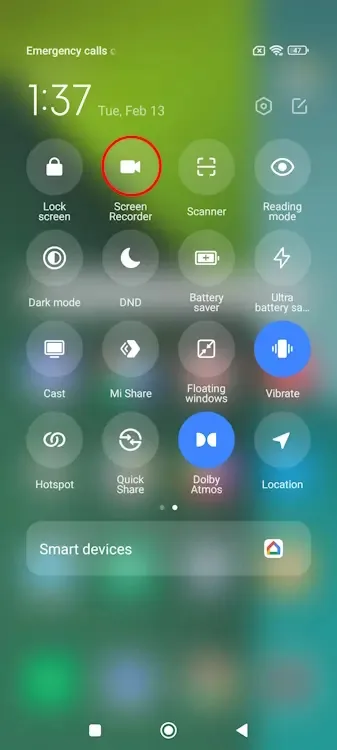
2. Look for and tap on the Screen recording tile in the panel. Note that the name of this option may vary slightly depending on your device.
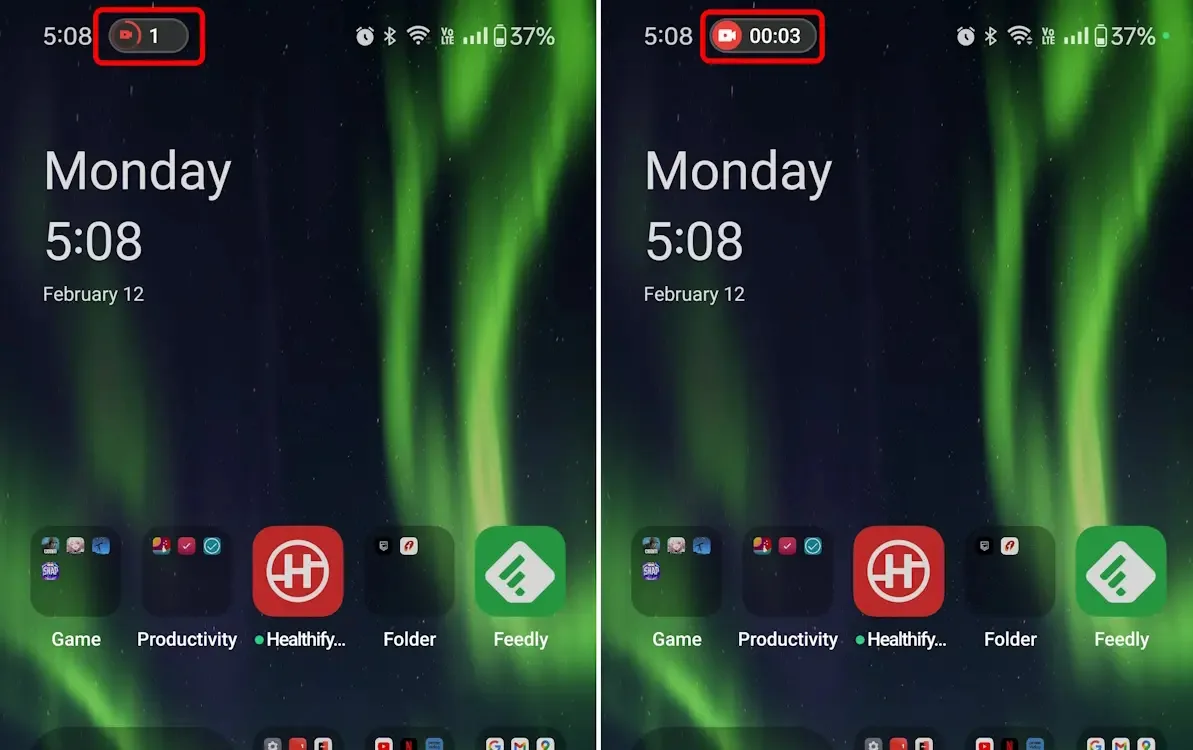
3. This will initiate a brief countdown, and the recording will begin. You’ll find the duration of the recording displayed inside a pill-shaped icon in the status bar at the top.
4. If you don’t see the screen recorder tile, enter the Quick Settings panel’s edit mode and add the tile to the front. Here’s a GIF demonstrating this process.
5. In OnePlus’ OxygenOS 14, a small Dynamic-Island-like recording icon will appear at the top. Tapping on this icon will reveal a recording toolbox. Alternatively, you can swipe down from the top to reveal the notification tray, where you’ll find the recording toolbox. To stop recording your screen, tap on Done from the notification tray.
6. Alternatively, long-pressing on the tile will take you to the native screen recorder settings. Here, you can adjust the recording quality, frame rate, video coding format, and more.
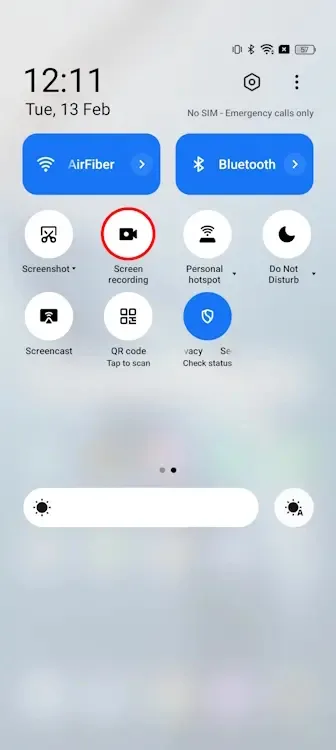
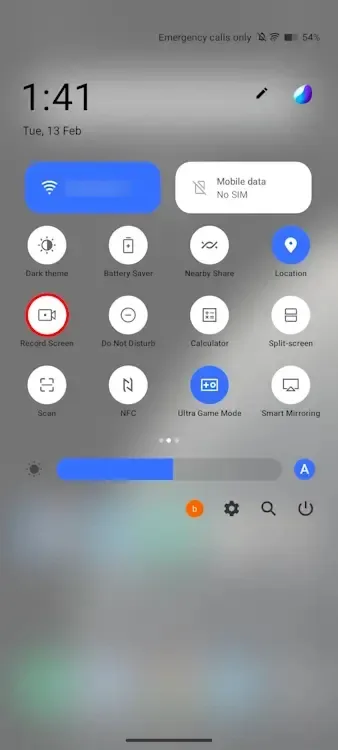
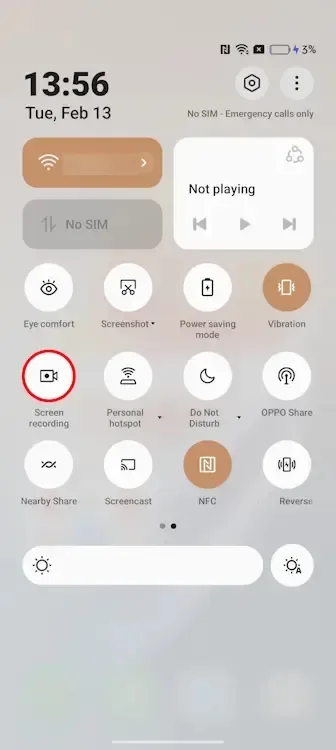
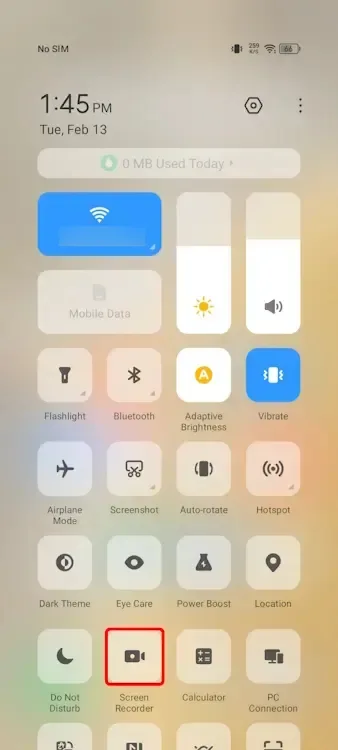
Different brands may have slight interface differences. To simplify things, we’ve utilized our resources at the Beebom office to demonstrate how this option appears across various Android skins:
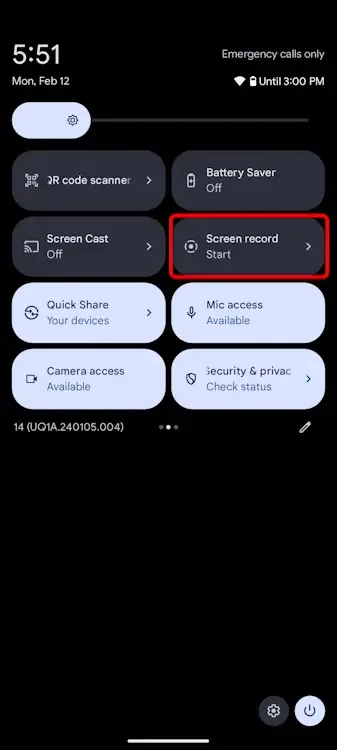
However, smartphones like the Pixel lineup may not offer settings such as the ability to change video quality or frame rate. In such cases, resorting to a third-party screen recorder is your next best option, which leads us to the next section.
How to Capture Your Screen with Third-Party Apps
There are numerous Android screen recording apps available but finding a reliable one can be challenging. To simplify the process, we recommend using either the XRecorder third-party Android app.
This app provides a variety of settings for you to adjust and achieve the best possible recording quality. Some settings, like recording at 60 FPS, require a subscription to the paid tier. Otherwise, the app is free to use, and here’s how you can record your Android screen with it:
1. Install the XRecorder app from the Google Play Store.
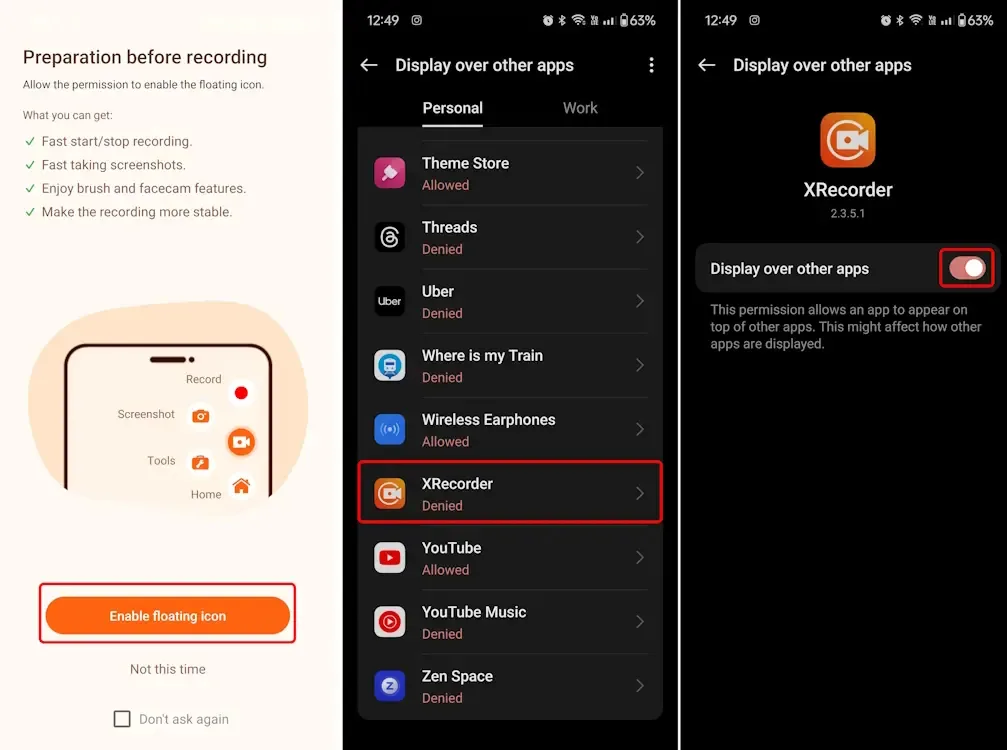
2. Open the XRecorder app and tap on “Enable floating icon” to permit recording from any app. This action will take you to the “Display over other apps” screen.
3. Scroll down and choose XRecorder from the list of apps. Next, switch on “Display over other apps.“
4. Return to the app and tap on “Allow” to grant the necessary permissions for the app to function properly.
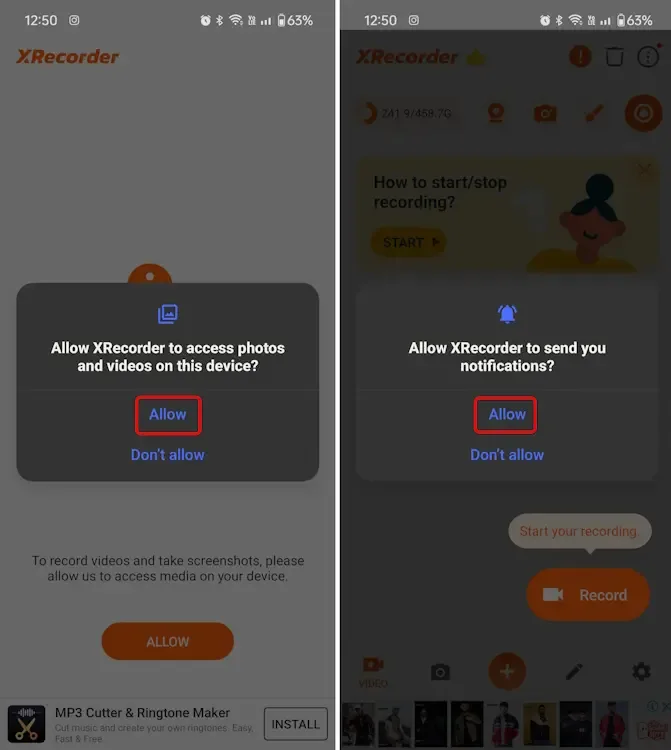
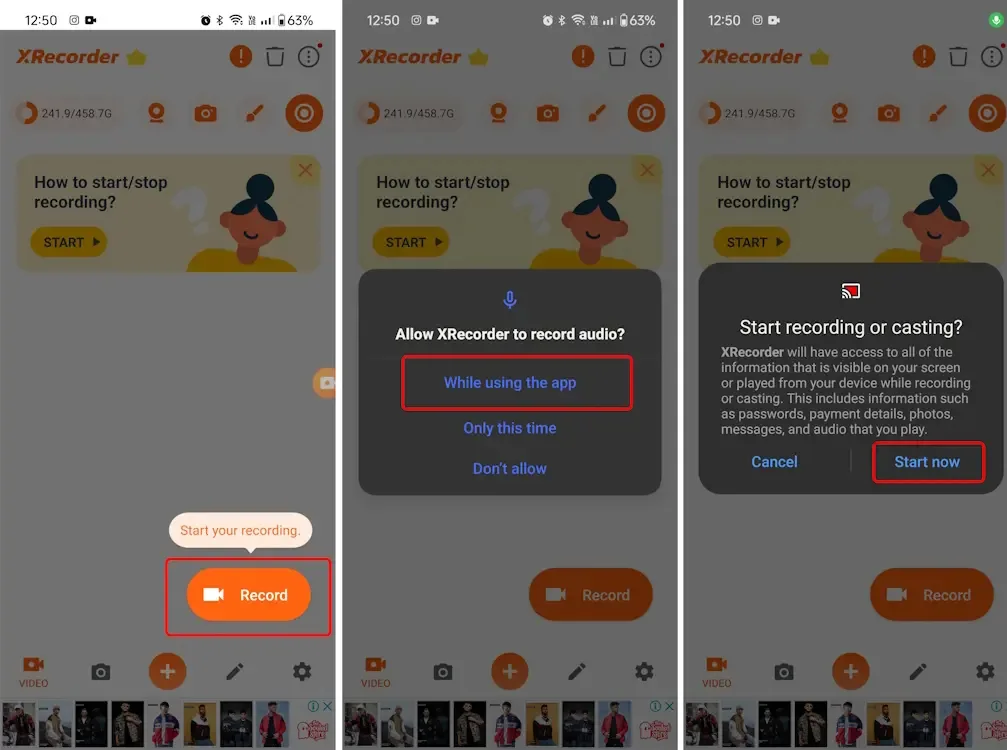
5. Next, tap on the Record button located at the bottom right corner. The app will prompt you to grant it microphone access. Choose “While using the app” from the popup menu. If you don’t allow this, XRecorder will not record any audio with your video.
6. In the following menu, select “Start now” to begin recording your screen.
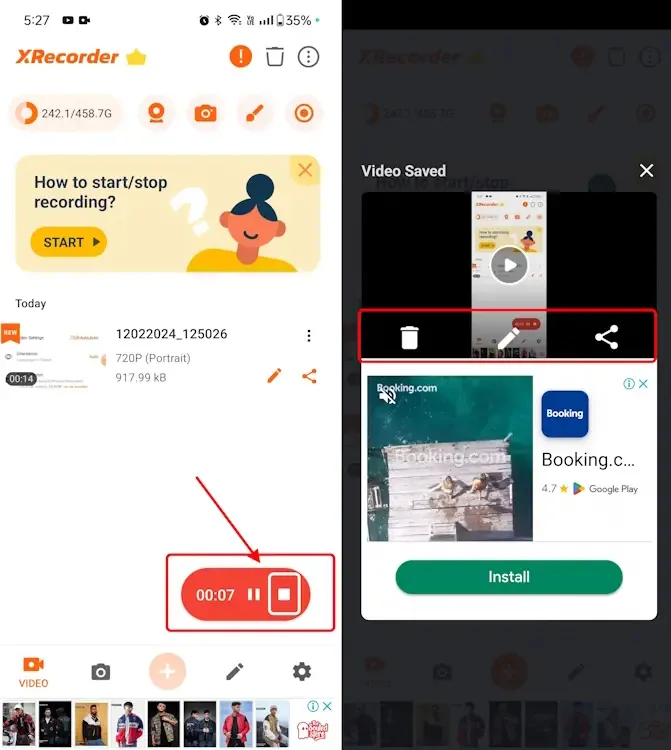
7. To stop recording, tap on the square icon in the recording toolbox at the bottom right corner.
8. On the next screen, use the on-screen options to delete, edit, or share the screen recording.
9. You’ll also notice a floating record icon. Tap on this icon to quickly record your screen or adjust the recorder settings.
10. To close the floating window, long-press on the floating icon and drag it towards the cross button that appears on the bottom half of the screen.
We hope this guide has helped you learn how to screen record on your Android device like a pro. If you encounter any challenges, don’t hesitate to drop a comment below.


