Chrome Remote Desktop is a convenient tool for connecting to computers remotely from your Chromebook or other PCs. It offers various features, including easy access to other computers and file transfers between your Chromebook and the remote PC. Best of all, it’s available on all operating systems. Here’s two ways to use Chromebook Remote Desktop.
Before we begin, note that while you can remotely access a Windows or Mac screen directly, Remote Access isn’t supported on Chromebooks. Instead, you must use the Remote Support feature. Remote Access saves your PCs for easy, one-click access, whereas Remote Support requires entering a code each time you share your Chromebook display.
Method 1: Using Remote Desktop on a Chromebook
- Visit remotedesktop.google.com on your Chromebook.
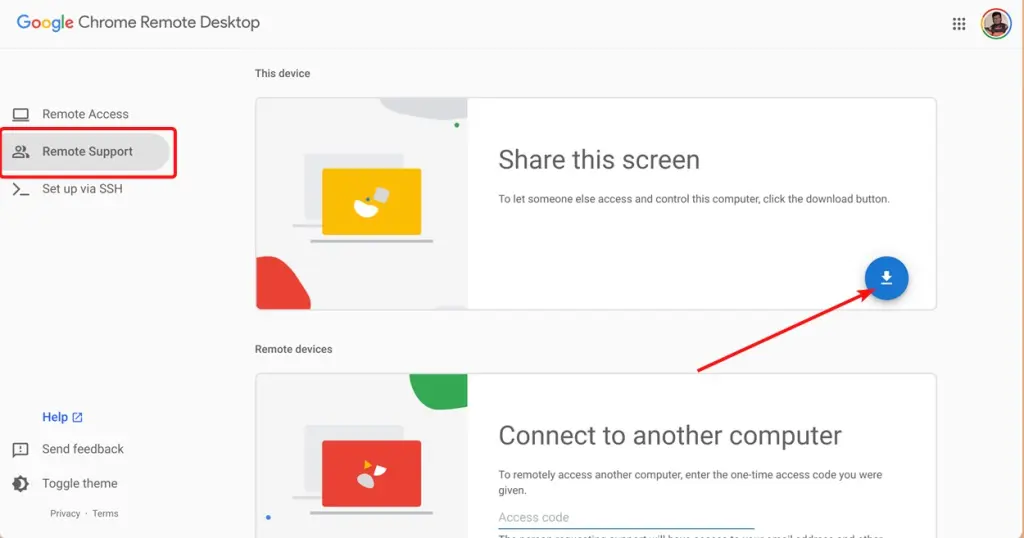
- Click on “Remote Support” in the sidebar and then click the download icon.
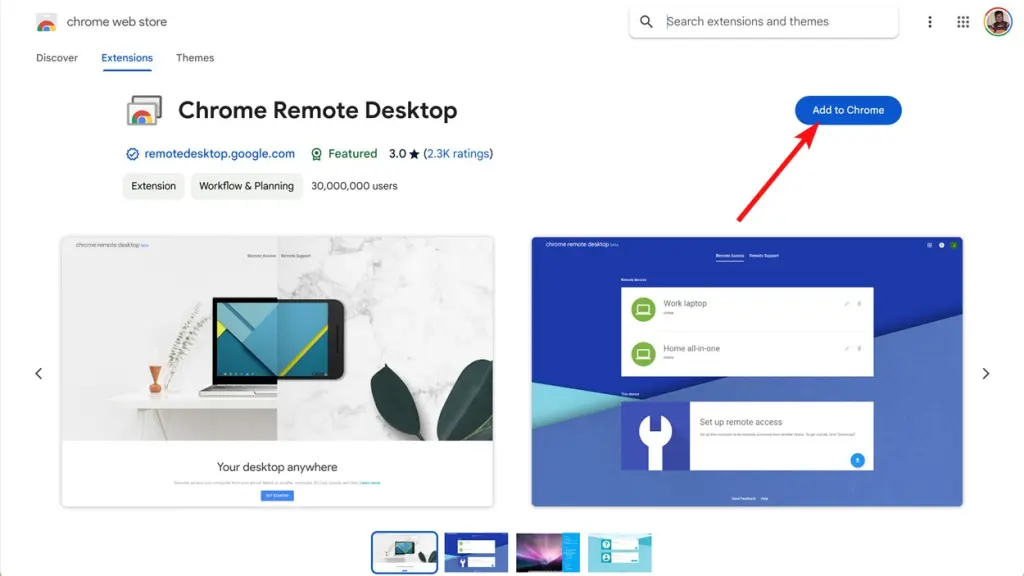
- A new window for the Remote Desktop Extension will open. Click on “Add to Chrome” and then “Install“.
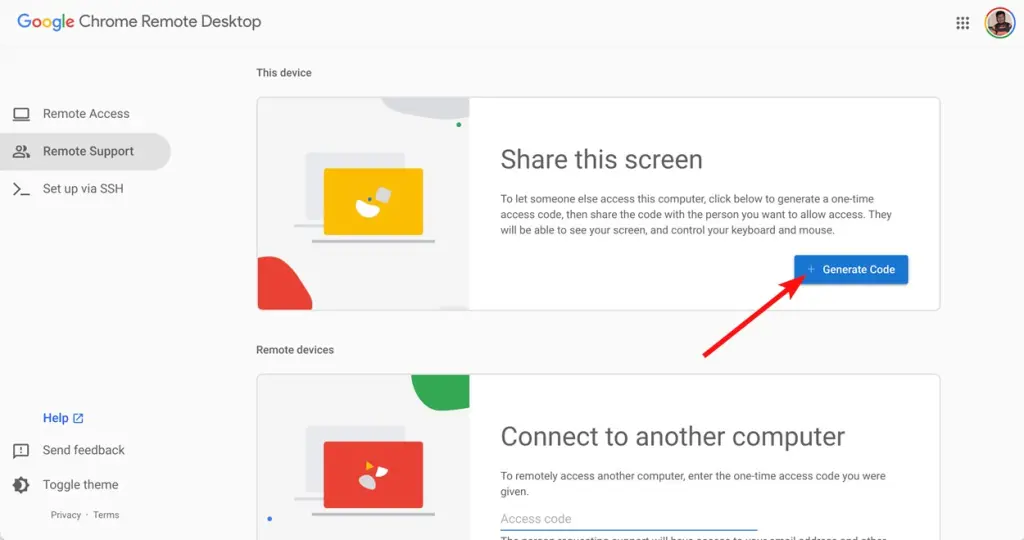
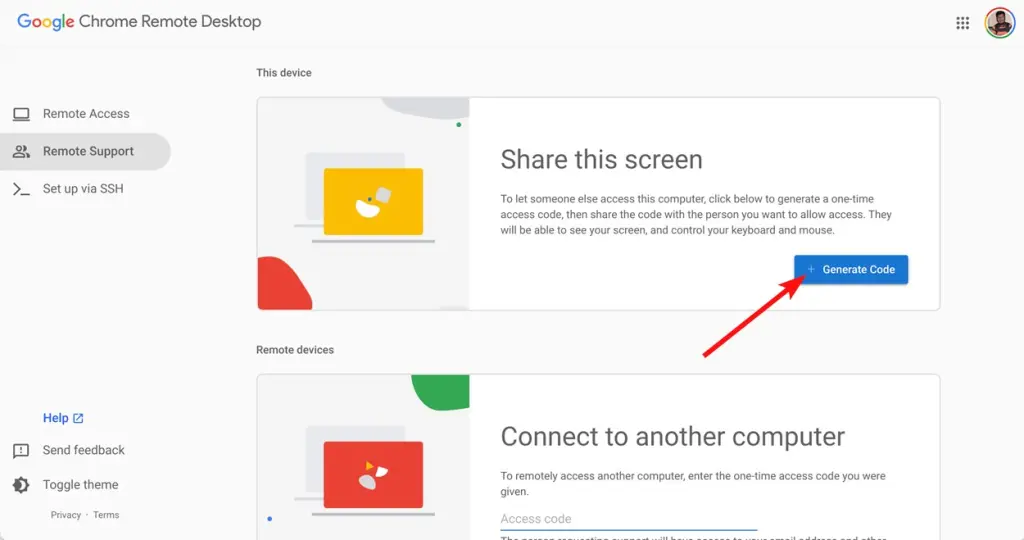
- Once installed, go back to Chrome Remote Desktop and click “Generate Code“.
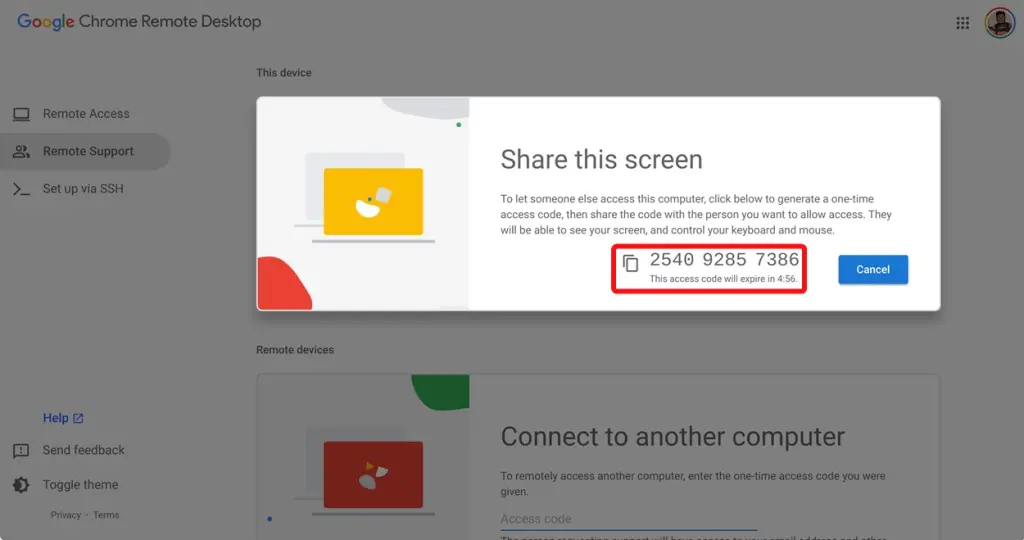
- You have five minutes before the code expires. On the other computer, visit the Remote Desktop website.
- Click on “Remote Support“.
- In the “Connect to another computer” section, enter the code from your Chromebook and click “Connect“.
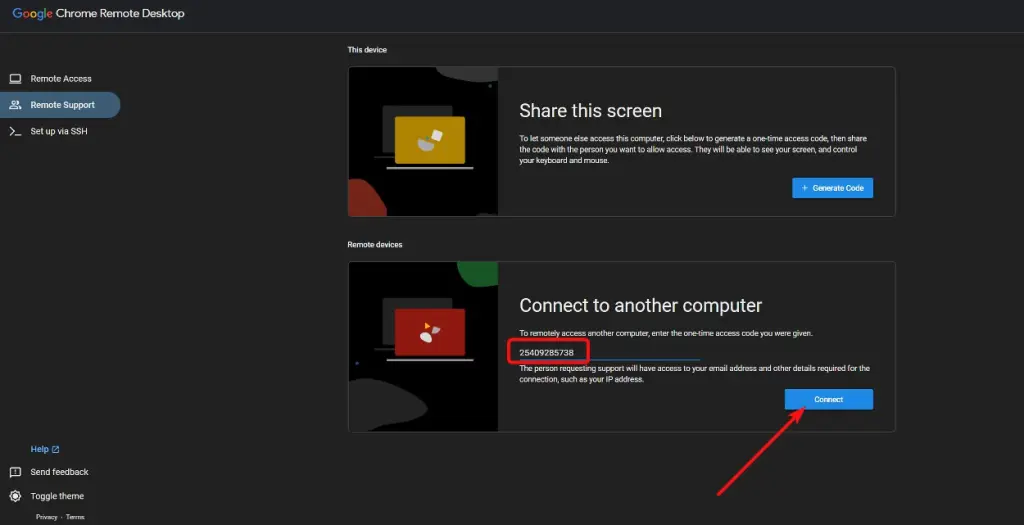
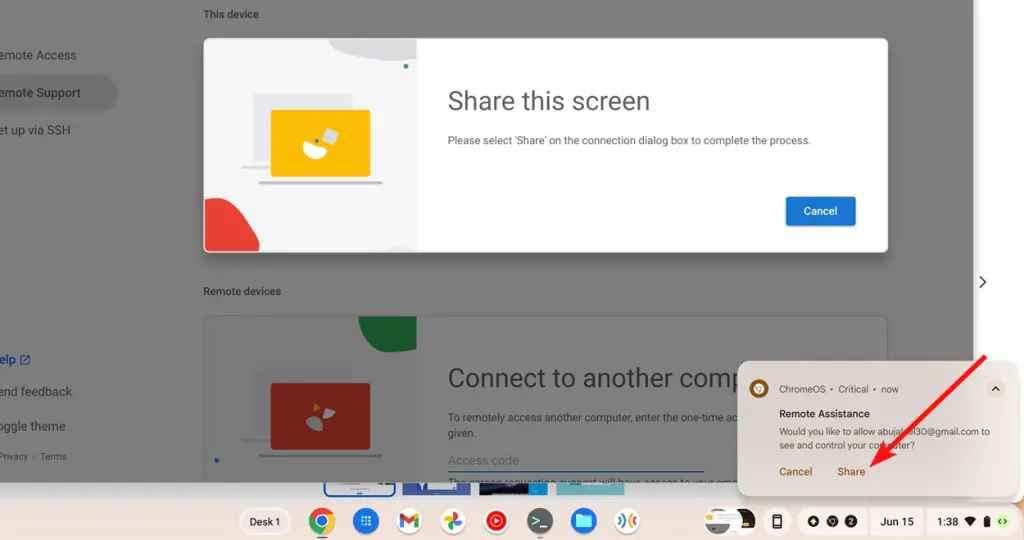
- A notification will appear on your Chromebook, asking whether you would like to share your screen. Click “Share” to proceed.
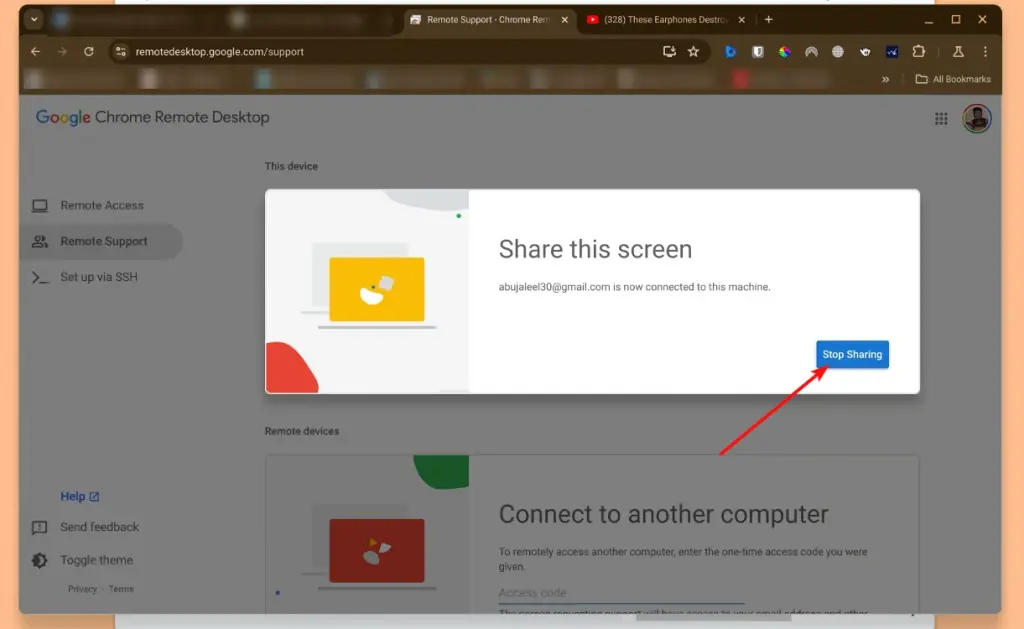
- You should now be able to view and control your Chromebook’s screen from the other PC.

- Once you’re finished and wish to stop sharing, simply open the notification tray on your Chromebook and click on “Stop Sharing” within the remote desktop notification.
- This is how you can share your Chromebook’s screen. Although Remote Access isn’t available on ChromeOS, the Remote Support feature is still very useful for helping someone with their Chromebook issues. You can follow the same process for Windows or Mac PCs as well.
Method 2: Using Remote Desktop from a Phone
- Go to the Chrome Remote Desktop website using your Chromebook.
- Select “Access my computer“, opt for “Remote Support” and then click “Generate Code“.
- Download and install the Chrome Remote Desktop app on your Android or iOS device.
- Tap the menu icon and select “Remote Support“.

- Tap the “Access code” field and enter the code displayed on the Chromebook.
- Click “Connect“. On your Chromebook, click “Share” to begin sharing your screen.
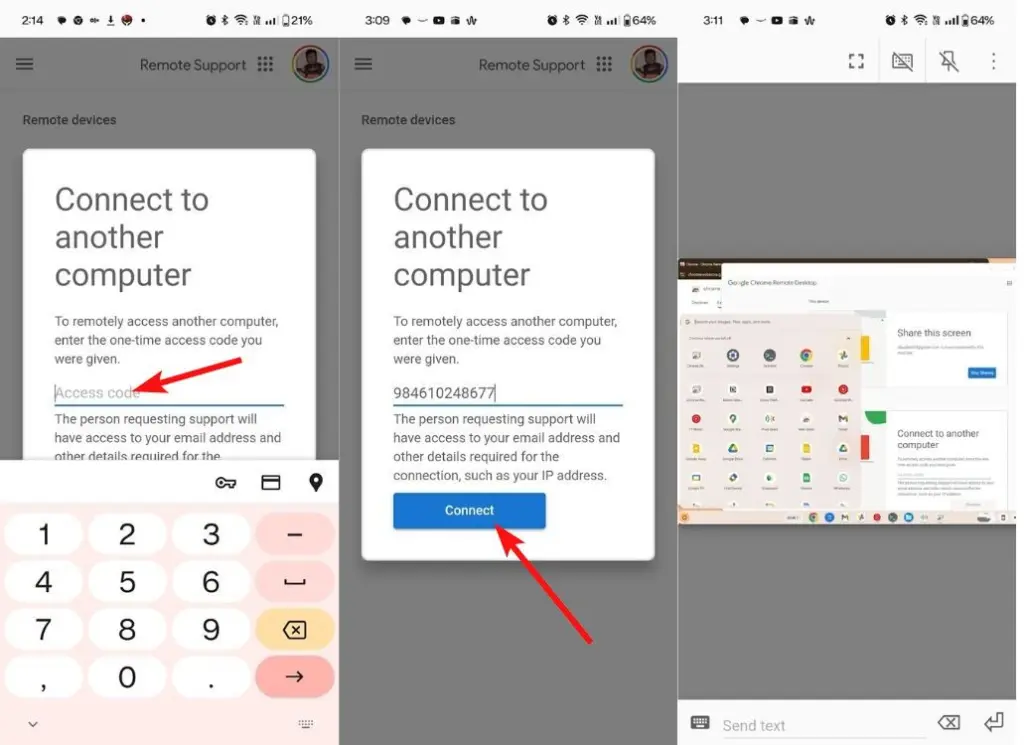
- Your Chromebook screen should now appear on your Android or iOS device. To access more options, tap the menu icon > Settings.
As mentioned previously, Chromebooks do not support Remote Access but do support Remote Support. Therefore, if you’re traveling and need to access your Chromebook’s screen, you’ll need someone to generate and send you the access code for the session. Hopefully, Google will address this limitation in the future.
What do you think of the Chrome Remote Desktop feature? Are there any other features you’d like Google to add? Share your thoughts in the comments.
