
The long-awaited Journal app has arrived with the iOS 17.2 update, offering users a way to document and write about their daily experiences, including various aspects like people, places, activities, music, workouts, and photos. Although the Journal app in iOS 17 boasts a user-friendly interface, some users might find it a bit bewildering, given that it’s entirely new. This guide will walk you through how to use the Journal app on your iPhone with iOS 17.
Creating New Entries in the Journal App on iPhone
The Journal app is primarily designed to help you create entries that include audio, photos, and videos on your iPhone. You can document your memories by writing about them and incorporating images, videos, voice recordings, and location tags. To create a new journal entry in the iOS 17 Journal app, follow these steps:
Before you start a new journal entry, the Journal app provides two options: “Recommended” and “Recent.” The “Recommended” section offers prompts to help you get started with your writing. These prompts may include suggestions such as “Write about something in your life that feels very meaningful to you” or “What’s the biggest challenge you’ve ever overcome? How did you do that?“
In the “Recent” section, the Journal app provides suggestions for journaling based on your recent activities, including photos, trips, location data, and the music you’ve been listening to. Apple emphasizes that all the data used for these suggestions is stored locally on your device and is not shared with any third-party apps, prioritizing user privacy.
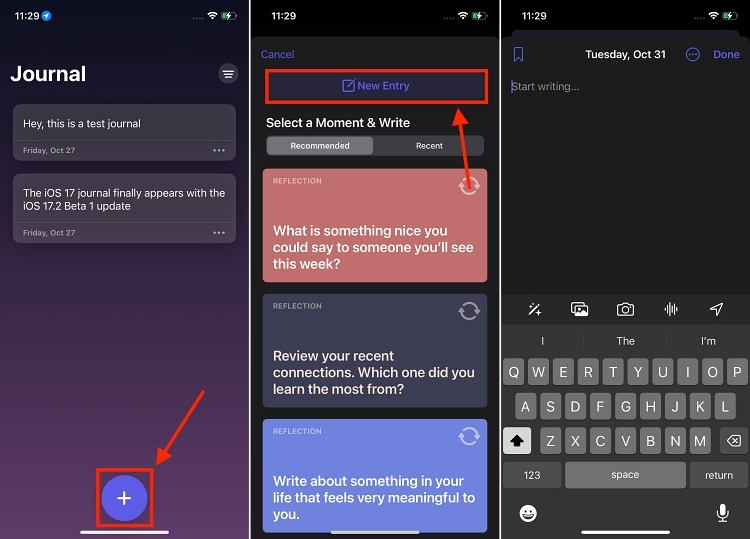
If you prefer to begin writing without any suggestions or recommended inputs, just tap the “New Entry” button at the top. Here’s how:
1. Open the Journal app and tap the + button at the bottom center to create a new journal entry. Next, choose “New Entry” located at the top.
2. Begin typing the text for your journal entry. You can also add photos, videos, and music to the entry (detailed instructions below).
3. After you’ve finished writing, tap the “Done” button at the top right. Your new journal entry will be saved and appear on the app’s home screen.
Adding Photos, Videos, Locations, or Voice Notes to Journal Entry
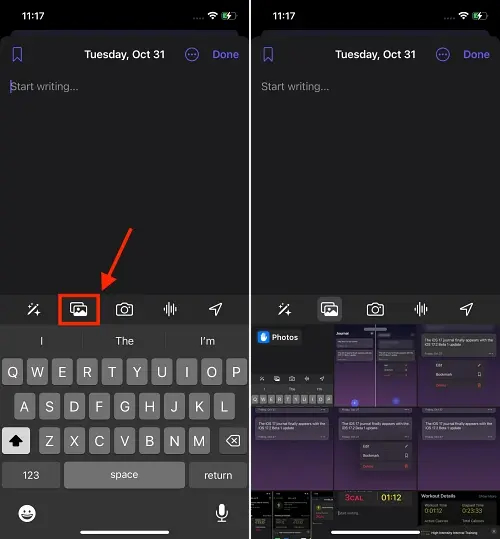
To include photos and videos in your journal entry, tap the “Photos” icon in the bottom menu. Next, choose the photos and videos you wish to include from your Photos app.
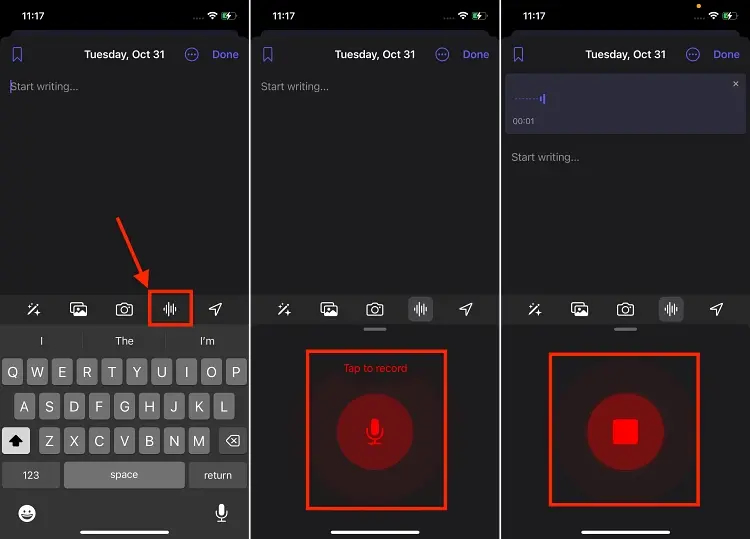
To include a voice note, tap the microphone icon at the bottom. Then, press the red microphone icon to begin recording. After finishing, tap the “Stop” button, and the voice note will be added to your journal entry.
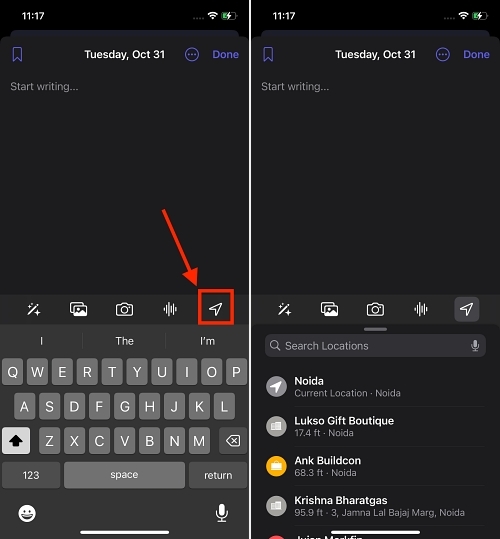
To include a location in your journal entry, tap the location icon at the bottom right. Choose a location from the list of available options or search for a location using the search bar.
Adding Music, Podcast, or Workout History to a Journal Entry
The Journal app makes it simple to incorporate the music and podcasts you’re enjoying from the Apple Music app into your journal. You can also document past workout details and save your reflections on a book, website, or news article you’re reading. Here’s how to do it:
1. Music & Podcast
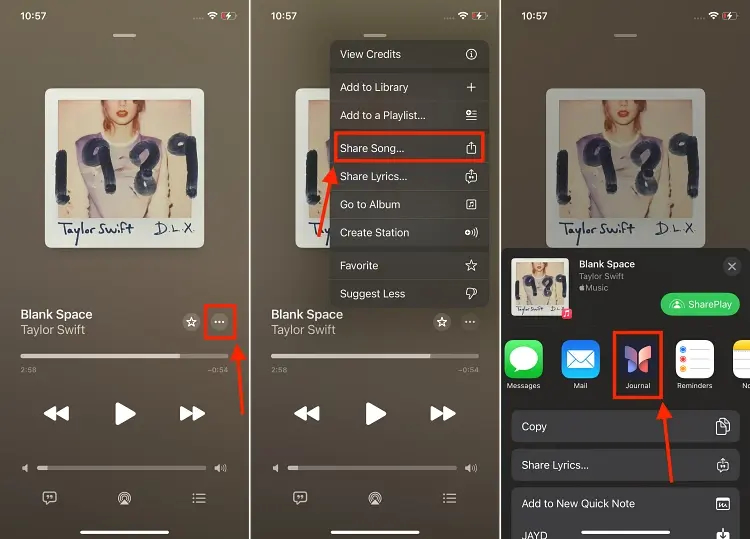
1. Launch the Apple Music app and begin playing the song you want to include in your journal.
2. While on the music player screen, tap the three-dot button located next to the song’s title. From the pop-up menu, choose the “Share Song” option.
3. Swipe right on the list of apps displayed in the sharing screen and locate the Journal app icon. Tap on it to open a new journal entry screen within the Journal app.
4. In this journal entry screen, express your thoughts about the song. When you’re done, tap the “Save” button at the top to save your journal entry. This same process applies to the Podcast app as well.

2. Workout Entry
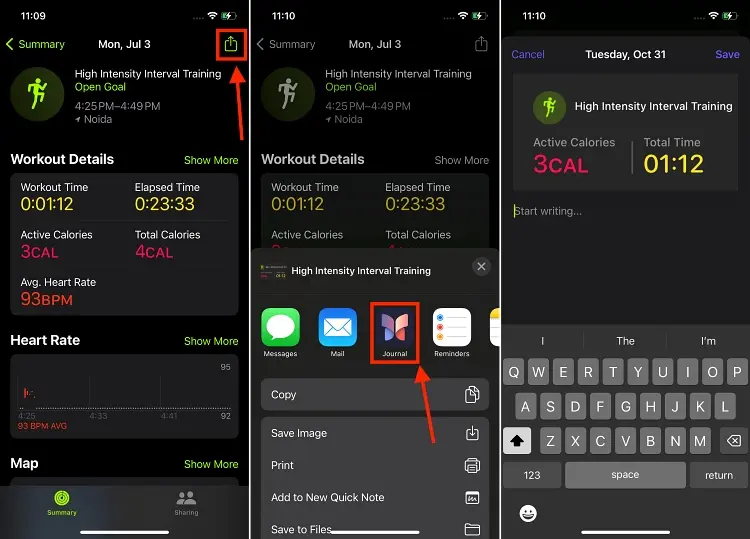
1. Open the Fitness app on your iPhone and choose a workout from your workout history.
2. After completing the workout, tap the share button located in the top right corner. Swipe to the right on the list of available apps in the sharing screen and tap the icon for the Journal app.
3. Begin writing your thoughts and feelings about the workout, then tap the “Save” button at the top to store the journal entry.
How to Edit, Delete, or Bookmark Entries in the iOS 17 Journal App
Every journal entry holds significance in our lives. However, there may be specific entries that carry more importance or some that you’d rather not revisit in the future. To assist with these needs, the Journal app in iOS 17 offers the capability to edit, delete, and bookmark entries, ensuring easy access and organization. Here’s how:
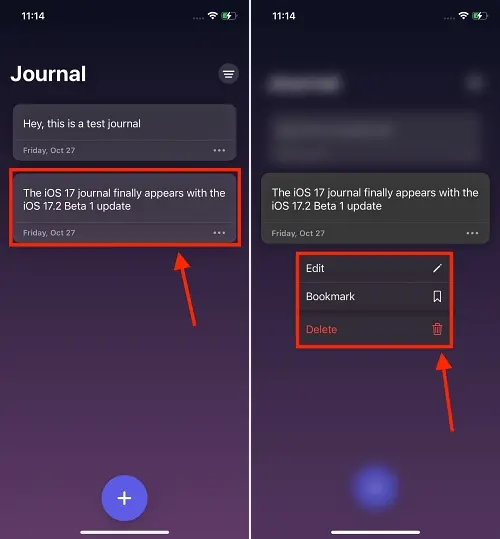
1. Launch the Journal app on your iPhone and either tap and hold a journal entry until a pop-up menu appears or tap the three-dot button located below the journal entry.
2. From the pop-up menu, select “Edit” to make changes to the journal entry, “Delete” to remove the entry, or “Bookmark” to mark the journal entry for easy reference.
How to Lock the iOS 17 Journal App on Your iPhone
Journal entries are personal, and Apple places a strong emphasis on user privacy, as reflected in the iOS 17 Journal app. To safeguard your journal entries against unauthorized access, you can lock them using Face ID, ensuring that only you can access their content.
While the Journal app may prompt you to lock your journal entries during the setup process, it’s possible that you ignored or dismissed the prompt. In that case, here’s how you can manually lock the Journal app on your iPhone:
1. Open the Settings app on your iPhone and scroll down to find the Journal app.
2. Tap on “Lock Journal” and enter your iPhone’s passcode when prompted.
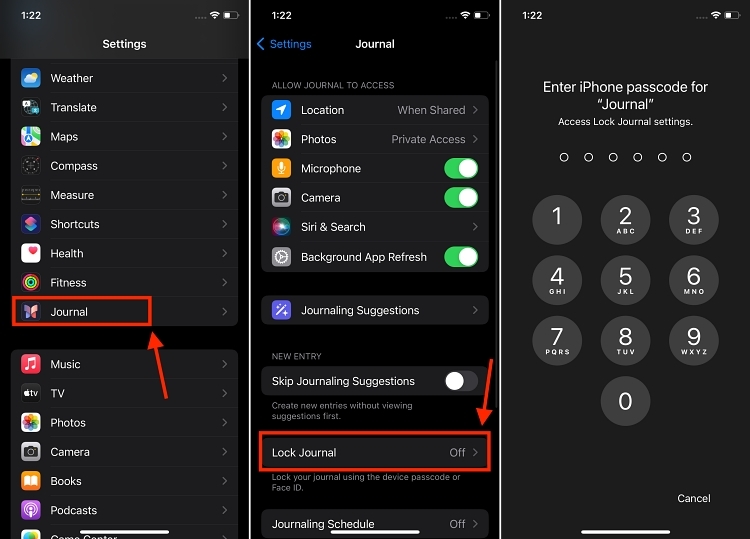
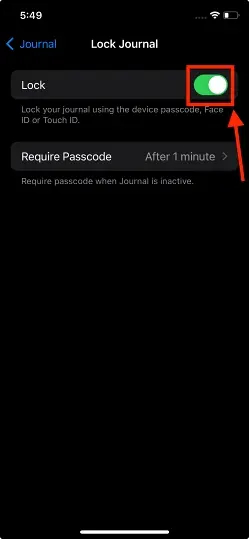
3. Afterward, toggle on the switch next to “Lock” to enable the lock for the Journal app.
4. You can also configure the time duration after which your iPhone will require the passcode or Face ID to unlock the app by tapping on the “Require Passcode” option.
Changing Entry Date in iOS 17 Journal App
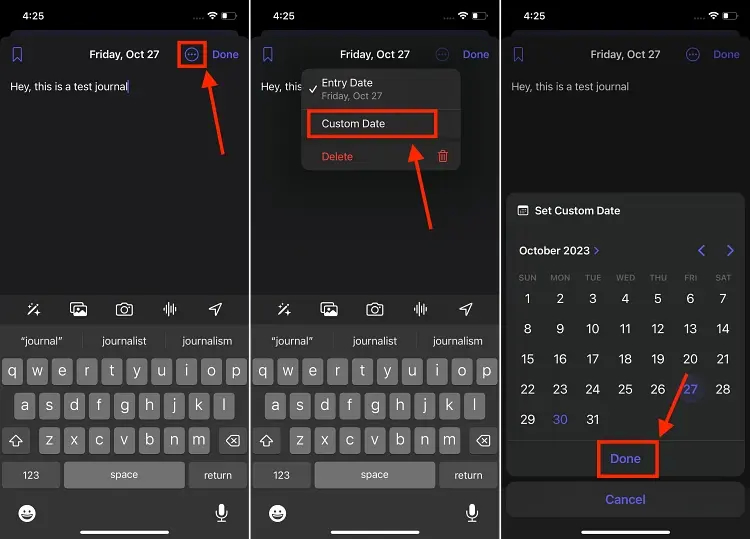
1. Open the Journal app and select the entry you wish to change the entry date for.
2. On the entry editing screen, tap the three-dot button located next to the entry date at the top.
3. Select “Custom Date,” then choose the desired date and tap “Done” to save the changes.
Setting up Journaling Schedule in the Journal App
Maintaining consistency in journaling can be challenging, especially with our busy lives. To assist you in establishing a regular journaling routine, the iOS 17 Journal app enables you to schedule journal entries for the start or end of your day. To enable this feature, follow these steps:
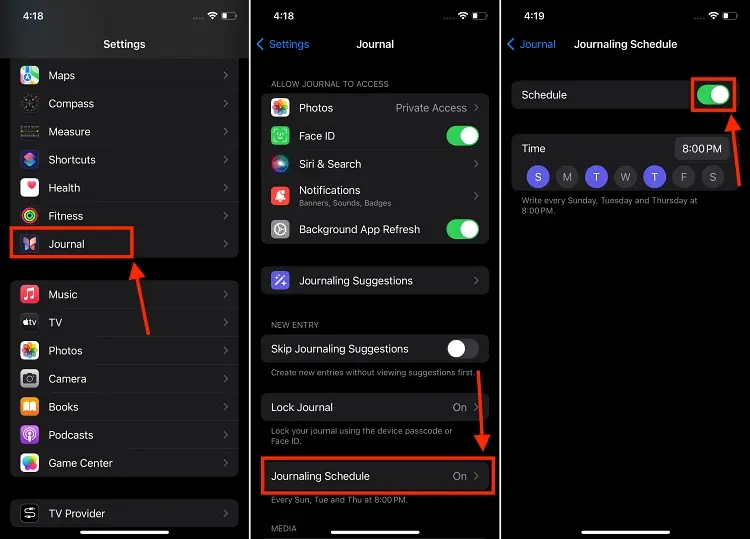
1. Open your iPhone’s Settings, and scroll down to find the Journal app. Tap to access the app’s settings.
2. Look for the Journaling Schedule option, then enable the toggle next to “Schedule” to activate the feature.
3. Choose the specific days of the week and the time you prefer to create new journal entries in the iOS 17 Journal app.
That’s all you need to know about using the iOS 17 Journal app on your iPhone. If you find that Apple’s latest Journal app is missing some features you need, there are several alternative journaling apps available for you to explore.


