Google Photos’ Locked Folder feature has been accessible on Android for quite some time, and though Google initially announced its arrival on iPhones in 2022, it is only now that the feature is gradually becoming available on iOS devices. So, if you’re interested in keeping your personal photos hidden from prying eyes, here’s a guide on how to set up and use the Locked Folder feature in Google Photos on your iPhone.
Note: Google has begun the rollout of the Locked Folder feature for all iPhone users, but its availability on your device may take some time.
Setting Up Google Photos Locked Folder
To set up the Locked Folder on your iPhone, simply follow these steps:
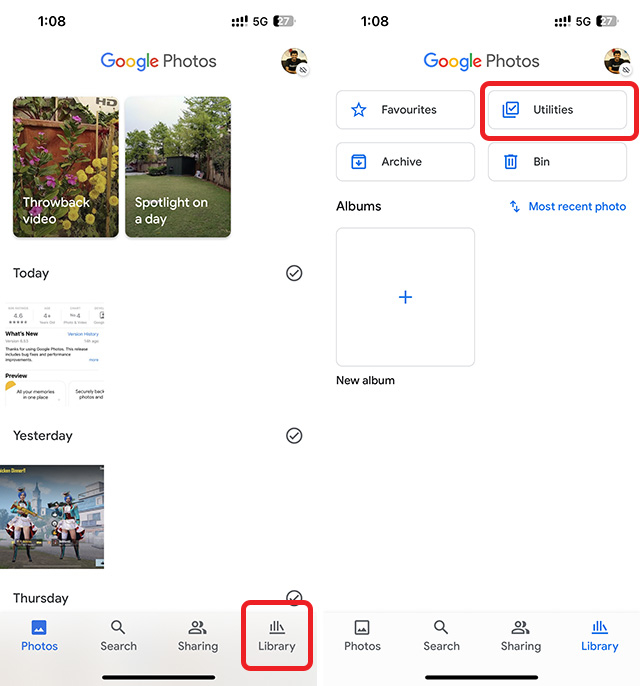
- Open Google Photos on your iPhone and tap on “Library” in the bottom navigation bar. Then, tap on “Utilities.”
- To initiate the setup process, tap on “Locked Folder,” and then choose “Set up a Locked Folder.”
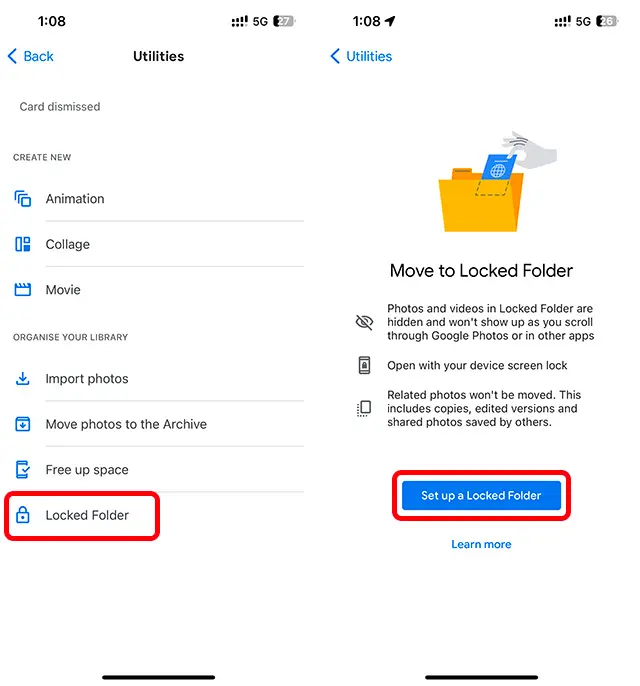
- Allow Google Photos to use Face ID (or Touch ID) and decide whether you want to back up photos within your Locked Folder or not.
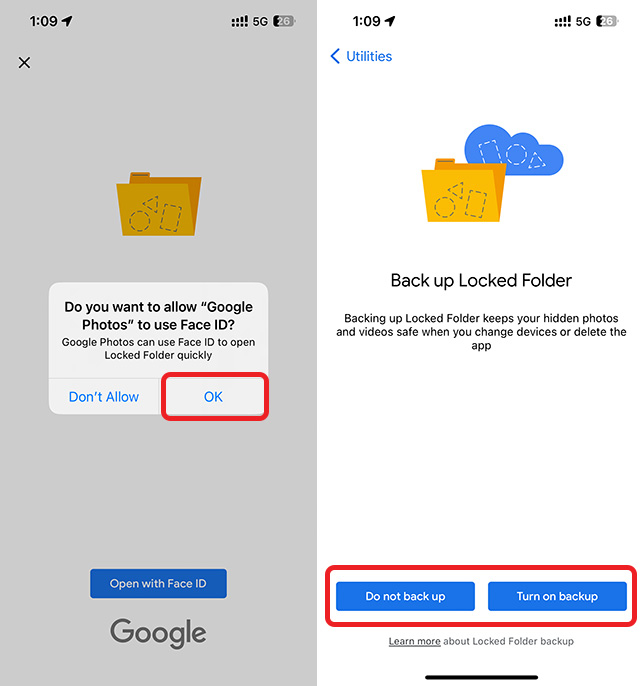
Note: Photos within the Locked Folder are automatically encrypted when you enable backups. Enabling backups allows you to access these photos on other devices. However, if you opt not to back up these photos, they will remain exclusively on your iPhone.
You’ve now successfully established a Locked Folder in Google Photos. Next, let’s delve into the process of adding photos to your Locked Folder and removing them when needed.
Adding Photos to Locked Folder
To add photos to your Locked Folder in Google Photos, follow these steps:
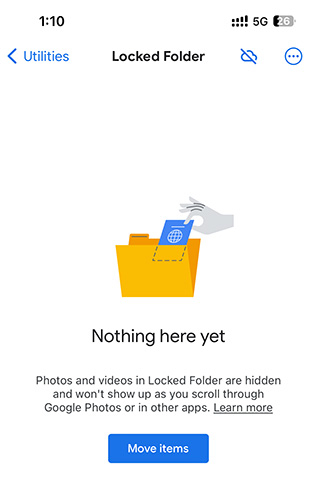
- Access your Locked Folder (Library -> Utilities -> Locked Folder).
- If you haven’t added any photos yet, you will see a big ‘Move items‘ button inside the locked folder. Tap on it.
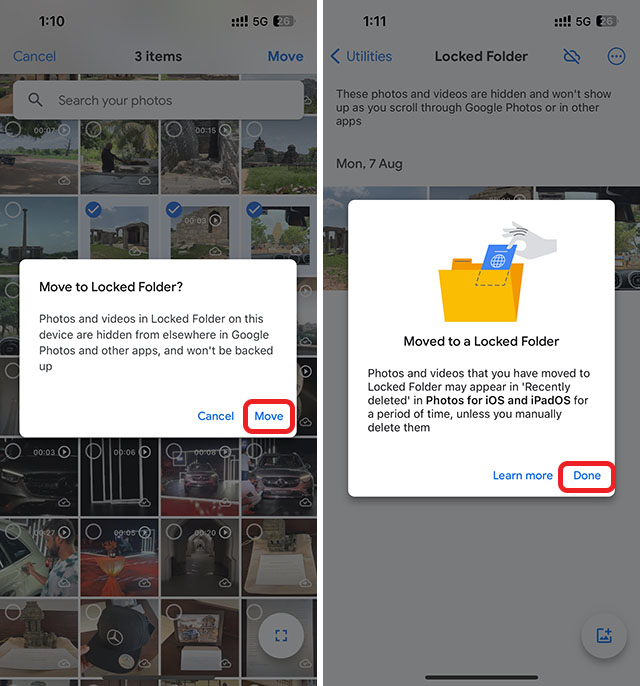
- Choose the photos you wish to hide and tap on ‘Move.’

- Confirm your selection by tapping ‘Move‘ again in the confirmation dialog box.
- Once the photos are hidden, Google Photos will display a confirmation pop-up. Simply tap ‘Done‘ to complete the process.
Alternatively, you can follow these steps to add photos to your hidden folder:
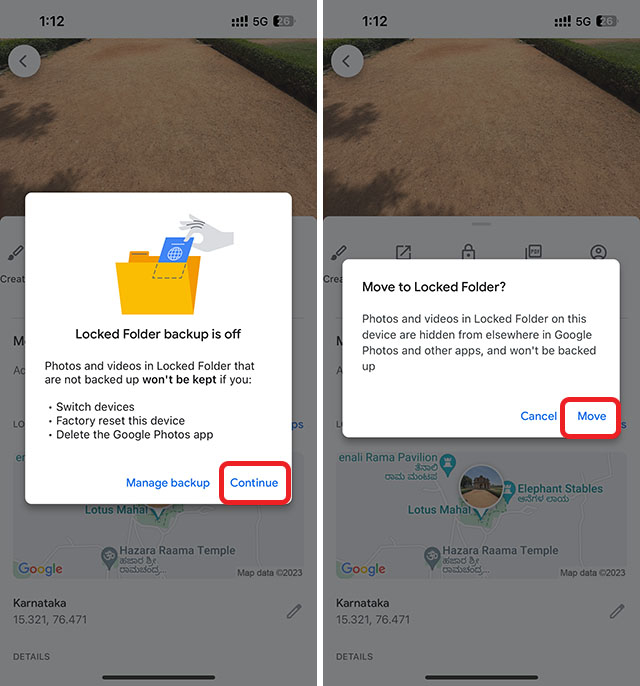
- Open the photo you want to hide. Swipe up to reveal sharing options then tap on ‘Move to Locked Folder.‘
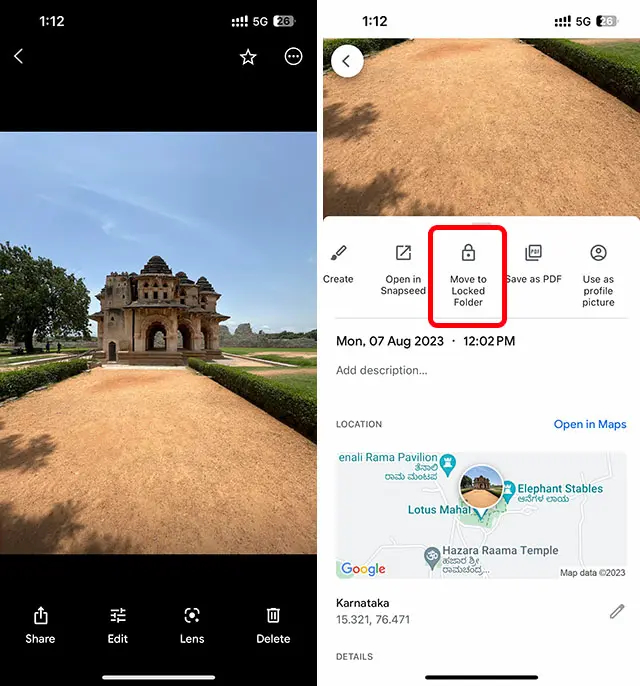
- Confirm your intent in the pop-up dialog boxes, and the photo will be moved to your Google Photos Locked Folder.
Removing Photos from Locked Folder
If you wish to remove photos from the Locked Folder in Google Photos, follow these steps:
- Access the Locked Folder by following this path: Library -> Utilities -> Locked Folder.
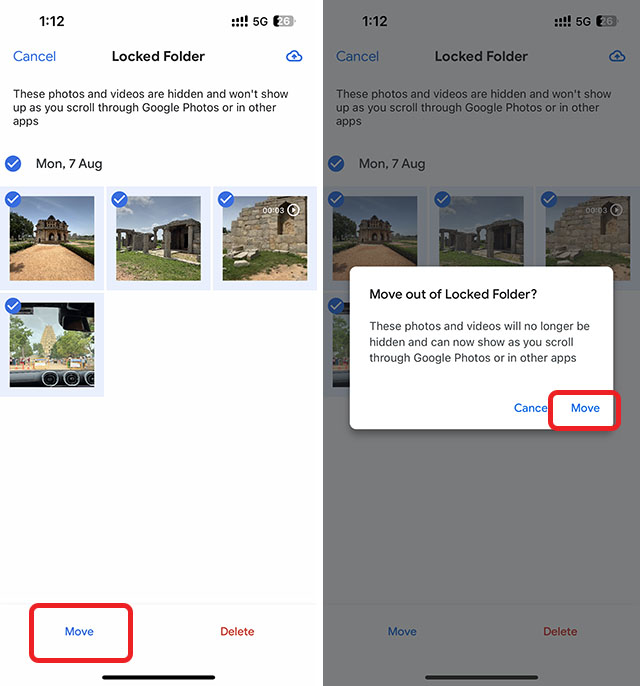
- Select the photos you want to “unhide.” Tap on ‘Move.’
- Confirm your intent in the dialog box that appears, and the selected photos will be removed from the Locked Folder.