
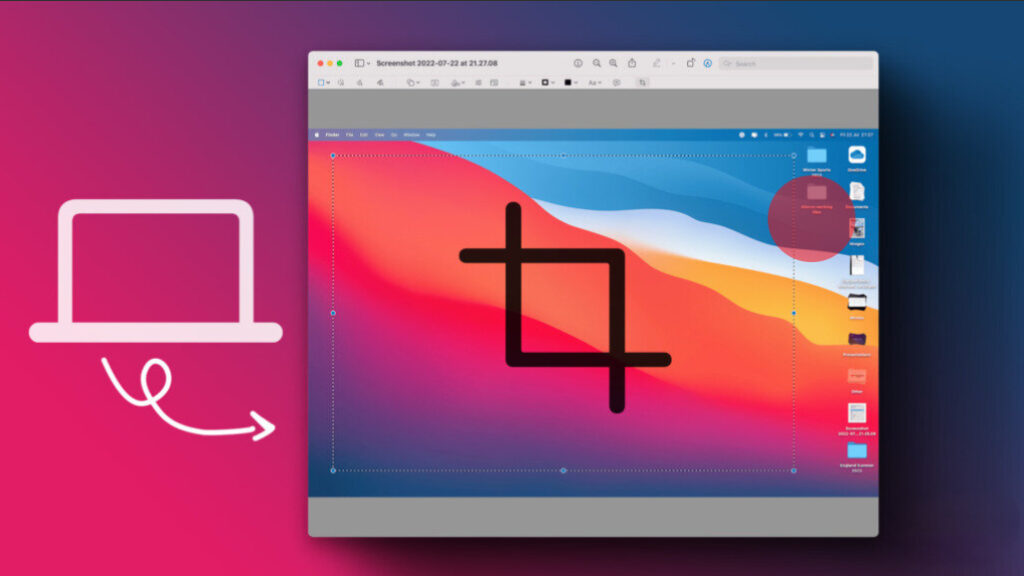
Taking a screenshot on a Mac is a straightforward process, typically accomplished with a simple keystroke. However, there are instances where you might want to focus on a specific part of the screenshot, which requires cropping it. If you’re unsure how to crop a screenshot on your Mac or MacBook, this guide will walk you through the process.
1. Cropping Screenshots using a Keyboard Shortcut
Although you can easily capture a screenshot using your Mac’s built-in screenshot tool, there might be situations where you need to crop a specific section of the screenshot afterward. To accomplish this, you can utilize the Preview tool on your Mac or MacBook. This tool not only allows you to crop screenshots but also provides options for resizing and annotating them. Here’s a guide on how to crop screenshots on your Mac using keyboard shortcuts:
1. On your Mac, navigate to the specific window or content you want to capture in your screenshot.
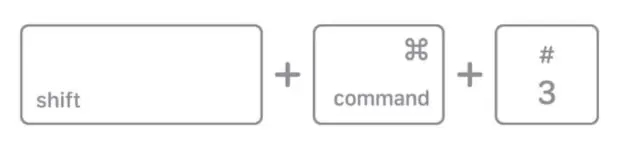
2. To capture a screenshot of the entire screen, press the “Shift + Command + 3” keys simultaneously.
3. Next, immediately open the screenshot by clicking on the thumbnail that appears in the bottom right corner of your screen, or wait for it to be saved to your desktop, and then open it.
4. In the screenshot preview window, use your MacBook’s touchpad to create a rectangular selection around the area you want to crop from your screenshot.

5. Once you’ve made the selection, press the “Command + K” keys simultaneously on your Mac’s keyboard to crop the chosen area from your screenshot.
2. Cropping a Screenshot on Mac using Menu Bar
1. Start by following the first three steps from the previous method to capture a screenshot and select the portion you want to crop.
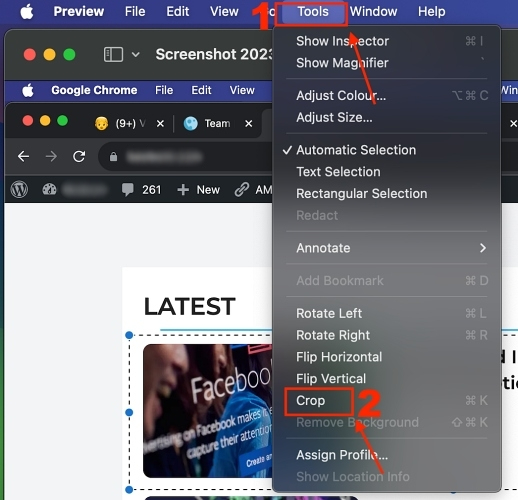
2. After selecting the area, click on “Tools” in the top menu bar.
3. From the drop-down menu, choose “Crop.”
4. The selected area will now be cropped from your screenshot.
3. Cropping a Screenshot on Mac using Touch Bar
Cropping a screenshot on older MacBook Pro models is made even simpler with the use of the Touch Bar. With just a single tap, you can crop screenshots using this feature. Here’s how it works:
1. As previously mentioned, capture a screenshot and create a rectangular selection as described earlier.
2. Next, find and tap the Crop icon, which is represented by a square icon with extended corners, on your MacBook Pro’s Touch Bar. This action will crop the area you selected earlier.

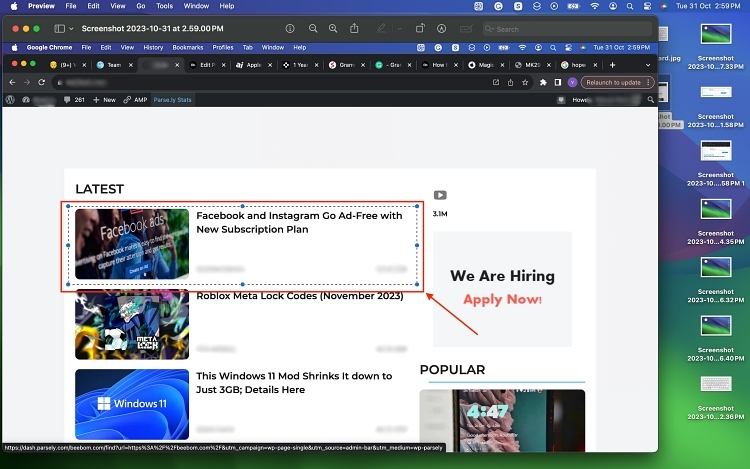
3. Here’s an example of what the cropped screenshot will look like using any of the methods explained above:

Note: Your Mac automatically saves the cropped screenshot, so it's advisable to create a copy of your original screenshot beforehand to prevent any potential data loss.
4. Croppings a Screenshot using the Photos App
In addition to the Preview tool, you can utilize the Mac’s Photos app for editing and cropping screenshots. The Photos app offers advanced editing capabilities, allowing you to adjust colors, resize images, apply filters, and more. Here’s how you can edit screenshots on Mac using the Photos app:
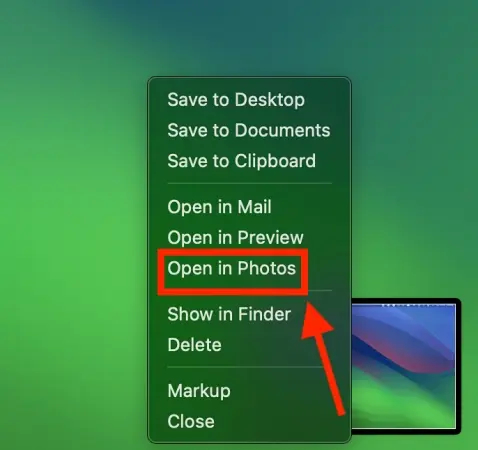
1. On your Mac application, press the “Shift + Command + 3” keys to capture a screenshot of the entire screen.
2. Right-click on the preview thumbnail of the screenshot that appears at the bottom right corner, then select the “Open in Photos” option from the pop-up menu.
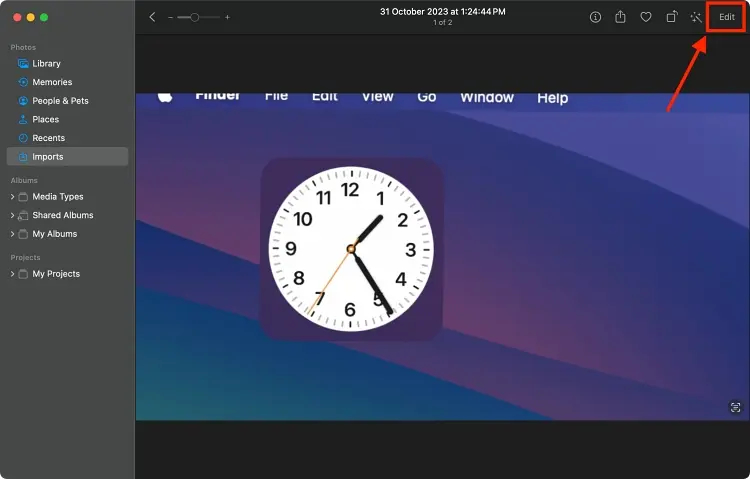
3. Click the “Edit” button at the top right corner of the Photos app.
4. In the editing toolbar at the top, click the “Crop” button.
5. Cropping handles will appear around your screenshot, allowing you to adjust the cropping area.
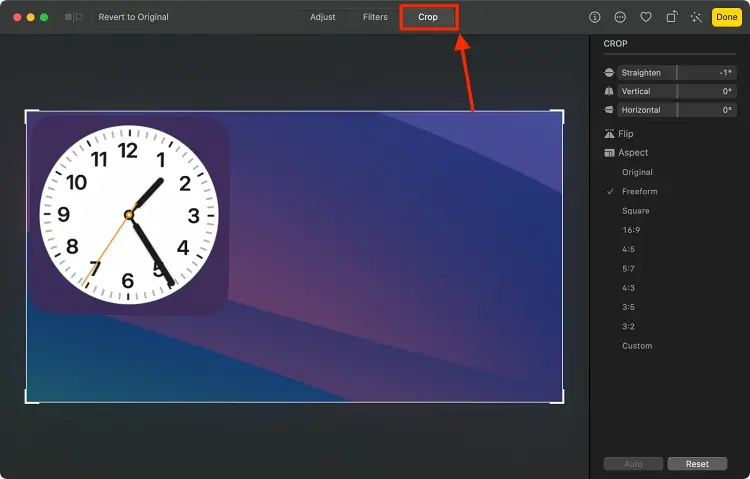
6. Click and drag the handles to resize the crop box on your screenshot. You can also move the entire crop box around your screenshot by clicking inside it and dragging.
7. When you’re satisfied with the cropping selection, press Enter or click the “Done” button in the upper right corner of the window.
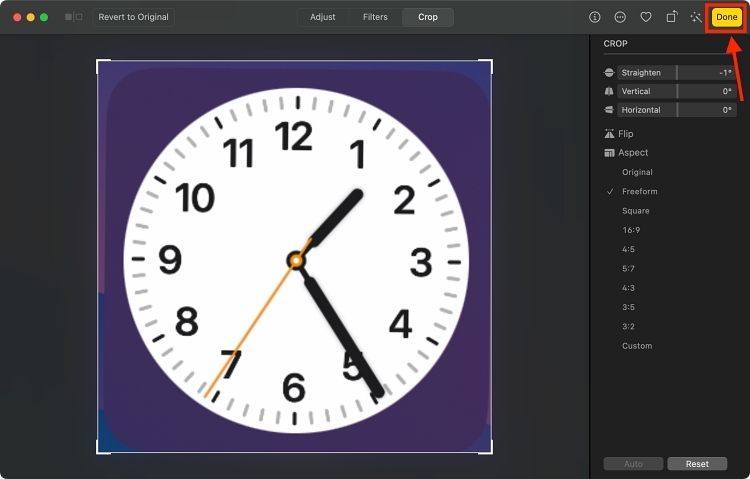
After clicking the “Done” button, the Photos app will automatically save your cropped screenshot. You now have a perfectly cropped screenshot on your Mac, ready to be shared or printed. If you’re editing screenshots on your iPhone, you can use the “quick crop” feature in the Photos app on your iPhone.


