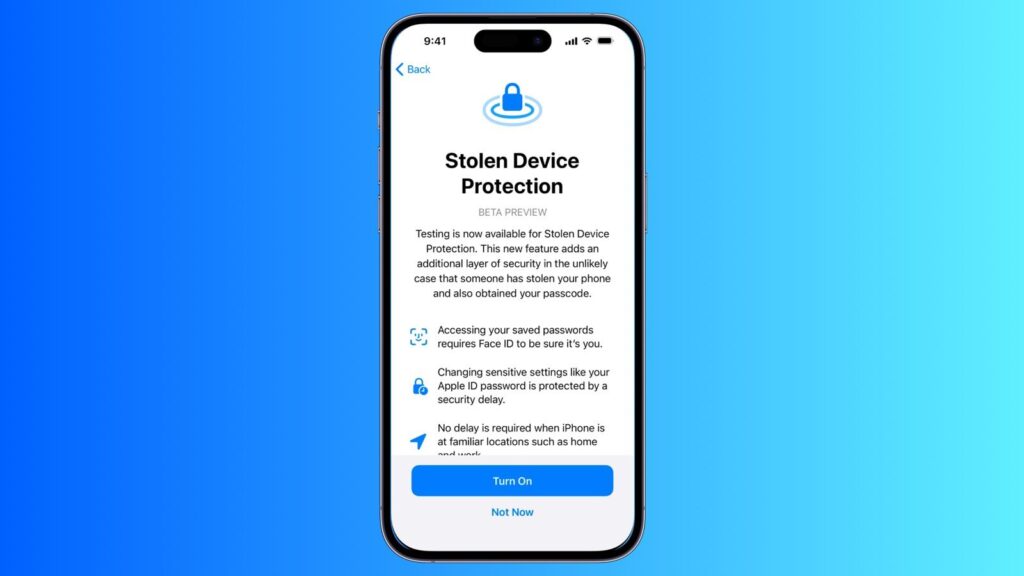
With the release of iOS 17.3, Apple introduced a novel feature called Stolen Device Protection, designed to safeguard against data theft when unauthorized individuals gain access to your iPhone passcode. In essence, this feature establishes an additional layer of security, making it challenging for thieves to exploit the passcode for significant alterations to your Apple ID, especially in unfamiliar locations like home or work.
Despite Apple’s longstanding reputation for pioneering user privacy in the tech industry, the implementation of the Stolen Device Protection feature was prompted by a report from The Wall Street Journal. The report exposed a scam where attackers targeted their victims, often in social settings like bars late at night, attempting to coerce individuals into divulging their passcodes. This manipulation occurred through requests to connect over Snapchat or by discreetly observing passcodes over shoulders.
Continue reading to discover the steps for enabling Stolen Device Protection on your iPhone and gaining insights into its operational mechanism.
How Stolen Device Protection Mode Functions?
Before the introduction of Stolen Device Protection mode, anyone possessing your iPhone’s passcode had the capability to execute significant modifications. This included actions like changing your Apple ID password, generating a recovery key, deactivating lost mode, transferring settings to a new device, disabling Find My, accessing your saved Keychain passwords, and more.
While uncovering an iPhone’s passcode is a challenging task, there may arise situations where a thief or attacker establishes a connection with you, eventually obtaining knowledge of your six-digit or four-digit passcode. Subsequently, they can pilfer your iPhone and easily lock you out by disabling Find My and gaining control over your Apple ID.
The emergence of the new Stolen Device Protection mode addresses this vulnerability. Once activated, this feature mandates Apple’s Face ID recognition in addition to the passcode, whenever sensitive actions are attempted, such as viewing stored passwords or wiping the phone, especially when the iPhone is in an unfamiliar location. This dual authentication method renders it impossible for a thief to execute sensitive changes or access sensitive settings solely with a passcode.
Additionally, if an attacker attempts to alter your Apple ID password or disable Face ID, your iPhone will impose a mandatory one-hour delay. Subsequently, the attacker will need to pass a Face ID check after the designated hour to effectuate any changes to the credentials.
Note: The Stolen Device Protection feature and the one-hour delay won't be activated if your iPhone is in a trusted location, such as your home or workplace. This implies that the feature exclusively operates when your iPhone is situated in an unfamiliar setting. Presently, there isn't an option to manually designate familiar locations for this feature. Instead, your iPhone autonomously recognizes trusted locations based on your usage patterns.
Below is a table outlining actions that necessitate both passcode and Face ID recognition when Stolen Device Protection is activated, along with actions requiring biometrics and an additional hour of security delay:

Turning On Stolen Device Protection on iPhone
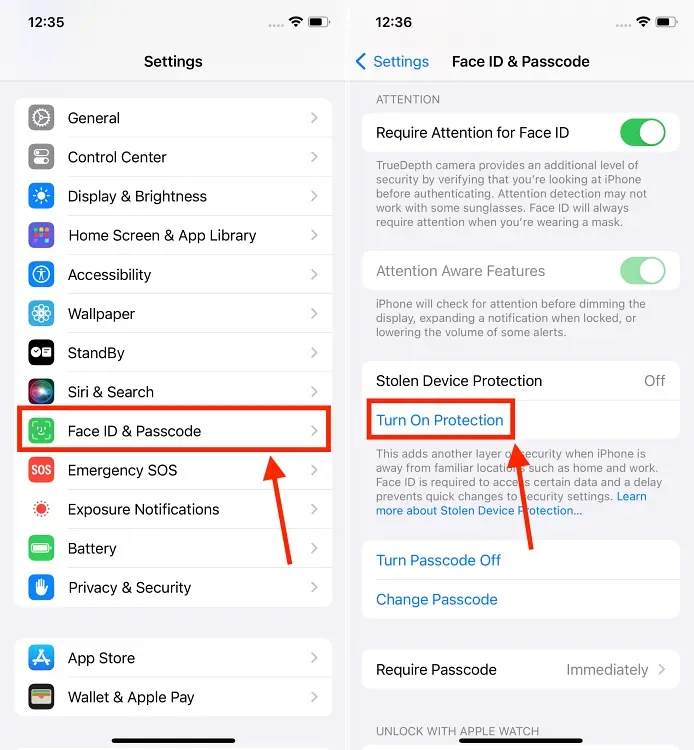
After updating to iOS 17.3, your iPhone will suggest enabling Stolen Device Protection directly on the home screen. However, you can manually activate this feature through the iPhone settings. Here’s a step-by-step guide:
- Open the Settings on your iPhone.
- Navigate to the Face ID and Passcode settings.
- Scroll down to find the Stolen Device Protection section.
- Tap the “Turn On Protection” button located under Stolen Device Protection.

Turning Off Stolen Device Protection on iPhone
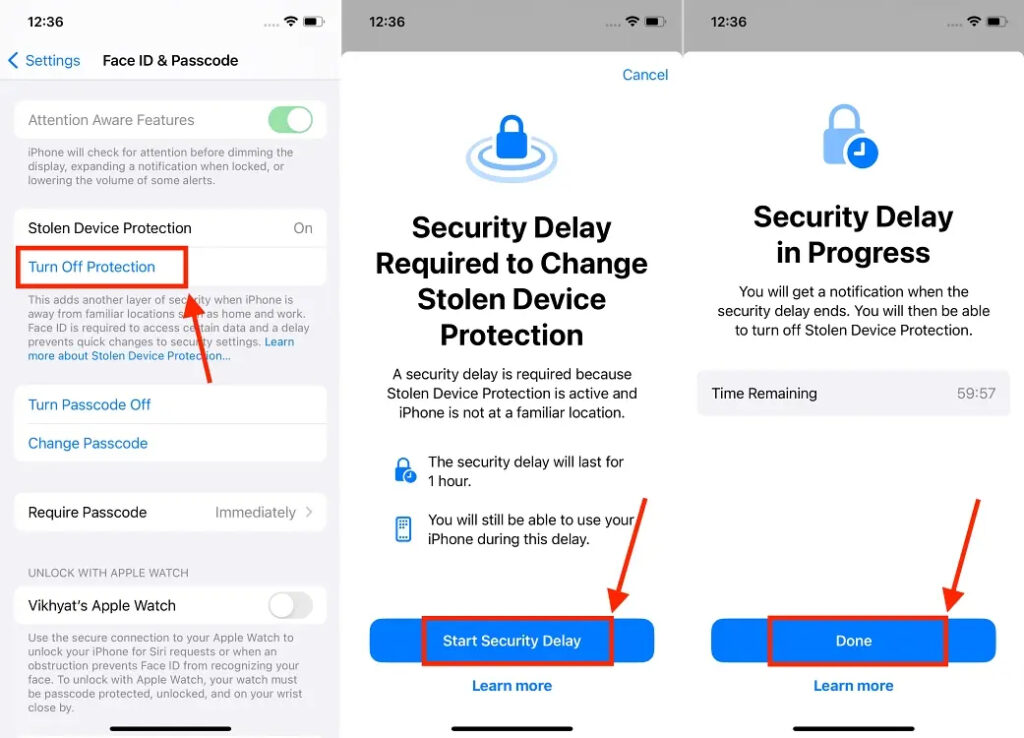
- Open the Settings app on your iPhone, and navigate to the Face ID & Passcode section. Enter your passcode to access the settings.
- Scroll down to find the Stolen Device Protection section. Press the “Turn Off Protection” button located below it. Confirm the action by authenticating with your Face ID.
- Now, tap the blue “Start Security Delay” button.
- On the subsequent screen, you can view the Time Remaining for the Security Delay. Tap “Done” to exit.
- You will receive a notification when the one-hour delay concludes, after which you can turn off the feature.

It’s essential to note that while this feature restricts unauthorized access to sensitive information or modifications, an individual with knowledge of the passcode can still unlock your iPhone and perform various operations.
However, the security measure prevents the thief from locking you out of your Apple ID or disabling Find My, allowing you to locate or remotely wipe your iPhone.

0 Comments